DRIVE BELT ADJUSTMENT
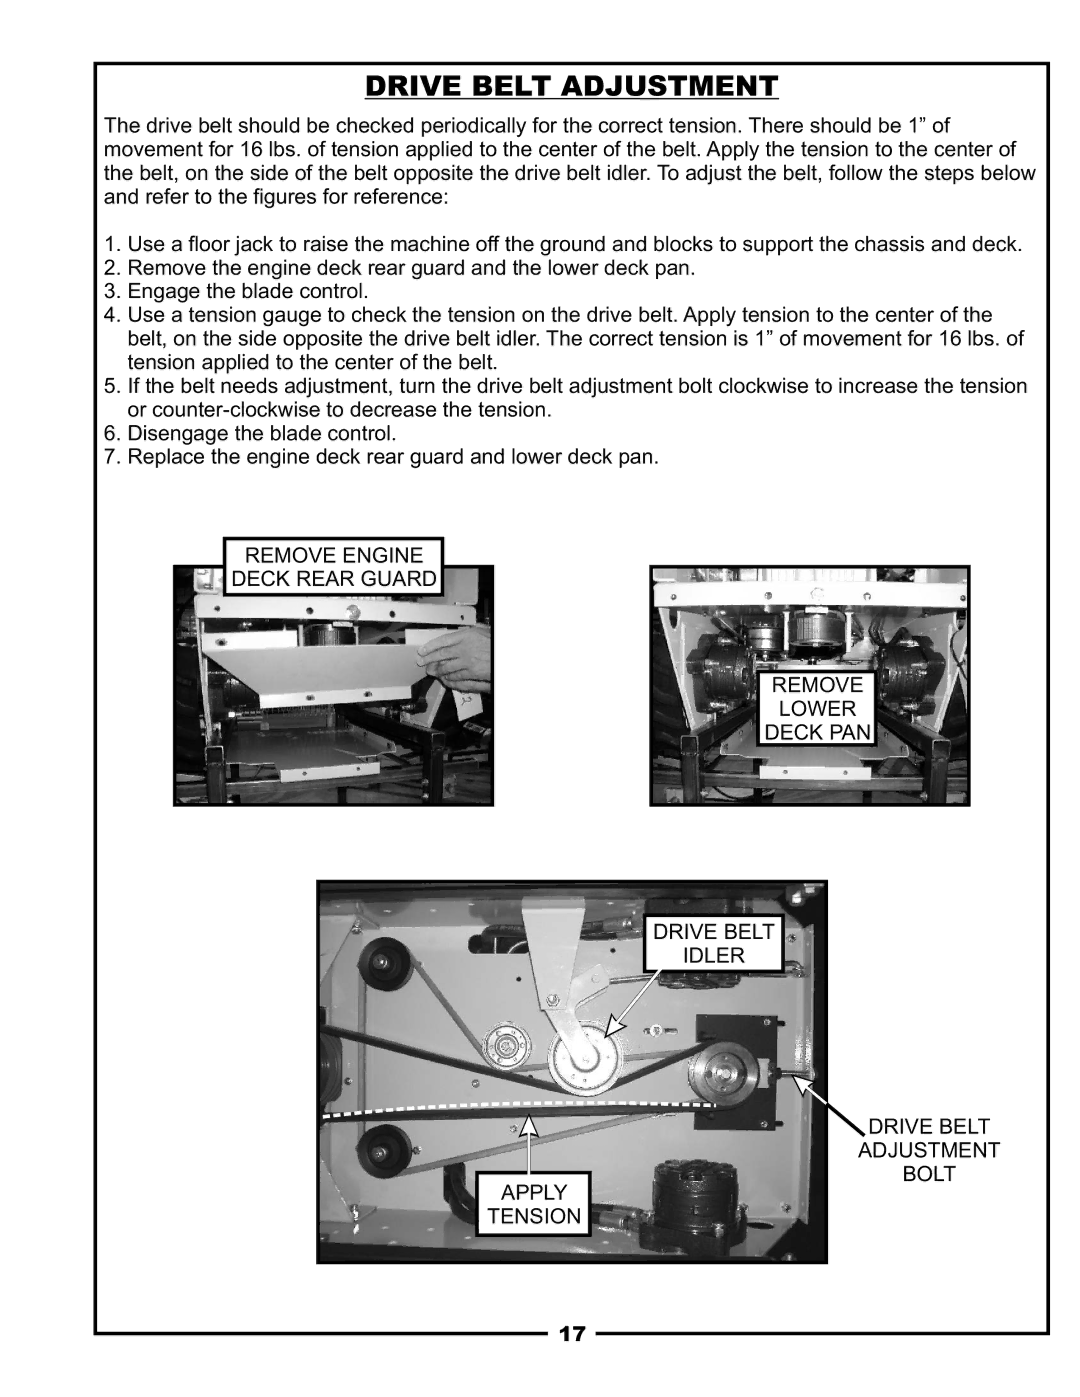
The drive belt should be checked periodically for the correct tension. There should be 1” of movement for 16 lbs. of tension applied to the center of the belt. Apply the tension to the center of the belt, on the side of the belt opposite the drive belt idler. To adjust the belt, follow the steps below and refer to the figures for reference:
1.Use a floor jack to raise the machine off the ground and blocks to support the chassis and deck.
2.Remove the engine deck rear guard and the lower deck pan.
3.Engage the blade control.
4.Use a tension gauge to check the tension on the drive belt. Apply tension to the center of the belt, on the side opposite the drive belt idler. The correct tension is 1” of movement for 16 lbs. of tension applied to the center of the belt.
5.If the belt needs adjustment, turn the drive belt adjustment bolt clockwise to increase the tension or
6.Disengage the blade control.
7.Replace the engine deck rear guard and lower deck pan.
REMOVE ENGINE
DECK REAR GUARD
REMOVE
LOWER
DECK PAN
DRIVE BELT
IDLER
DRIVE BELT
ADJUSTMENT
BOLT
APPLY
TENSION
17