DECK AND DRIVE BELT REMOVAL/REPLACEMENT
Use the following procedure for removal and replacement of the drive and deck belts:
REMOVAL:
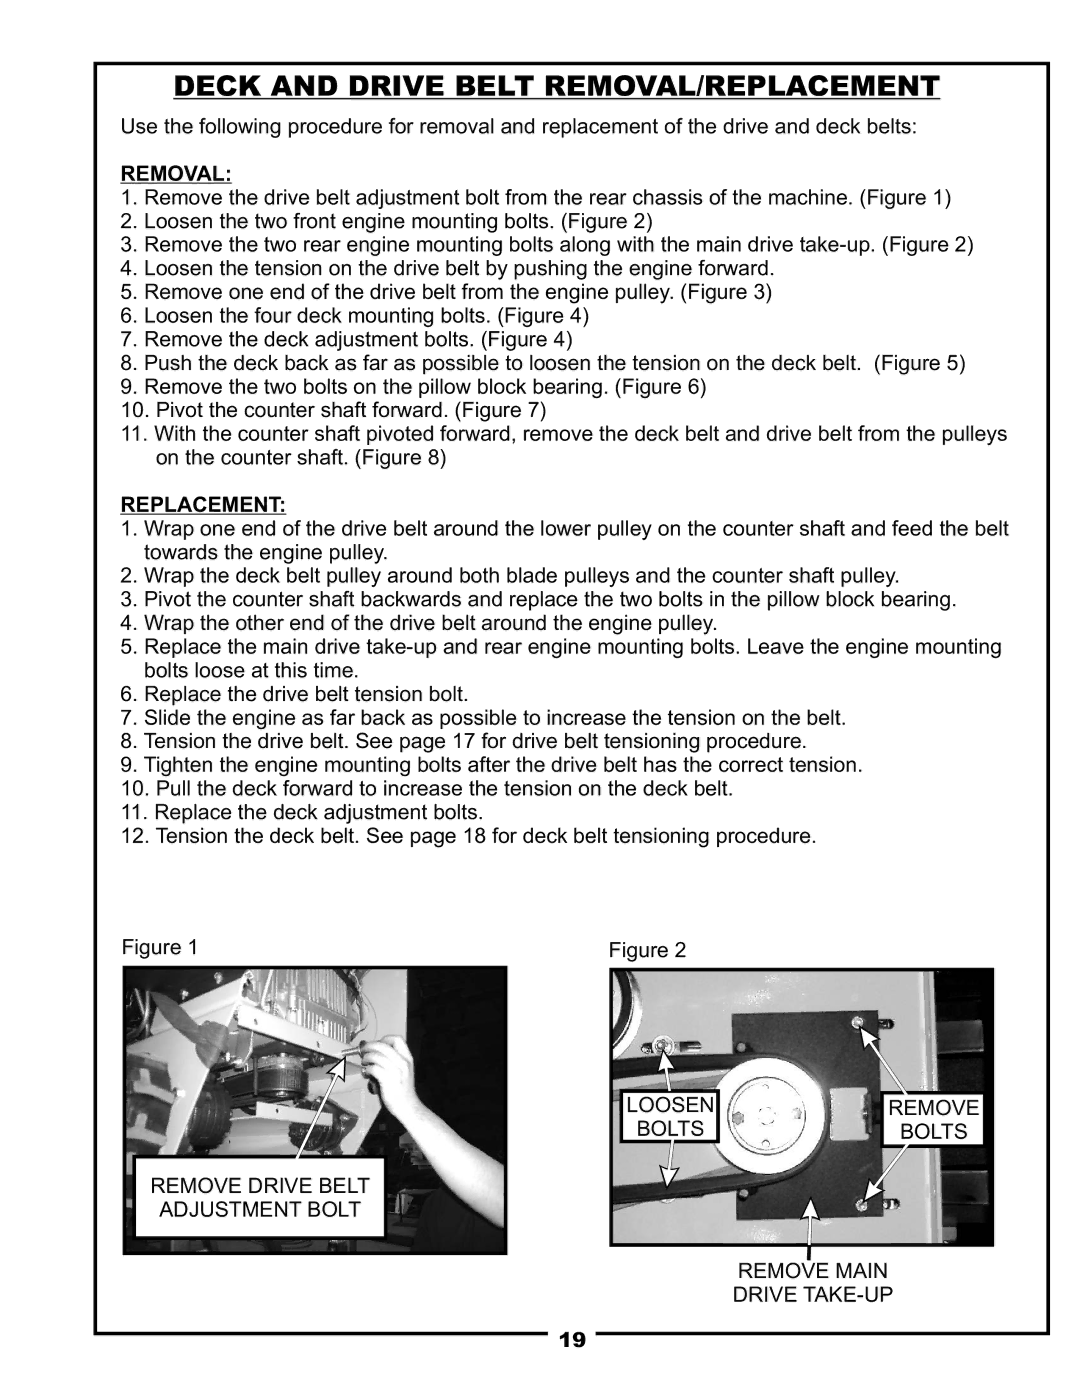
1.Remove the drive belt adjustment bolt from the rear chassis of the machine. (Figure 1)
2.Loosen the two front engine mounting bolts. (Figure 2)
3.Remove the two rear engine mounting bolts along with the main drive
4.Loosen the tension on the drive belt by pushing the engine forward.
5.Remove one end of the drive belt from the engine pulley. (Figure 3)
6.Loosen the four deck mounting bolts. (Figure 4)
7.Remove the deck adjustment bolts. (Figure 4)
8.Push the deck back as far as possible to loosen the tension on the deck belt. (Figure 5)
9.Remove the two bolts on the pillow block bearing. (Figure 6)
10.Pivot the counter shaft forward. (Figure 7)
11.With the counter shaft pivoted forward, remove the deck belt and drive belt from the pulleys on the counter shaft. (Figure 8)
REPLACEMENT:
1.Wrap one end of the drive belt around the lower pulley on the counter shaft and feed the belt towards the engine pulley.
2.Wrap the deck belt pulley around both blade pulleys and the counter shaft pulley.
3.Pivot the counter shaft backwards and replace the two bolts in the pillow block bearing.
4.Wrap the other end of the drive belt around the engine pulley.
5.Replace the main drive
6.Replace the drive belt tension bolt.
7.Slide the engine as far back as possible to increase the tension on the belt.
8.Tension the drive belt. See page 17 for drive belt tensioning procedure.
9.Tighten the engine mounting bolts after the drive belt has the correct tension.
10.Pull the deck forward to increase the tension on the deck belt.
11.Replace the deck adjustment bolts.
12.Tension the deck belt. See page 18 for deck belt tensioning procedure.
Figure 1 | Figure 2 |
LOOSEN | REMOVE |
BOLTS | BOLTS |
REMOVE DRIVE BELT
ADJUSTMENT BOLT
REMOVE MAIN
DRIVE TAKE-UP
19
