TRACK ADJUSTMENT/REMOVAL/REPLACEMNT
REMOVAL:
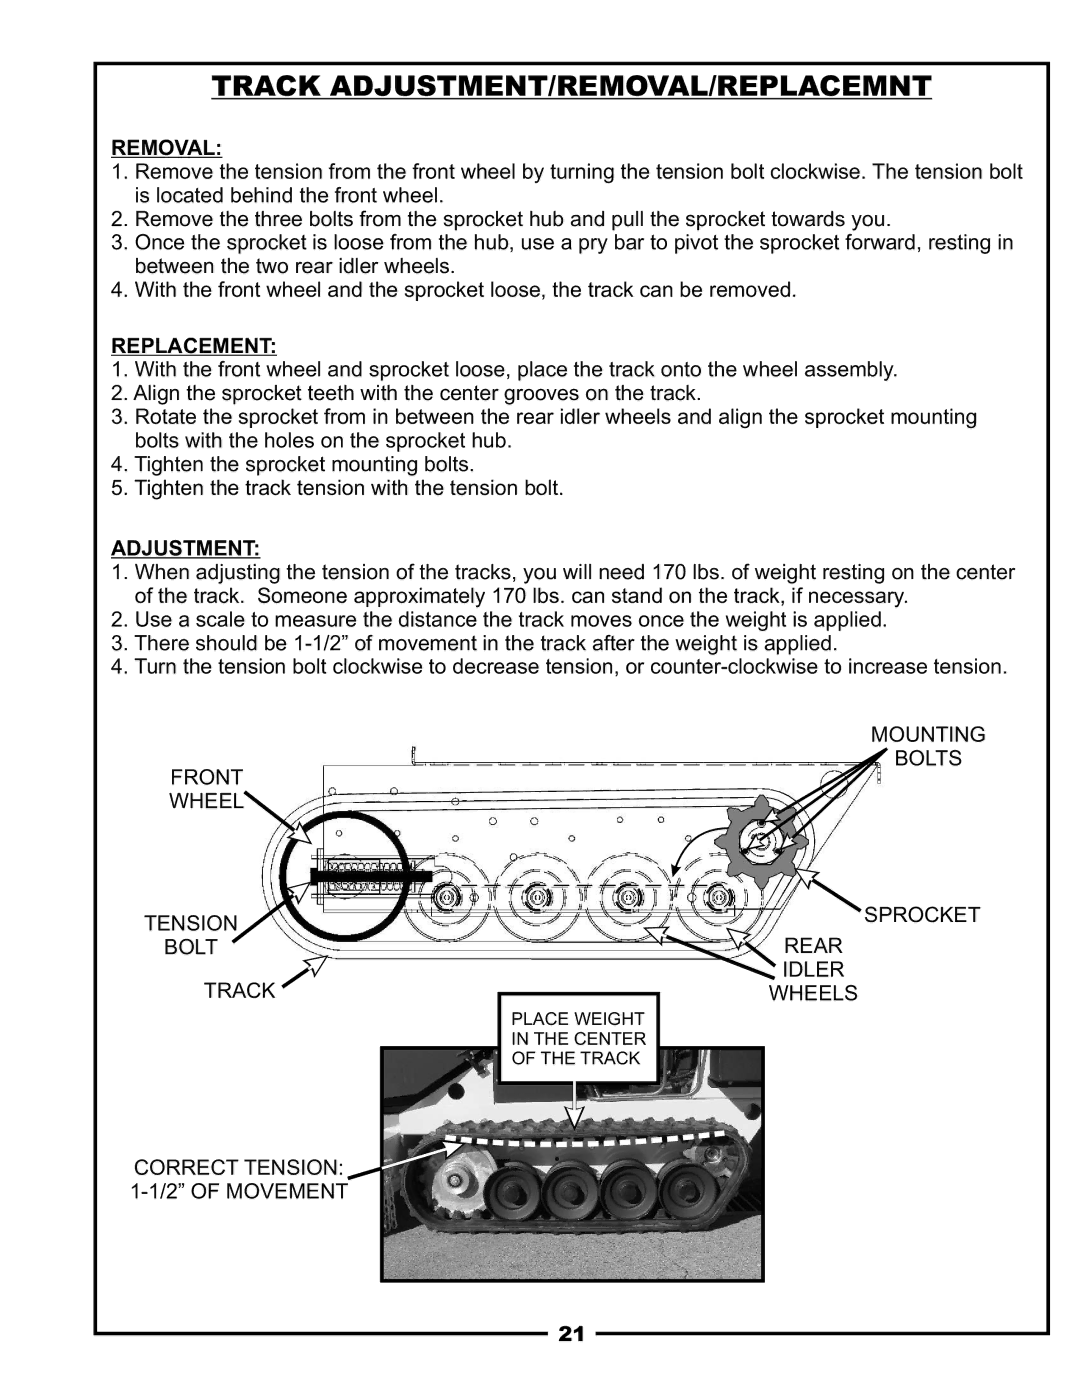
1.Remove the tension from the front wheel by turning the tension bolt clockwise. The tension bolt is located behind the front wheel.
2.Remove the three bolts from the sprocket hub and pull the sprocket towards you.
3.Once the sprocket is loose from the hub, use a pry bar to pivot the sprocket forward, resting in between the two rear idler wheels.
4.With the front wheel and the sprocket loose, the track can be removed.
REPLACEMENT:
1.With the front wheel and sprocket loose, place the track onto the wheel assembly.
2.Align the sprocket teeth with the center grooves on the track.
3.Rotate the sprocket from in between the rear idler wheels and align the sprocket mounting bolts with the holes on the sprocket hub.
4.Tighten the sprocket mounting bolts.
5.Tighten the track tension with the tension bolt.
ADJUSTMENT:
1.When adjusting the tension of the tracks, you will need 170 lbs. of weight resting on the center of the track. Someone approximately 170 lbs. can stand on the track, if necessary.
2.Use a scale to measure the distance the track moves once the weight is applied.
3.There should be
4.Turn the tension bolt clockwise to decrease tension, or
MOUNTING
BOLTS
FRONT
WHEEL
TENSION | SPROCKET |
BOLT | REAR |
TRACK | IDLER |
WHEELS | |
| PLACE WEIGHT |
| IN THE CENTER |
| OF THE TRACK |
CORRECT TENSION: 1-1/2” OF MOVEMENT
21