CONNECTING DAY/NIGHT FILTER CONTROL
In some installations, high infrared (IR) illumination or other light sources may interfere with the camera’s automatic day/night mode operation. Use an external day/night filter switch, such as a photosensor, to keep the camera from constantly switching filters.
The control signal input responds as shown in Table C.
Table C. Day/Night Control Signal
Signal | Voltage | Day/Night Mode |
|
|
|
Open or High | 3.0 V to 3.3 V | AUTO |
|
|
|
Short or Low | ||
|
|
|
NOTES:
•Do not exceed the values listed in Table C.
•The C10DN Series camera responds only to the input signal from the switch. It does not provide enough power to drive an external device.
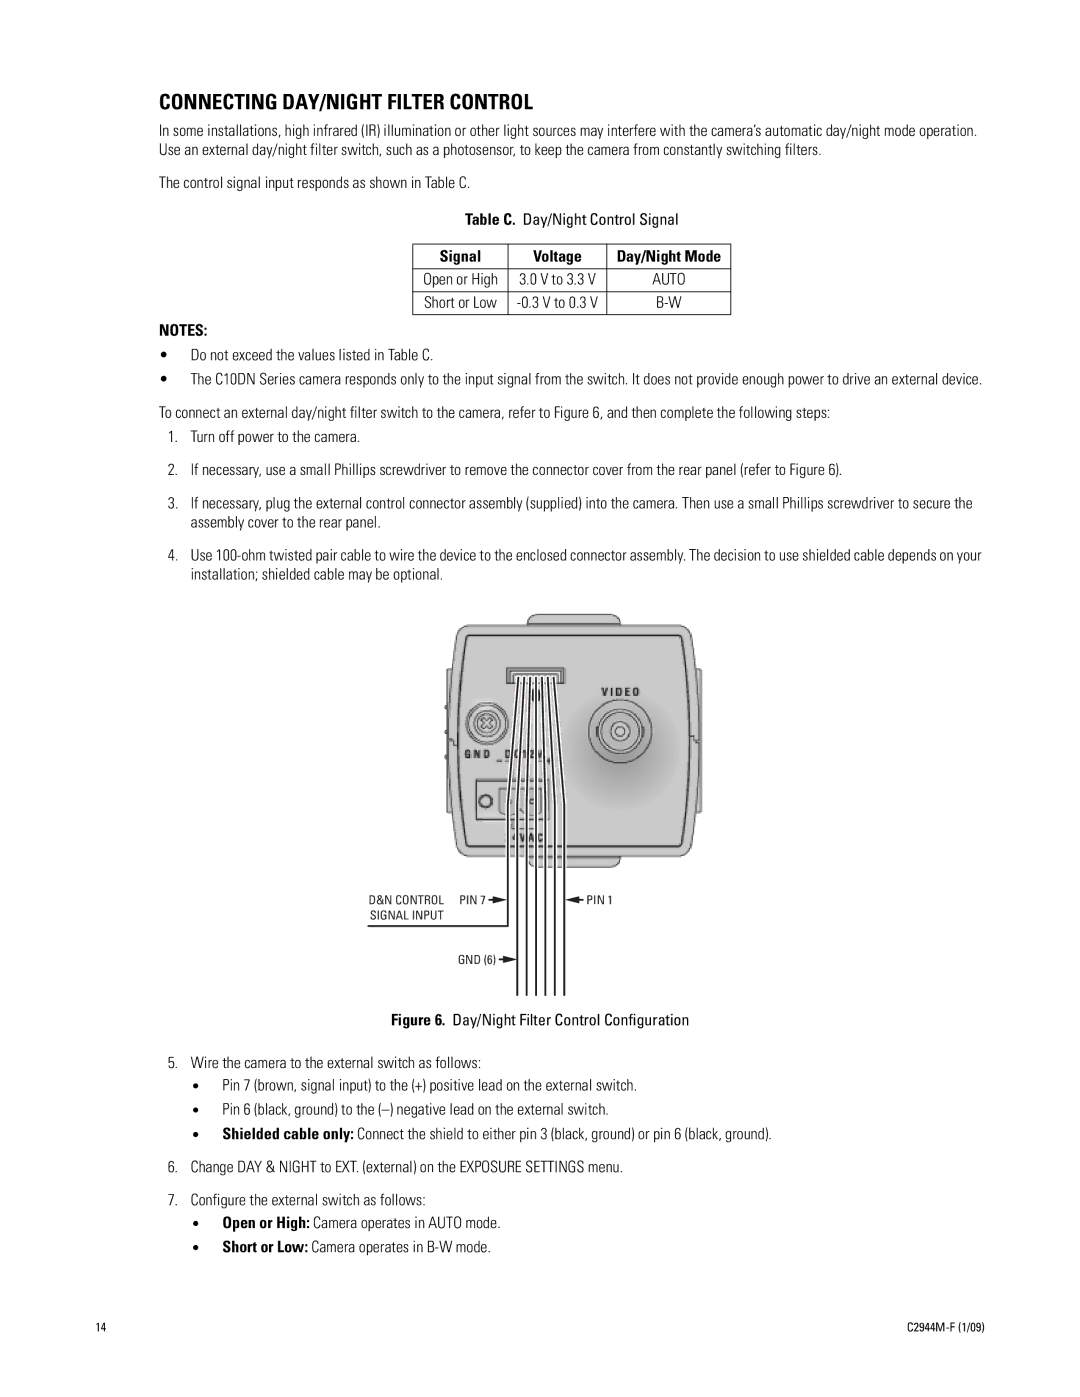
To connect an external day/night filter switch to the camera, refer to Figure 6, and then complete the following steps:
1.Turn off power to the camera.
2.If necessary, use a small Phillips screwdriver to remove the connector cover from the rear panel (refer to Figure 6).
3.If necessary, plug the external control connector assembly (supplied) into the camera. Then use a small Phillips screwdriver to secure the assembly cover to the rear panel.
4.Use
D&N CONTROL | PIN 7 |
| PIN 1 |
SIGNAL INPUT |
|
|
|
| GND (6) |
|
|
|
|
|
Figure 6. Day/Night Filter Control Configuration
5.Wire the camera to the external switch as follows:
•Pin 7 (brown, signal input) to the (+) positive lead on the external switch.
•Pin 6 (black, ground) to the (–) negative lead on the external switch.
•Shielded cable only: Connect the shield to either pin 3 (black, ground) or pin 6 (black, ground).
6.Change DAY & NIGHT to EXT. (external) on the EXPOSURE SETTINGS menu.
7.Configure the external switch as follows:
•Open or High: Camera operates in AUTO mode.
•Short or Low: Camera operates in B-W mode.
14 |
