Accessing the Setup Menus
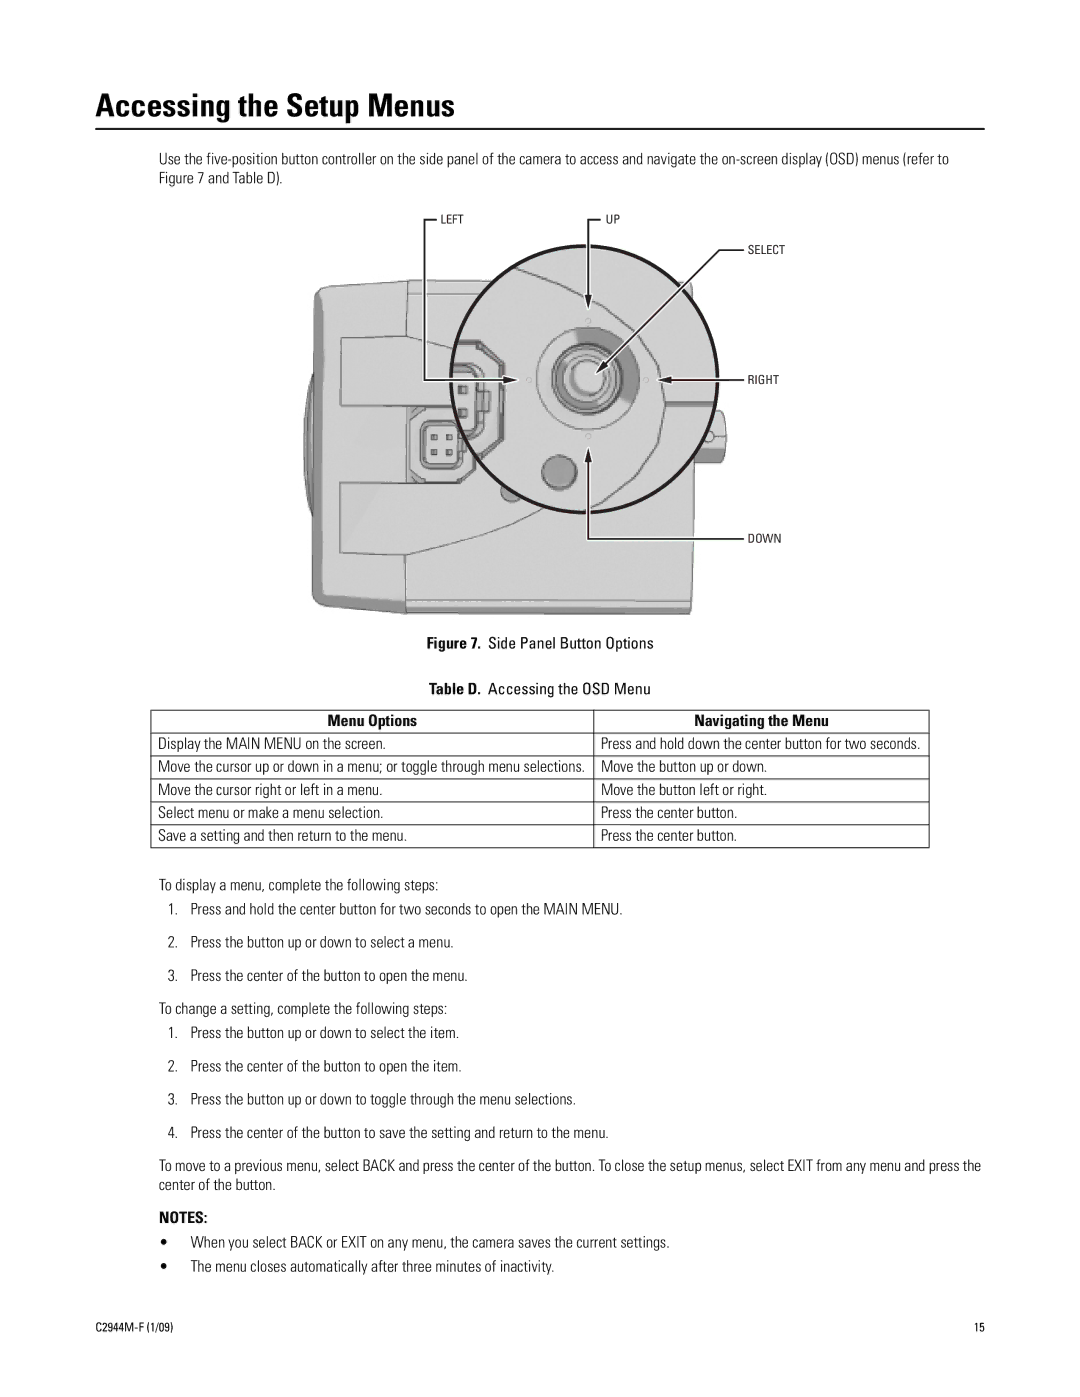
Use the
LEFT | UP |
SELECT
RIGHT
DOWN
| Figure 7. Side Panel Button Options | |
| Table D. Accessing the OSD Menu | |
|
|
|
Menu Options |
| Navigating the Menu |
|
|
|
Display the MAIN MENU on the screen. |
| Press and hold down the center button for two seconds. |
|
| |
Move the cursor up or down in a menu; or toggle through menu selections. | Move the button up or down. | |
|
|
|
Move the cursor right or left in a menu. |
| Move the button left or right. |
|
|
|
Select menu or make a menu selection. |
| Press the center button. |
|
|
|
Save a setting and then return to the menu. |
| Press the center button. |
|
|
|
To display a menu, complete the following steps:
1.Press and hold the center button for two seconds to open the MAIN MENU.
2.Press the button up or down to select a menu.
3.Press the center of the button to open the menu.
To change a setting, complete the following steps:
1.Press the button up or down to select the item.
2.Press the center of the button to open the item.
3.Press the button up or down to toggle through the menu selections.
4.Press the center of the button to save the setting and return to the menu.
To move to a previous menu, select BACK and press the center of the button. To close the setup menus, select EXIT from any menu and press the center of the button.
NOTES:
•When you select BACK or EXIT on any menu, the camera saves the current settings.
•The menu closes automatically after three minutes of inactivity.
15 |
