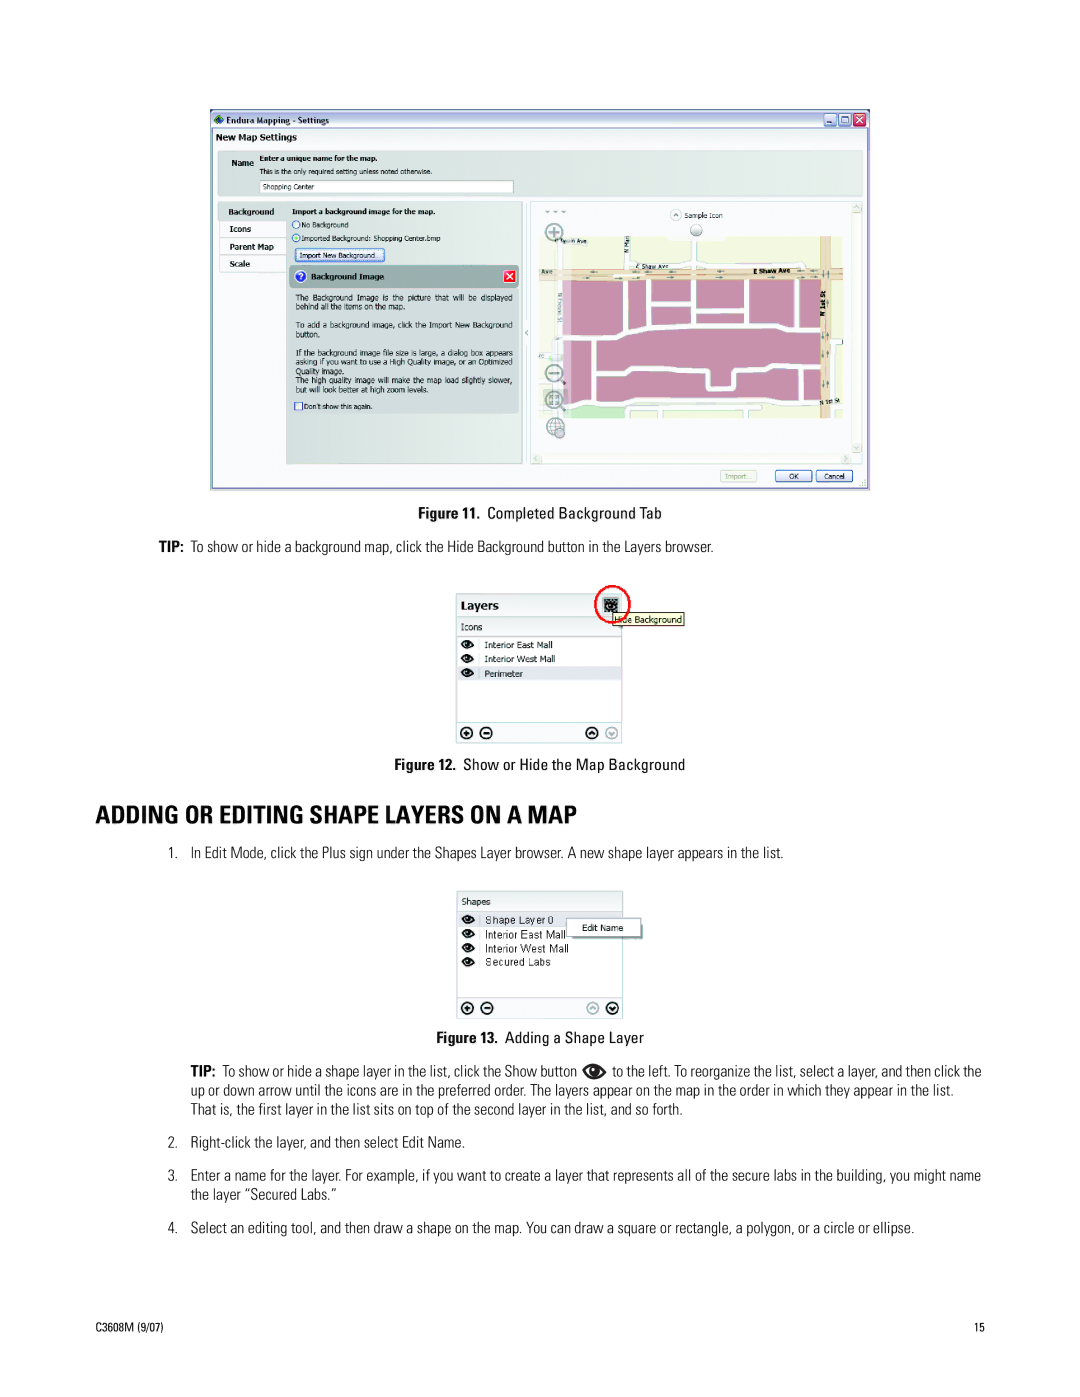
Figure 11. Completed Background Tab
TIP: To show or hide a background map, click the Hide Background button in the Layers browser.
Figure 12. Show or Hide the Map Background
ADDING OR EDITING SHAPE LAYERS ON A MAP
1. In Edit Mode, click the Plus sign under the Shapes Layer browser. A new shape layer appears in the list.
Figure 13. Adding a Shape Layer
TIP: To show or hide a shape layer in the list, click the Show button ![]() to the left. To reorganize the list, select a layer, and then click the up or down arrow until the icons are in the preferred order. The layers appear on the map in the order in which they appear in the list. That is, the first layer in the list sits on top of the second layer in the list, and so forth.
to the left. To reorganize the list, select a layer, and then click the up or down arrow until the icons are in the preferred order. The layers appear on the map in the order in which they appear in the list. That is, the first layer in the list sits on top of the second layer in the list, and so forth.
2.
3.Enter a name for the layer. For example, if you want to create a layer that represents all of the secure labs in the building, you might name the layer “Secured Labs.”
4.Select an editing tool, and then draw a shape on the map. You can draw a square or rectangle, a polygon, or a circle or ellipse.
C3608M (9/07) | 15 |