ASSOCIATING ENDURA DEVICES WITH AN ICON
1.From the Edit Mode screen, display the desired icon layer on the map.
2.In the Device Browser list, use the filters to sort the list. You can display devices by their availability (online or offline), by type (camera, encoder, alarm, and so forth), or by location.
3.Select a device or group of devices, and then drag it to the icon. A message appears confirming that the devices have been associated with the icon.
Figure 24. New Device Association Message
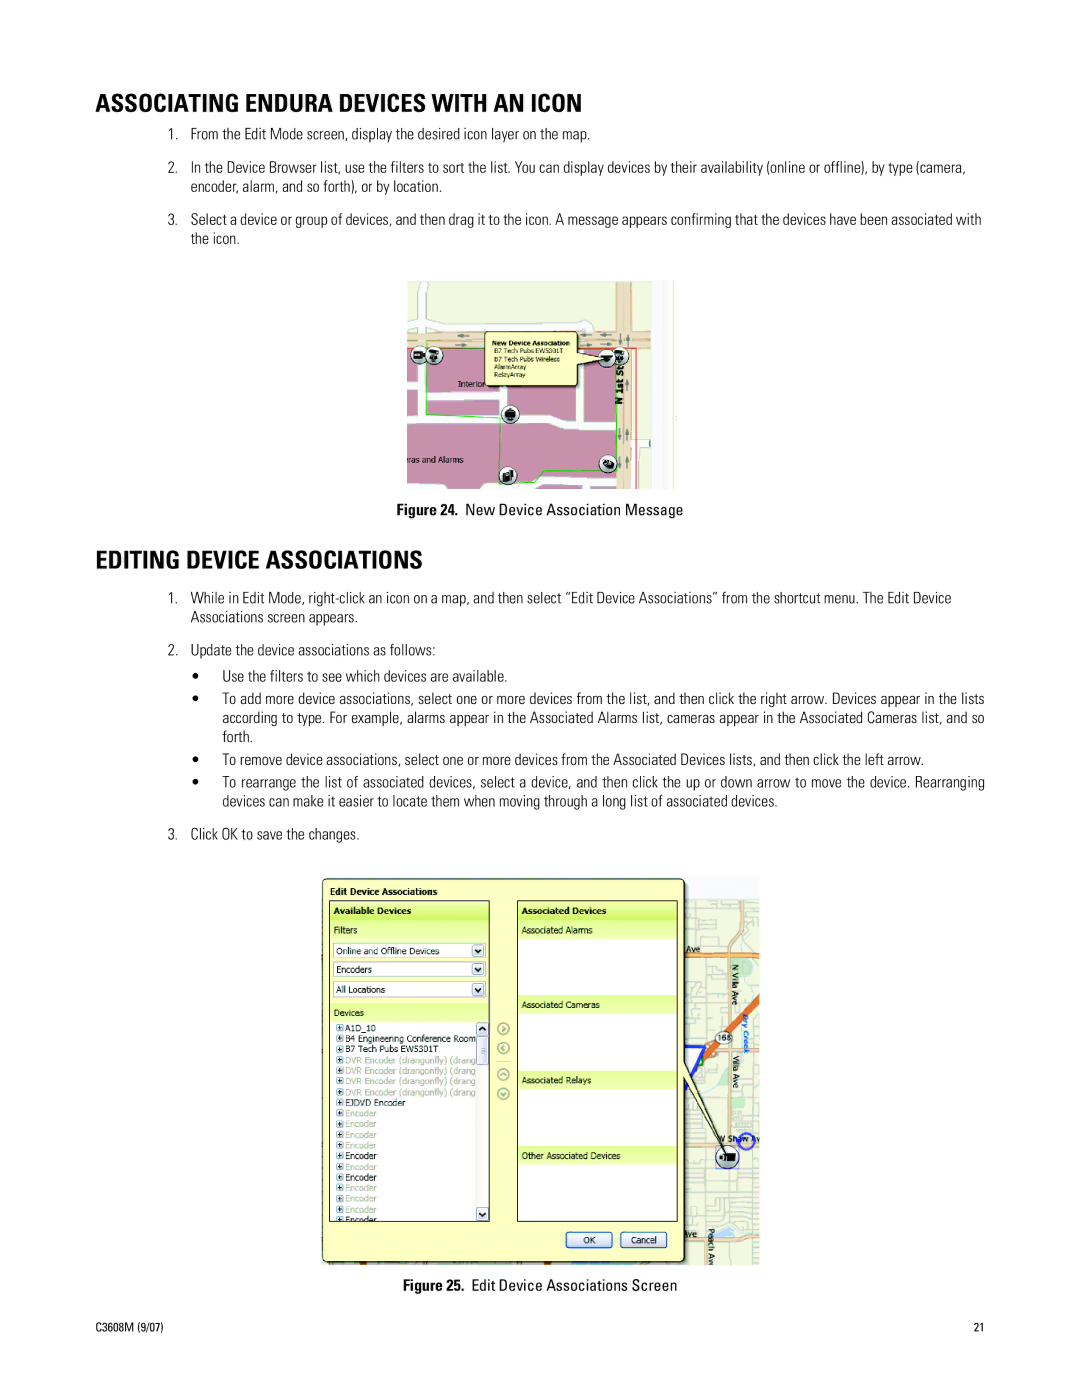
EDITING DEVICE ASSOCIATIONS
1.While in Edit Mode,
2.Update the device associations as follows:
•Use the filters to see which devices are available.
•To add more device associations, select one or more devices from the list, and then click the right arrow. Devices appear in the lists according to type. For example, alarms appear in the Associated Alarms list, cameras appear in the Associated Cameras list, and so forth.
•To remove device associations, select one or more devices from the Associated Devices lists, and then click the left arrow.
•To rearrange the list of associated devices, select a device, and then click the up or down arrow to move the device. Rearranging devices can make it easier to locate them when moving through a long list of associated devices.
3.Click OK to save the changes.
Figure 25. Edit Device Associations Screen
C3608M (9/07) | 21 |