Appendixes
APPENDIX A: CONNECTING ATM/POS DEVICES
The DX4700/DX4800 allows you to connect to one ATM or POS device. One camera channel can be used to record ATM/POS video. For information about configuring the unit for ATM/POS recording, refer to the DX4700/DX4800 Operation/Configuration manual. For information about connecting your DX4700/DX4800 using AVE equipment, contact Pelco Product Support.
Refer to the following information when referencing the DX4700/DX4800 Operation/Configuration manual:
•Setting up the ATM/POS interface
•Configuring ATM/POS transaction settings
•Configuring advanced ATM/POS activated relay output
•Linking relay outputs to ATM/POS events
•Linking cameras to record in response to ATM/POS events
•Linking presets and patterns to ATM/POS events
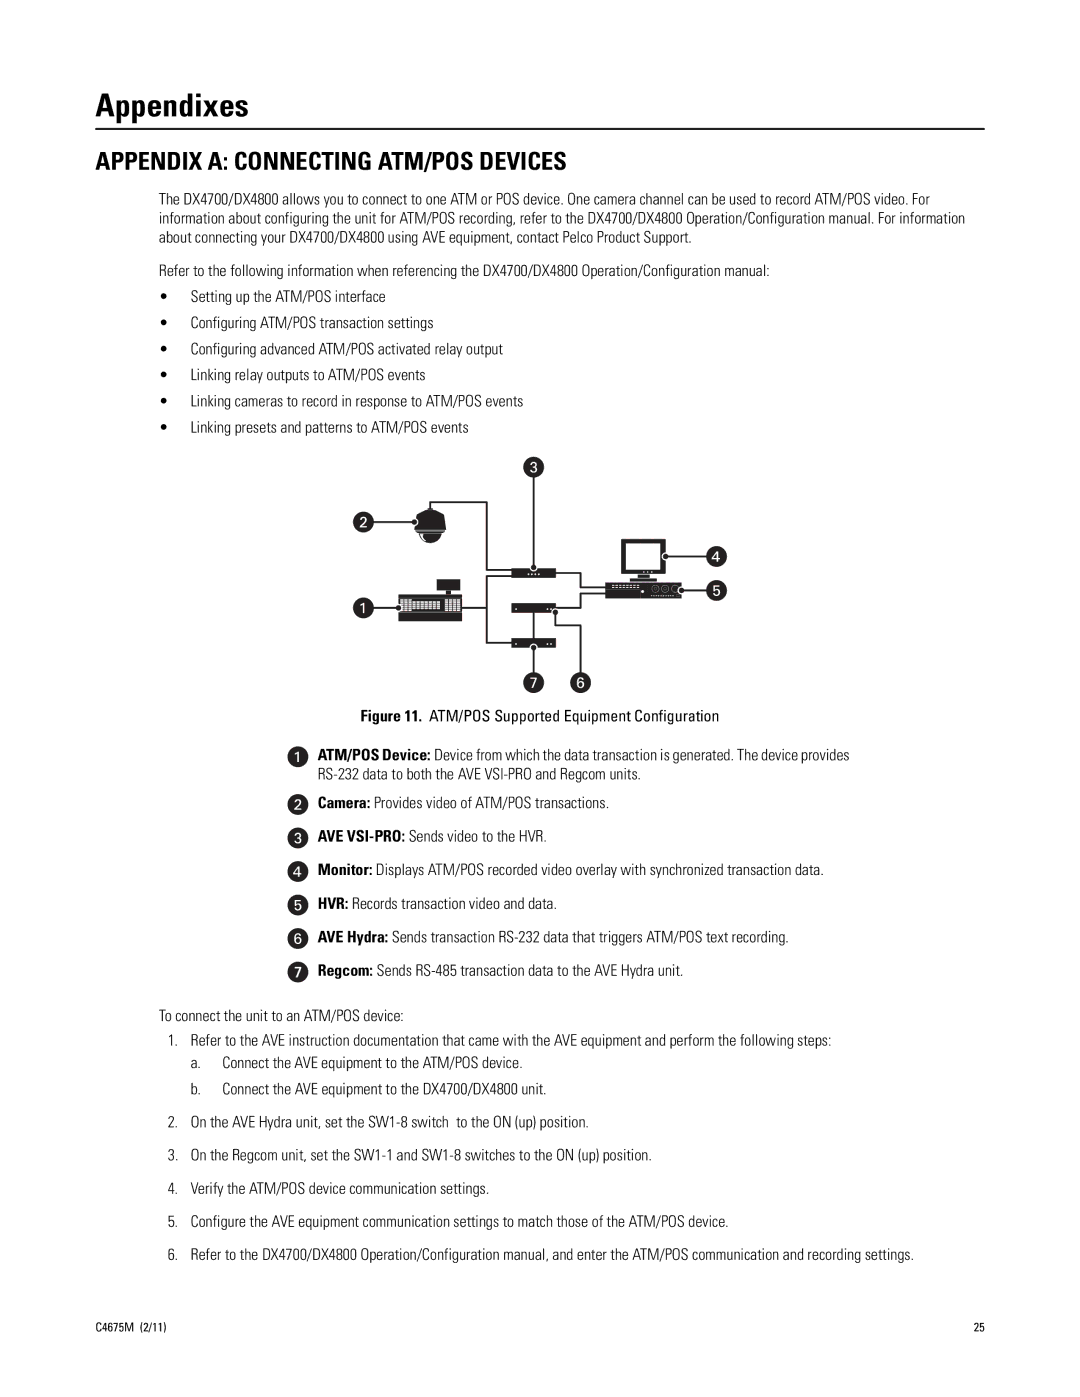
Figure 11. ATM/POS Supported Equipment Configuration
ATM/POS Device: Device from which the data transaction is generated. The device provides
RS-232 data to both the AVE VSI-PRO and Regcom units.
Camera: Provides video of ATM/POS transactions.
AVE VSI-PRO: Sends video to the HVR.
Monitor: Displays ATM/POS recorded video overlay with synchronized transaction data.
HVR: Records transaction video and data.
AVE Hydra: Sends transaction RS-232 data that triggers ATM/POS text recording.
Regcom: Sends RS-485 transaction data to the AVE Hydra unit.
To connect the unit to an ATM/POS device:
1.Refer to the AVE instruction documentation that came with the AVE equipment and perform the following steps:
a.Connect the AVE equipment to the ATM/POS device.
b.Connect the AVE equipment to the DX4700/DX4800 unit.
2.On the AVE Hydra unit, set the SW1-8 switch to the ON (up) position.
3.On the Regcom unit, set the SW1-1 and SW1-8 switches to the ON (up) position.
4.Verify the ATM/POS device communication settings.
5.Configure the AVE equipment communication settings to match those of the ATM/POS device.
6.Refer to the DX4700/DX4800 Operation/Configuration manual, and enter the ATM/POS communication and recording settings.
C4675M (2/11) | 25 |
