DX8100 Series Digital Video Recorder
C2630M-B 4/08
Contents
Creating Bookmarks
100
Performing Periodic Maintenance
List of Illustrations
Page
C2630M-B 4/08
Page
List of Tables
DX8100 Viewer
DX8100 Client Emergency Agent
DX8100 Mobile Client
NEW DX8100 Features
DX8100 WEB Client
Software Upgrades
Upgrade Policy
Upgrade policy is described in the following sections
Starting and Shutting Down the DX8100
Hardware Upgrades
Starting the DX8100
DX8100 Documentation
Shutting Down the DX8100
Logging in to a Local DX8100
Local DX8100 Login
Logging OUT of the Local DX8100
Disconnecting from a Remote Site
Remote DX8100 Login
Connecting to a Remote Site
Exiting to the Windows Operating System
Working with Dual Monitors
Configuring the Dual Display Card
Logging OUT of a Remote Site
Understanding the DX8100 Application Window
Description of the DX8100 Main Window
Following figure shows the parts of the DX8100 main window
DX8100 DVR Main Window
Part Description
DX8100 Menu BAR
Command Description
File Menu
Edit Menu
View Menu
Favorite Menu
Export Menu
Help Menu
DX8100 Toolbar
Button Name Description
Description of Operating Modes
Displaying the DX8100 Window from a
Displaying Video in Full Screen View
Understanding View Panes and Panels
Switching Between Standard and Extended Panel Views
Working with View Panes and Panels
Shows a view pane for a four division display
Configuring View Panels
Navigating View Panels
Shows the view panel, which contains view panes
Navigating Between View Panels
Display Type Grouping Number
Manually Cycling Through Hidden View Panels
Starting an Automatic Cycle View Mode
Expanding and Collapsing View Panes
Automatically Cycling Through View Panels
Selecting User Groups to Set the Cycle View Dwell Time
Stopping an Automatic Cycle View Sequence
Selecting the Cycle View Dwell Time
Assigning a Camera to a Pane
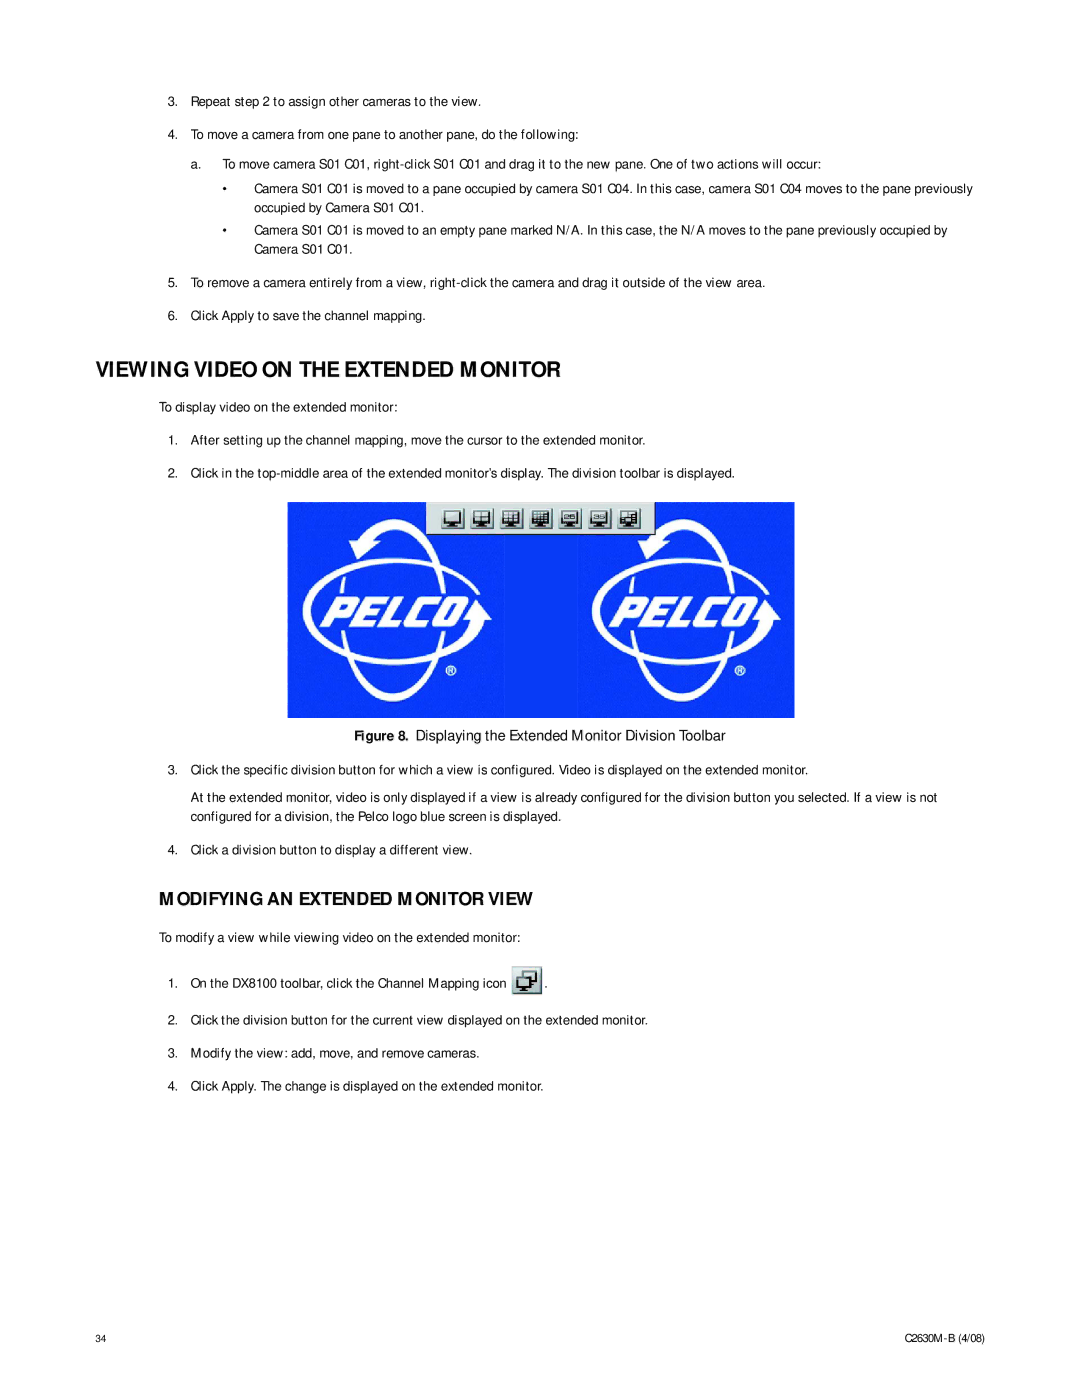
Viewing Video on the Extended Monitor
Working with the Site Tree
Site Tree Parts
Following commands
Assigning Cameras to View Panes
Linking Alarm Inputs to a Camera
Setting UP Links
Manually Turning On and Off a Relay
Linking Relay Outputs to Alarm Inputs
Linking a Relay Output to a Camera
Removing Links
Removing a Linked Alarm Input from a Camera
Removing a Linked Relay Output from an Alarm Input
Removing a Linked Relay Output from a Camera
Working in Live View Mode
Assigning and Removing Cameras from View Panes
Adding a Camera View to Favorites
Setting UP Favorites
To add a camera view to favorites
Organizing Favorites in Folders
Organizing Favorites in Folders
Creating a Favorites Folder
To create a favorites folder
C2630M-B 4/08
Indicates that the PTZ control is enabled
Live View ON-SCREEN Display OSD
Enabling and Disabling Instant Recording
Customizing the ON-SCREEN Display OSD
Instant Recording
Site Name Camera Name Video Recording Audio Recording
Enabling Instant Recording
Adding Instant Recording to OSD
Starting and Stopping Instant Recording
Disabling Instant Recording
Starting Instant Recording
Table O. Recording Indicators
Operating the ON-SCREEN PTZ Controls
Stopping Instant Recording
Operating the PTZ Controls
Adjusting the Camera Lens
Adjusting the Camera Zoom
Buttons
Key Description
Home and End These keys provide the following functionality
Left and Right Arrows
PTZ Presets
Programming a Preset
Activating a Preset
Programming a Preset
PTZ Patterns
Clearing a Preset
Programming a Pattern
Activating a Pattern
Programming a Pattern
Using the PTZ OSD Menu Control
Accessing Programming Features of Remote Cameras
Clearing a Pattern
Part Description Enter Provides the following actions
Accessing a Remote Camera Programming Menu
Following figure shows the PTZ OSD Menu control
Buttons Left and Right Perform no activity
Camera Setup Menu
Sending Auxiliary Commands to a Device
Programming a Preset Tour
Configuring Preset Tours
Accessing a Preset Tour Group
Adding Presets to a Tour
Adding Preset to Tour
Deleting Presets from a Tour
Deleting Preset from Tour
Activating a Preset Tour
Deactivating a Preset Tour
KBD300A Standard Mode Operational Features
Using the KBD300A Keyboard
Keyboard Control Action
Left/right direction
Assigning Cameras to View Panels
Accessing Playback Mode
Playback ON-SCREEN Display OSD
Following table describes the parts of the payback controls
Playback Controls
Playback Controls
Table T. Parts of the Playback Controls
Part Description
Item Part
Playback Timeline
Selected second
Starting Playback from a Specific Point in Time
Playing Back Video by Time
Understanding Instant Playback
Playing Back Video by Event
Operating Playback Digital Zoom
Level
Zoom Using the Digital Zoom Control
Zoom
Zoom Out
Zoom Using the Mouse
Zoom Out Using Mouse
Panning a Zoomed Image
Panning Zoomed Video with the Mouse
DX8100 DVR Search Mode Window
Search Window
Reusing the Search Time Range
Displaying a Deinterlaced Image in the Search Mode
Item Part Description
All None Motion Alarm
Index Video Search
Thumbnail Video Search
DX8100 DVR Index Search Screen
POS Search
DX8100 DVR Thumbnail Search Screen
To enter the POS Search mode On the DX8100 toolbar, click
Understanding the POS Search View
Channel number From
Function is not supported at this time
Searching and Displaying POS Data by Device Name
Searching POS Data by Device Name
Video Window
Displaying POS Data Discovered by Device Name
POS Transaction Search by Device Name
Searching by POS Transaction Number
Transaction Number text box, type the transaction number
Searching for ALL Transactions with Exceptions
Searching an POS Event by Transaction Number
Searching for Transactions That Satisfy Specific Exceptions
Searching for Transaction with Exception Only Events
Searching for Transactions by Line Item
Transactions that Satisfy Specific Exception Filters
Searching for Transactions by Action Code
Transactions that Contain a Unique Line Item
Pixel Video Search
Searching Transactions by Action Code
Searching Video Based on Changes in Screen Pixels
Pixel Search Screen
Working with Special View and Search Methods
Viewing a Video Thumbnail
Viewing Video in the Deinterlaced Mode
Viewing Live and Playback Video Simultaneously
Exporting Bookmarked Video Regions
Button Command Description
Creating Bookmarks
Clearing All Bookmarks
Clearing Bookmarks
Clearing a Single Bookmark
Click . a red bookmark flag appears on the timeline
Bookmarking and Exporting Multiple Channels
Selecting a Time Range for Duplication
Inserting and Removing a USB Flash Drive
Selecting the Export Device and Time Ranges
Removing a USB Flash Drive
Installing a USB Flash Drive
Remove the USB flash drive
Enabling the Deinterlacing Filter
Mapping and Disconnecting a Network Drive
Mapping a Network Drive
Disconnecting a Network Drive
Export Video Dialog Box
Starting AN Export Process
Performing the Export
Type Description
Changing a Bookmarked Time Range
Exporting Selected Video
Assigning a Custom Export Video File Name
Export Time Range
Selecting the Export Format
Format Description
Exporting a Sequence of Still Images
Finalizing AN Export Process
Stopping AN Export While in Process
Retaining Video When Stopping an Export Process
Deleting Video Data When Stopping an Export Process
Working with DX8100 Backed UP Video
Logs and Health Status
Viewing Logs from the Application Window
Viewing System Health Status
Working with System Health Status View
Working with System Health LOG View
Setting Up the DX8100
Accessing the Setup Mode
Understanding the Setup Dialog BOX
Button
Camera Setup
Basic Camera Setup
Camera
Motion Detection Setup
Low Sensitivity Level
Audio Setup
Camera Motion Detection Setup
Setting Up the Standard Audio Options
AUX Audio Settings Dialog Box
Listening to Live Audio
Setting Up the Expanded Audio Options
To set up the expanded audio option Do the following
Listening to Live Audio at a Local Server
Configuring Video Loss Detection
Listening to Live Audio from a Remote DX8100 System
Applying Settings to ALL Cameras
Link Setup
Click Apply to All Cameras
Configuring DX8100 Basic Relay and Alarm Settings
Configuring Basic Relay and Alarm Settings
Understanding How Relays and Alarms React to a Power Outage
Configuring Basic Relay Operating Properties
Linking Relay Outputs to External Events
Configuring Basic Alarm Input Operating Properties
Linking Relay Outputs to Motion Events
Linking Relay Outputs to Alarm Events
Linking Relay Outputs to ATM/POS Events
Linking Cameras to Record in Response to External Events
Linking Relay Outputs to Video Loss Events
Linking Cameras to Record in Response to Motion Events
Linking Cameras to Record in Response to Alarm Events
Linking Cameras to Record in Response to ATM/POS Events
Linking PTZ Presets and Patterns to External Events
Linking Cameras to Record in Response to Video Loss Events
Linking PTZ Presets and Patterns to Motion Events
Linking PTZ Presets and Patterns to Alarm Events
Linking Presets and Patterns to ATM/POS Events
4a 5a
Linking Presets and Patterns to Video Loss Events
Accessing the Schedule
Schedule Setup
Following figure shows the Schedule
Weekends, or Custom Mode
Setting UP the Camera Recording Mode
Scheduling a Record Mode
Sets the start and end dates for a custom schedule
Mode Color Description
Clearing a Scheduled Recording
Clearing Recording Times for a Specific Record Mode
Clearing Recording Times for All Record Modes
Creating a Yearly Recording Schedule
Scheduling Individual Days Using the Year View
Creating Yearly Recording Schedules
Copying Schedule Attributes to a Different Day
Creating Multiple-Day Schedules
Creating Monthly or MULTIPLE-DAY Recording Schedules
Select Copy from the quick-menu
Working with Single-Day Schedules
Creating Single-Day Schedules
Click the Apply button at the bottom of the Schedule
Copying and Applying Schedule Attributes
Month View Page Single-Day Schedule
Editing Schedules
Changing an Existing Schedule Profile
Deleting an Existing Schedule Profile
Month View
Working with Custom Camera Settings
Configuring Custom Camera Settings
Examples of Custom Camera Settings
Normal Motion Alarm
Setting the Frame Rate
Configuring the Frame Rate
Accessing the Frame Rate Configuration Dialog Box
Normal Motion Alarm
Frame Rate Configuration Dialog Box
Setting the Resolution and Frame Rate
Table AG. Resolution Values
Click Apply when you return to the Schedule Setup screen
Frame Rate Configuration Screen
Model Format
Setting Up DX8100 for Maximum IPS Recording
Understanding DX8100 Server Maximum IPS Recording
Total Per Camera
C2630M-B 4/08 145
Understanding the DX8100 Frame Rate Calculations
Available frame rate capacity
Setting UP Advanced Relay Output
Configuring Advanced Motion-Activated Relay Output
Configuring Advanced Alarm-Activated Relay Output
Option Result
Configuring Advanced ATM/POS-Activated Relay Output
Linking Relays to ATM/POS
Configuring Advanced Video Loss-Activated Relay Output
Linking Relays to Video Loss
Configuring the DX8100 for Network Access
Setting UP Network Properties
Setting Up DX8100 Network Access
Setting Up Dhcp
Network Setup
Setting Up a Static IP Address
Setting UP TCP/IP and Bandwidth Throttle
Port Number User Changeable Description
Multicast Requirements
Working with Multicasting
Enabling Multicasting
Accessing Network Information
Setting UP DNS/WINS
Working with Time Synchronization
Adding a NTP Time Server
Editing a NTP Time Server
To select the NTP server, do one of the following
Deleting a NTP Server
Comparing the DX8100 and NTP Server Time
Setting Up Automatic Time Synchronization
Manually Synchronizing the DX8100 Time
Enabling Database Overwrite
Setting UP Port and Device Communication Properties
Understanding the PORT/DEVICE
Serial Data Standard Supported Port RS-422
RS-232
Setting Up RS-422/RS-485 Communication Port Properties
Setting UP ATM/POS Device Communication Ports
Setting Up COM1 Port Properties
Interface Mode RS-232 default Baud Rate
Setting UP ATM/POS Device Properties
Selecting the ATM/POS Device Mode and Communications Options
Device Configuration
Baud rate Parity Data bits Stop bits
Modified ER-650 Data Format Dialog Box
C2630M-B 4/08 167
168 C2630M-B 4/08
Setting Up an ATM/POS Data Format
Click Schedule
Understanding the Data Format
Includes the following options
Item Command Description
Table AT. Parts of the Data Format
Value Description
Creating a New Data Format
Using Custom Device Filters
Editing a Data Format
Assigning a Data Format to an ATM/POS Device
Deleting a Data Format
Setting Up ATM/POS Exceptions
Assigning a Data Format to an ATM/POS Device
Using Action Codes
Code Description
Creating an ATM/POS Exception
Advanced
None Value to the right is not used and is disabled
Modifier Description
Deleting an ATM/POS Exception
Editing an ATM/POS Exception
Assigning an Exception to An ATM/POS Device
Verifying the ATM/POS Communication Connection
Assigning an Exception to an ATM/POS Device
Recording ATM/POS Events
Verifying the ATM/POS Communication Connection
Setting UP the KBD300A Keyboard
Recording ATM/POS Transaction
Control Action
Configuring KBD300A Communication Settings
KBD300A Standard Mode Operational Features
Turns the specified auxiliary output on or off
Each DX8100 site
Installing or Updating Device Protocols
KBD300A Shift Mode Operational Features
Expands DX8100 site
Data Backup Setup
Following figure shows the Backup schedule
Delete Allows you to delete a selected backup schedule
Accessing the Backup Configuration
Deselected backup schedule does not run as scheduled
Delete Allows you to delete the selected backup schedule
Adding a Backup Schedule
Editing AN Existing Backup Schedule
Initiating AN Instant Backup Schedule
Deleting AN Existing Backup Schedule
Channel record type All channels
Click OK. The backup starts immediately
Disconnecting from a Network Drive
Mapping a Network Device
Accessing the User
User Setup
Selecting a Backup Media Device
Viewing Backed UP Video
Following figure shows the User
User
Lists the authorized users
BUILT-IN User Accounts
User Buttons Allows you to do the following
Definition of Camera Security Access
Definition of User Access Levels
Modifying User Access Rights
Adding NEW Users
Modifying User Properties
Add New User Dialog Box
Changing a USER’S Group Affiliation
Changing User Passwords
Setting Login Timeout
Deleting Existing Users
Adding a Remote Site
Site Setup
Assigning Automatic Login Permission to a User
Adding a Site with a Static IP Address
Adding a Site with a Dynamic IP Address
Adding a Site with a Static IP Address
4b 4c
Finding Active Remote Cameras
Activating Remote Sites
Editing a Remote Site
System Setup
Modifying a Remote Site
Deleting a Remote Site
Working with the Export Feature
Accessing the System
Exporting Current DVR Settings
Using the Edit Menu to Perform an Export
Working with the Import Feature
Importing DVR Settings
Using the Edit Menu to Perform an Import
Using System Logs
To import a settings file from a specific drive or folder
Viewing a Log File
DX8100 Log View Windows OS Log View
Selecting the Language
Exporting Log Information
Setting the System Time
Setting System Time
Working with Standard and Daylight Saving Time
Selecting the Video Format
Working with CTRL+ALT+DEL Function
Enabling Ctrl+Alt+Del
Using Ctrl+Alt+Del
Setting UP Auto Reboot
Specifying the Data Retention Time Limit
Setting UP Camera Mapping
External Monitor Setup
Accessing the External Monitor Setup
Working with Online Help
Setting Up Automatic Camera Mapping
Setting Up Manual Camera Mapping
Creating Monitor Sequence Instances
External Monitor Manual Mapping
Loading an Existing Sequence List
Modifying a Sequence Instance in the List
Deleting a Sequence Instance from the List
Modify a Mapping Sequence
Appending an Existing Sequence List
Configuring Display Override
Click Apply at the bottom of the External Monitor
Using the External Monitor Option
Emergency Notification Setup
Accessing the Emergency Agent Notification Setup
Changing Client Emergency Agent Properties
Adding Client Emergency Agents to be Notified
Deleting Clients from the Notification List
Setting Server Event Transmission Time
Emergency E-MAIL Notification Setup
Linking Cameras to Client Emergency Agents
Setting Up the E-mail Server
Accessing the Emergency E-MAIL Notification Setup
Configuring Emergency E-MAIL Notification
Enabling or Disabling E-mail Notification
Testing E-mail Notification
Basic E-mail Notification Setup
Setting UP the Time Period
Configuring E-Mail Notification Frequency
Sending E-mail Notifications in Response to Alarm Events
Setting the Time of Day
Sending E-mail Notifications in Response to Motion Events
Setting UP E-MAIL Notification Groups
Deleting an E-mail Group
Adding an E-mail Notification Group
Modifying an E-mail Group Name
Click OK Click Close Click Apply
Adding Members to an E-mail Group
Add User to E-mail Group
Deleting Members from an E-mail Group
Remove User from E-mail Group
Modifying E-mail Group Member Attributes
Modify Member Attributes
Sending E-MAIL Notifications
Sending E-mail Notifications to Individuals
Sending E-mail Notifications to Groups
Sending E-mails to Groups
Select Upgrade Package
Updating the DX8100 Server and Client Applications
Click Browse. The Open dialog box opens
Updating DX8100 Configuration File
Upgrade Confirmation Dialog Box
Recovering a Password
Software Upgrade Server Console
Performing Periodic Maintenance
Accessing the DX8100 Front Panel
DX8100 Filter Tab Location Remove the filter
193
80, 85 Audio Audio indicator
User
192
COM1communications properties Commands
Lens, adjusting Mapping Motion detection zones
111 High Low Medium None Settings
Connecting DX8000 DVRs
Overview 216 Port
117
217
218 Emergency e-mail notification
Keypad
Linking Alarm input, removing from camera
Mode Extended view mode
Interface
110 Parity 164 Password Recovery Pattern
Operating modes Function Display Search Setup
Operation and configuration
Preset
Disconnecting from Editing Logging into
Relays Event-Relay Link Settings page, accessing
122 Setting up
128 Setting up
161
152
155 Overview
148
208
204
Viewing a log file
47, 163
C2630M-B 3/08 244
Product Warranty and Return Information
ISO9001