Operating Manual
Thank you for purchasing the Pentax Digital Camera
For Safe USE of Your Camera
About the Camera
Handling precautions for batteries
About the AC Adapter
Care to be Taken During Handling
Page
Contents
Taking Pictures
Recording and Playback of Sound
Settings
Playback/Deleting/Editing
Appendix
Memo
Contents of the Operating Manual
Checking the Contents of the Package
Names of Parts
Front
Back
Names of Operating Parts
Guide Indications
Attaching the Strap
Powering the Camera
Installing the Batteries
Open the battery cover
Getting
Battery Level Indicator
CR-V3
Using the AC Adapter optional
Using the AC Adapter Overseas
Denmark, Germany, Norway, Hungary, Finland
Installing the SD Memory Card
Data Backup
Precautions When Using an SD Memory Card
Recorded Pixels and Quality
Appropriate Number of Recorded Pixels According to Use
Appropriate Quality According to Use
Appropriate Quality According to Use Auto Select Mode
Approximate Number of Recordable Images by Size and Quality
Press the power switch
Press the power switch again
Turning the Camera On and Off
Playback Only Mode
Voice Recording Only Mode
Press the power switch while pressing the QPlayback button
Set the mode dial to O and press the power switch
Initial Setting
Setting the Display Language
Setting the Date and Time
Press the Menu button twice
Press the four-way controller
Twice
Press the four-way controller 23 to change the month
Language Video Output
Set the mode dial to R Check the image on the LCD monitor
Quick Start
Press the shutter release button halfway
Press the shutter release button fully
Using the Shutter Release Button
Press halfway
Focus frame
Status lamps
Playing Back Images
Playing Back the Previous or Next Image
Press the Q Playback button after taking a picture
Rotating the Displayed Image
Deleting the Displayed Image
Using the Button Functions
Capture Mode
Playback Mode
Delete button
Zoom/f/y button
Voice Recording Mode
Four-way controller in Playback mode
Shutter release button
Using the Menus
How to Use the Menus
Example of Menu Operation
Menu
Playback Menu
Enlarging a Menu Display
Example of Menu Operation
Rec. Mode Menu
Menu List
Playback Menu
Set-up Menu
Memo
Changing the Mode
Selecting the Capture Mode
Switching between Capture Mode and Playback Mode
Taking Pictures
Displaying Shooting Information in Capture Mode
Using Histogram
Letting the Camera Set the Functions Auto Select Mode
Press the shutter release button down fully
Using the Help Function
Set the mode dial to Press the 0 button
To select Mode Dial, Four-way
Controller or Buttons on Back
Setting the Functions Program Mode
Set the mode dial to R Set the functions you want to use
Set the mode dial to d Press the four-way controller
Text Lets you take clear pictures of text or writing Food
Use the four-way controller 2345 to choose the Picture mode
Press the shutter release button halfway
Taking Pictures of Dark Scenes Night-Scene Mode
Picture is taken Using the Shutter Release Button 1p.31
Taking Landscape Views Landscape Mode
Taking Portrait Pictures Portrait Mode
Taking Movies Movie Mode
Set the mode dial to C
Press the shutter release button
Keeping the Shutter Release Button Pressed
Using the Zoom
Press the Zoom/w/x button Capture mode
+ C . H =
Press the Menu button in Capture mode
Disabling the Digital Zoom Function
Using the Self-Timer
Continuous Shooting Continuous Shooting Mode
+ . H =
Using the Remote Control Unit optional
Press the zoom button to adjust
Zoom for remote control unit E
Press the shutter release button on the remote control
Taking Pictures with Color Filters Digital Filter Mode
Set the mode dial to + Press the four-way controller
Life of the Battery for the Remote Control Unit
To choose a color filter
Taking Two-in-One Pictures Two-in-One Mode
Take the first image
Take the second image
Use the four-way controller 2345 to select FPanorama Assist
Images will be joined
2, 3
Move the camera to the right Take the second image
Setting the Shooting Functions
Selecting the Focus Mode
Press the four-way controller 5 in Capture mode
Focus mode
Manual Focus
Selecting the Flash Mode
Press the four-way controller 4 in Capture mode
Flash Modes
Selecting the Recorded Pixels
Recorded Pixels Pictures
Selecting the Quality Level
Quality Levels
Set the mode dial to Press the Menu button in Capture mode
Selecting the Image Quality
Taking Pictures Image Quality
Adjusting the White Balance
+ C
White Balance
White Balance screen appears
Manual Setting
Changing the Focusing Area
Focusing Area
AE Metering Modes
Setting the Sensitivity
Sensitivity
Setting the Frame Rate
Setting the Instant Review Time Instant Review
Setting the Image Sharpness Sharpness
Setting the Color Saturation Saturation
Setting the Image Contrast Contrast
Setting the Exposure EV Compensation
To change the EV setting
To select EV Compensation
Saving the Settings
Saving the Menu Items Memory
Memory menu appears
Recording Sound Voice Recording Mode
To exit Voice Recording mode, turn the camera off
Recording
Sound
Playing Back Sound
Press the Q Playback button Use the four-way controller
To choose the recording to play
Back
Adding Sound Voice Memo to Images
Recording a Voice Memo
Setting the Voice Memo Recording Function
Playing Back a Voice Memo
Memo
Playing Back Images
Playing Back Still Pictures
Zoom Display
Setting the Quick Zoom Function
Playing Back Movies
Performed during playback
Displaying Shooting Information in Playback Mode
Protect icon
Quality White balance
Histogram
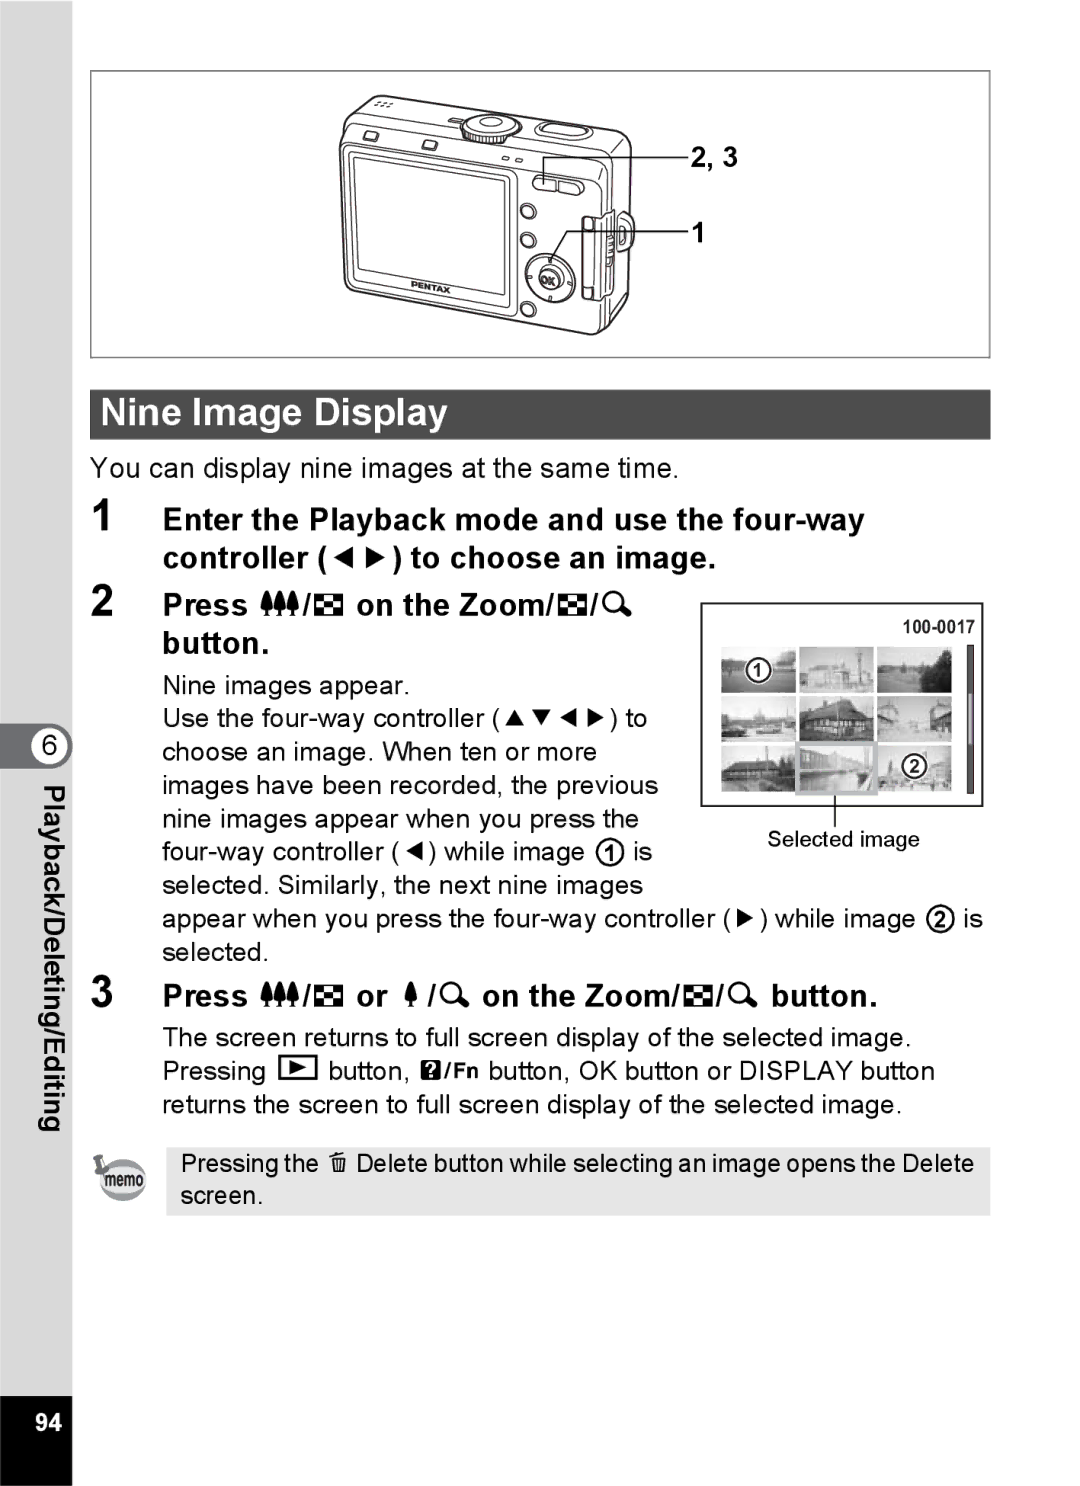
Nine Image Display
Press w/f or x/y on the Zoom/f/y button
Slideshow
To select Slideshow
To change the playback interval
Deleting
Deleting Individual Images or Sounds
Press the Menu button in Playback mode
Setting the Quick Delete Function
Deleting a Voice Memo only
Press the i Delete button twice in Playback mode
Deleting All Images
Protecting Images and Sounds from Deletion Protect
Use the four-way controller 23 to select Protect
To choose the image or sound to Protect
To select Protect
Press the Display button
Select Protect
Protecting All Images and Sounds
Viewing Images on a TV
Turn the TV and camera on
Press the shutter release button on the remote control unit
Press the remote zoom button on the remote control unit
Setting the Printing Service Dpof
Printing Single Images
4, 5
To choose whether to insert the date or not
Printing All Images
5, 6
Direct Printing Using PictBridge
Connecting the Camera to the Printer
Select PictBridge for USB Connection on the B Set-up menu
Camera
107
Printing Using the Dpof Settings
Disconnecting the Camera from the Printer
Editing Images
Changing the Image Size and Quality
Use the four-way controller 45 to change the quality
Editing Pictures with Digital Filters
To select Digital Filter
Use the four-way controller To choose the image to edit
To choose a digital filter
Copying Files
To select the file to copy Press the OK button
To Copy Files from the Built-in Memory to the SD Memory Card
Camera Settings
How to call the B Set-up menu
Formatting an SD Memory Card or the Built-in Memory
To select Format
Changing the Sound Settings
Changing the Volume
Select Sound on the B Set-up menu
Changing the Date and Time
To change the month
Setting the World Time
Use the four-way controller 45 to select O or P
121
Set-up menu
Changing the Start-up Screen
Using Screen Effects
Press the OK button four times
To select Background Color
To choose the background color
Adjusting the Brightness of the LCD Monitor
Use the four-way controller 45 to adjust the brightness
Changing the Display Language
Changing the Video Output Format
Changing the USB Connection Mode
Connection mode
Select USB Connection on the B Set-up menu
To change the USB
Setting Auto Power Off
Resetting to Default Settings Reset
Registering a Function Settings
Registering Functions
To choose a key on which to
Register a function
Align the mode dial with one
Following d, R, +, ., H, = Press the 0 button in Capture
Mode
Press the 0 button or the shutter release button
List of City Codes
Optional Accessories
Messages
Messages during shooting
Messages during playback
Memory card error
Messages for both
Troubleshooting
Problem Cause Remedy
135
Main Specifications
1024×768 640×480
137
138
139
Warranty Policy
141
For customers in USA
For customers in Canada
Pour les utilisateurs au Canada
Declaration of Conformity
Memo
Pentax Benelux B.V. for Netherlands