3 Installation
Smart Installation
In the 1st time (Virgin) installation, the OSD will instruct you step by step to do the TV installation setting.
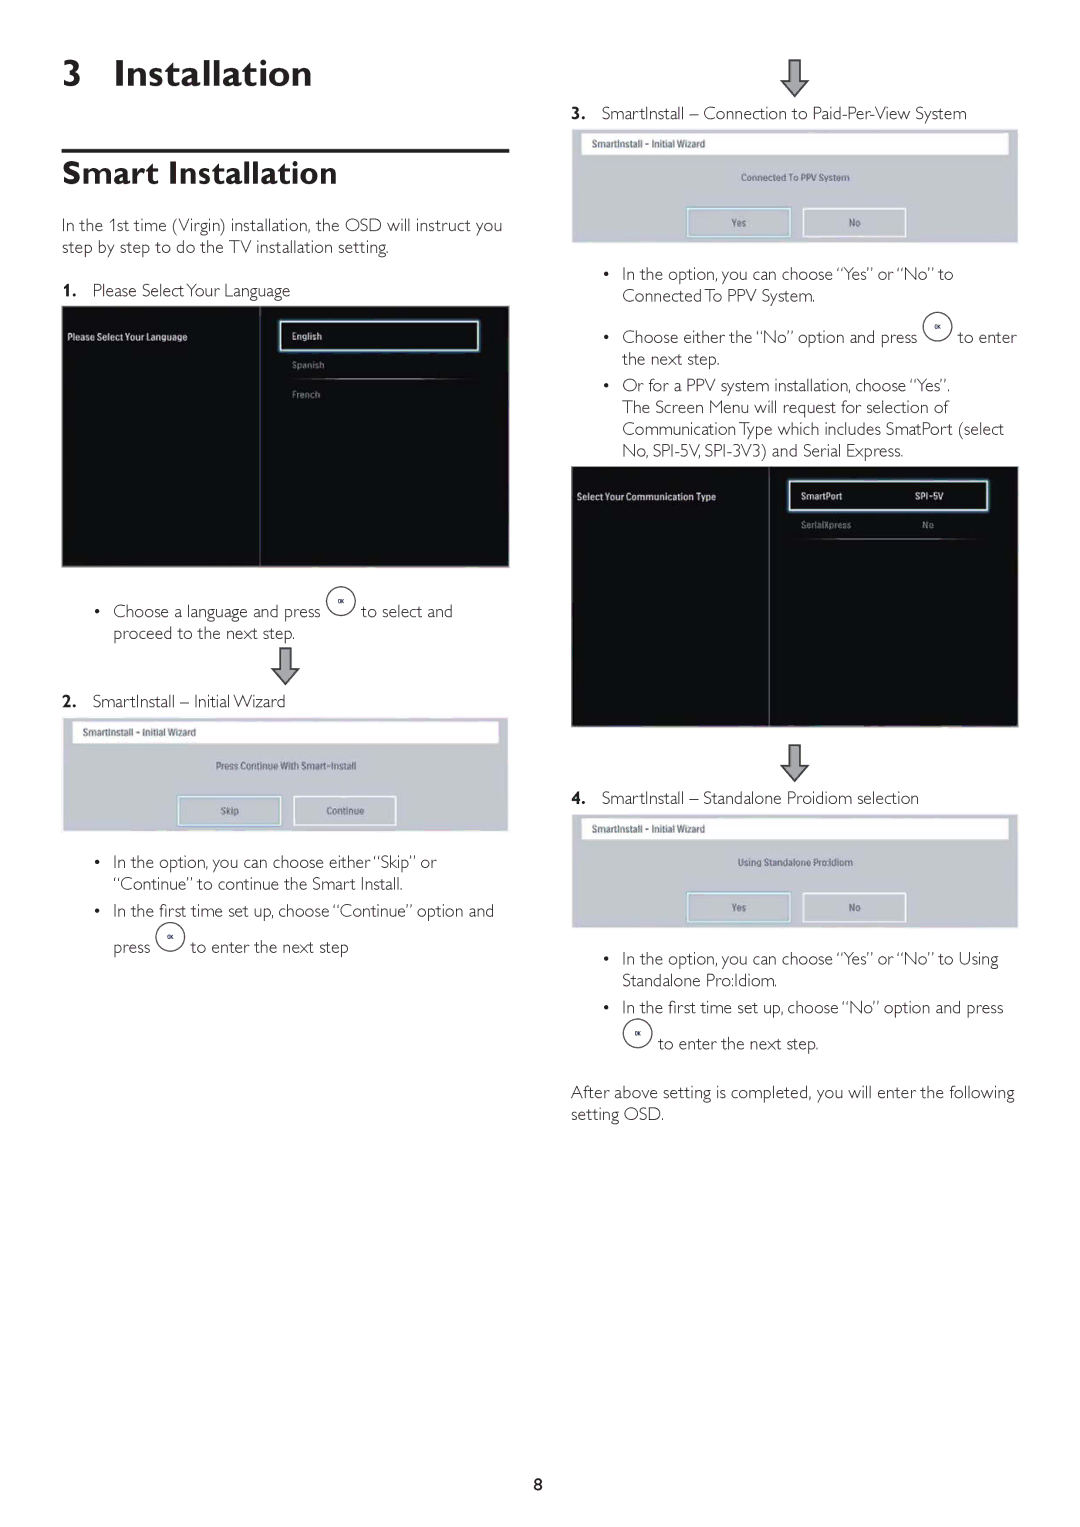
1.Please Select Your Language
•Choose a language and press![]() to select and proceed to the next step.
to select and proceed to the next step.
2.SmartInstall – Initial Wizard
•In the option, you can choose either “Skip” or “Continue” to continue the Smart Install.
•In the first time set up, choose “Continue” option and
press ![]() to enter the next step
to enter the next step
3.SmartInstall – Connection to
•In the option, you can choose “Yes” or “No” to Connected To PPV System.
•Choose either the “No” option and press ![]() to enter the next step.
to enter the next step.
•Or for a PPV system installation, choose “Yes”. The Screen Menu will request for selection of Communication Type which includes SmatPort (select No,
4.SmartInstall – Standalone Proidiom selection
•In the option, you can choose “Yes” or “No” to Using Standalone Pro:Idiom.
•In the first time set up, choose “No” option and press ![]() to enter the next step.
to enter the next step.
After above setting is completed, you will enter the following setting OSD.
8