8 Turning On the TV/VCR
Before you turn on the TV/VCR, make sure there are batteries in the remote control (details are on page five) and the TV/VCR is hooked up correctly (details are on pages six - seven).
The instructions on this page work only when you turn on the TV/VCR for the first time.
1
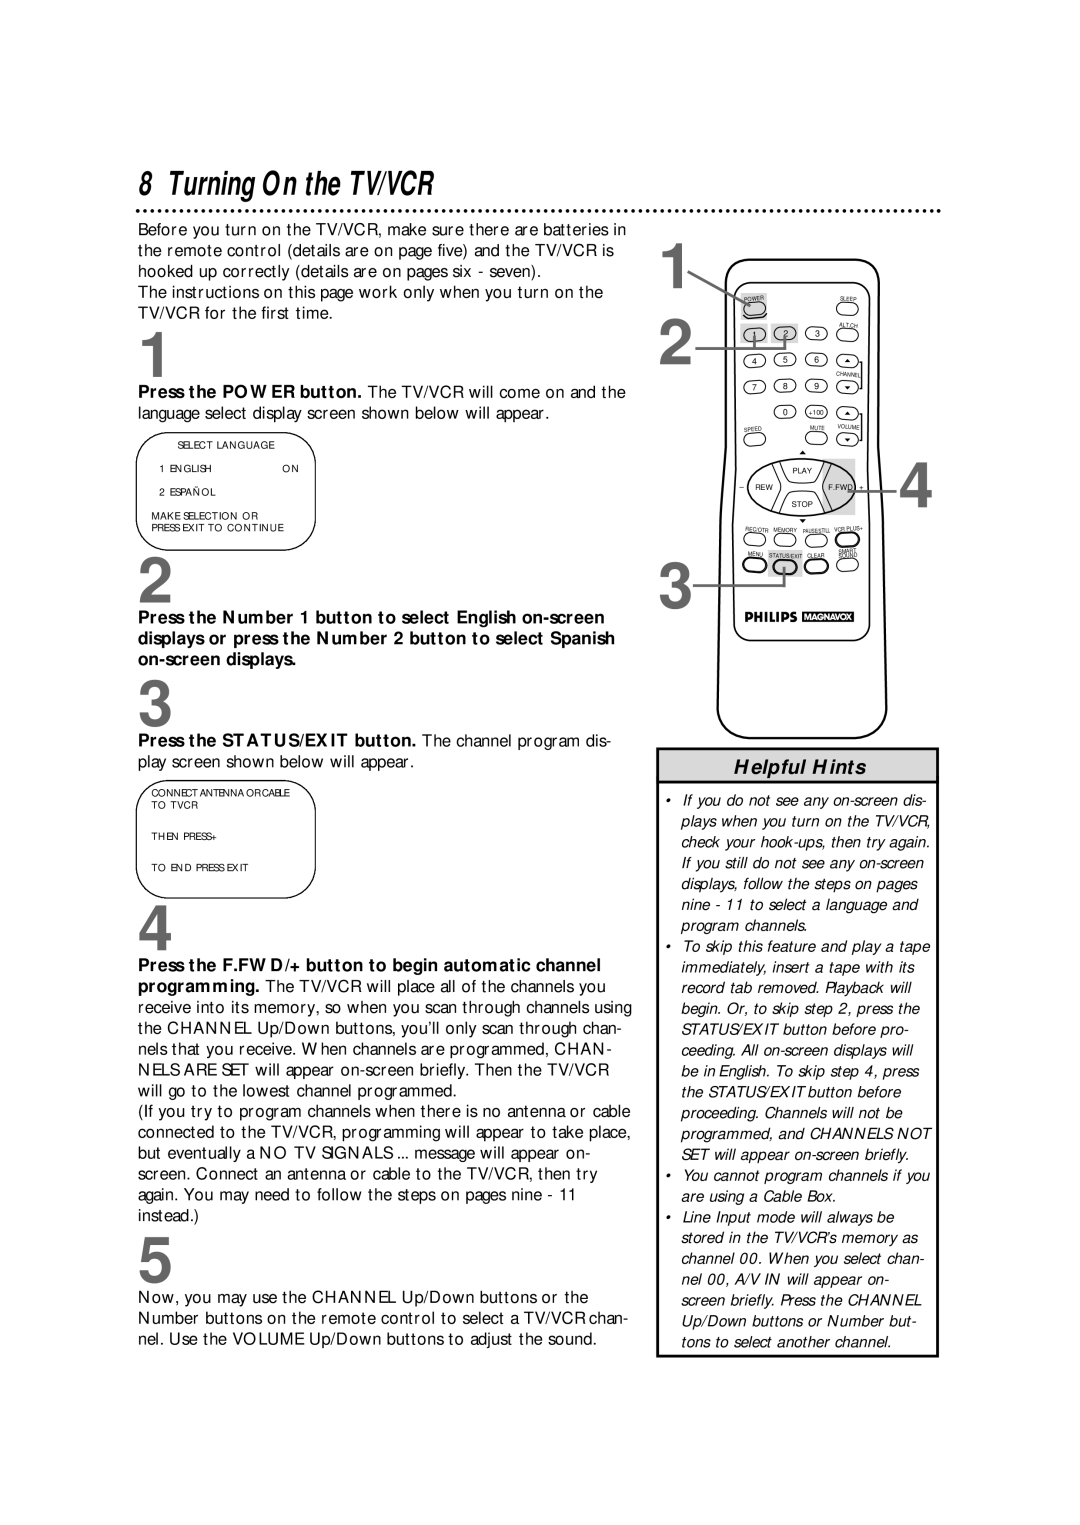
Press the POWER button. The TV/VCR will come on and the language select display screen shown below will appear.
SELECT LANGUAGE
1 ENGLISH | ON |
2 ESPAÑOL
MAKE SELECTION OR
PRESS EXIT TO CONTINUE
2
Press the Number 1 button to select English
3
Press the STATUS/EXIT button. The channel program dis- play screen shown below will appear.
CONNECT ANTENNA OR CABLE
TO TVCR
THEN PRESS+
TO END PRESS EXIT
4
Press the F.FWD/+ button to begin automatic channel programming. The TV/VCR will place all of the channels you receive into its memory, so when you scan through channels using the CHANNEL Up/Down buttons, you’ll only scan through chan- nels that you receive. When channels are programmed, CHAN- NELS ARE SET will appear
(If you try to program channels when there is no antenna or cable connected to the TV/VCR, programming will appear to take place, but eventually a NO TV SIGNALS ... message will appear on- screen. Connect an antenna or cable to the TV/VCR, then try again. You may need to follow the steps on pages nine - 11 instead.)
5
Now, you may use the CHANNEL Up/Down buttons or the Number buttons on the remote control to select a TV/VCR chan- nel. Use the VOLUME Up/Down buttons to adjust the sound.
1 | POWER |
|
|
| SLEEP |
|
2 |
| 2 |
| 3 | ALT.CH |
|
1 |
|
|
| |||
4 | 5 |
| 6 | o |
| |
|
|
| CHANNEL |
| ||
| 7 | 8 |
| 9 | p |
|
|
| 0 |
| +100 | o |
|
| SPEED |
|
| MUTE | VOLUME |
|
|
|
|
|
| p |
|
|
|
| o |
|
| 4 |
|
|
| p |
|
| |
|
| PLAY |
|
| ||
– | REW |
|
| F.FWD + |
| |
|
| STOP |
|
| ||
| REC/OTR | MEMORY | PAUSE/STILL VCR PLUS+ |
| ||
| MENU | STATUS/EXIT | CLEAR | SMART |
| |
| SOUND |
| ||||
3
Helpful Hints
•If you do not see any
•To skip this feature and play a tape immediately, insert a tape with its record tab removed. Playback will begin. Or, to skip step 2, press the STATUS/EXIT button before pro- ceeding. All
•You cannot program channels if you are using a Cable Box.
•Line Input mode will always be stored in the TV/VCR’s memory as channel 00. When you select chan- nel 00, A/V IN will appear on- screen briefly. Press the CHANNEL Up/Down buttons or Number but- tons to select another channel.
