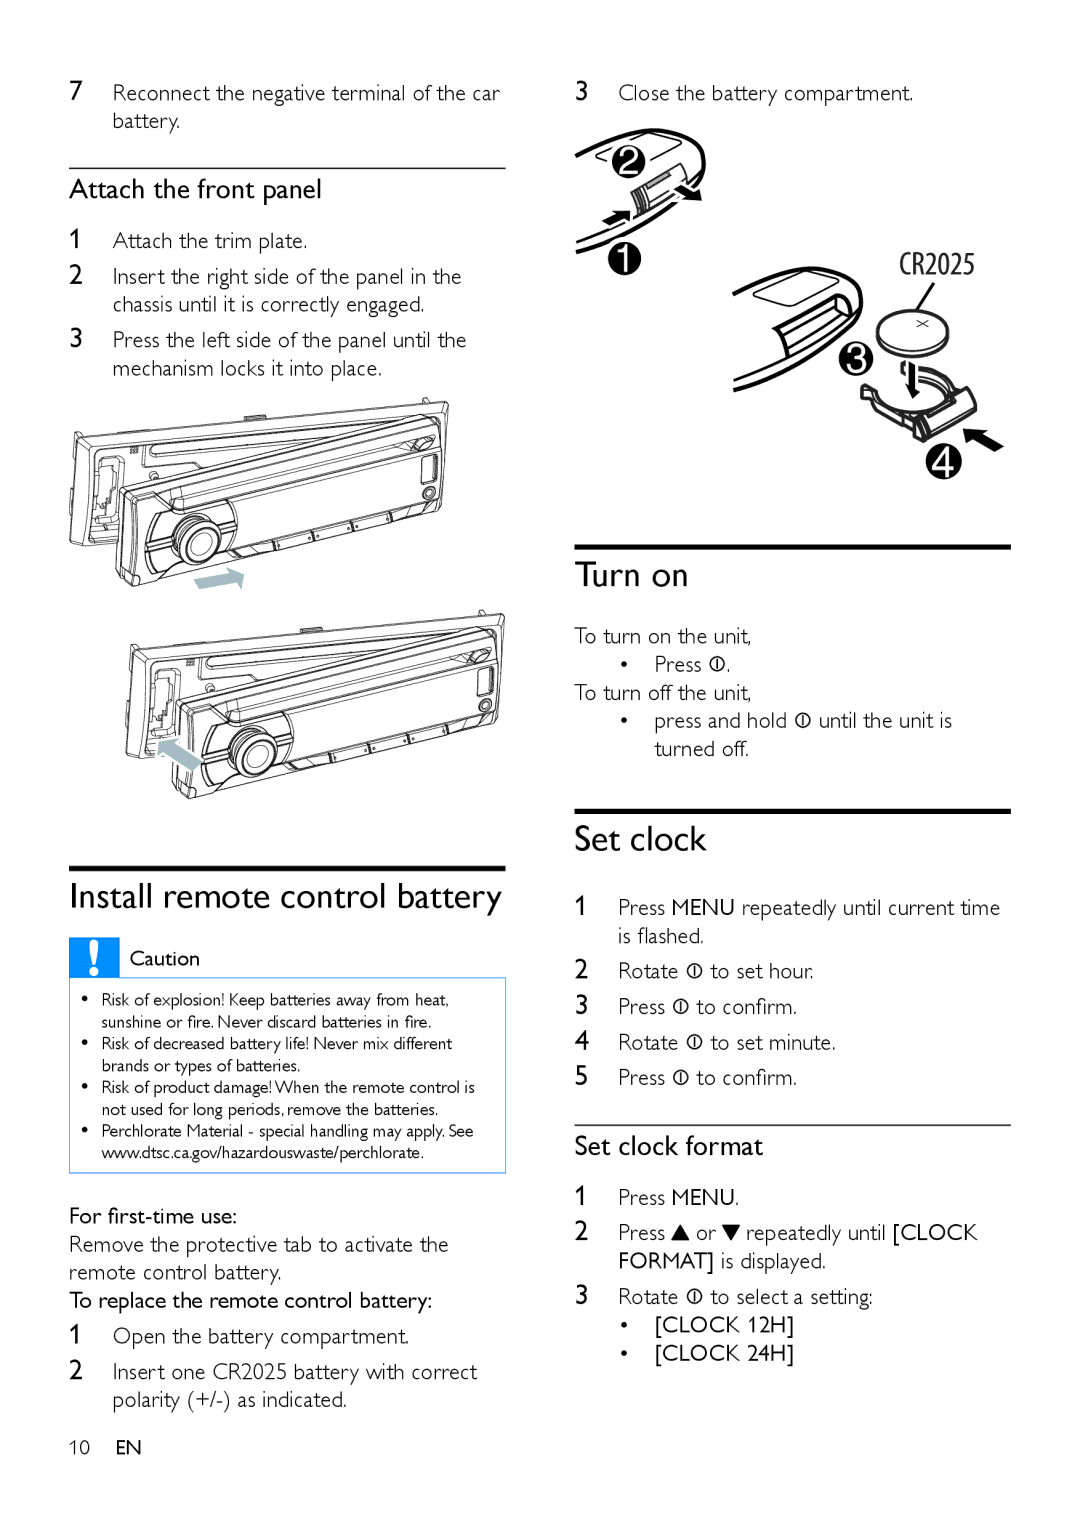
7 Reconnect the negative terminal of the car | 3 Close the battery compartment. |
battery. |
|
Attach the front panel
1Attach the trim plate.
2 Insert the right side of the panel in the chassis until it is correctly engaged.
3 Press the left side of the panel until the mechanism locks it into place.
Install remote control battery
![]() Caution
Caution
•• Risk of explosion! Keep batteries away from heat, sunshine or fire. Never discard batteries in fire.
•• Risk of decreased battery life! Never mix different brands or types of batteries.
•• Risk of product damage! When the remote control is not used for long periods, remove the batteries.
•• Perchlorate Material - special handling may apply. See www.dtsc.ca.gov/hazardouswaste/perchlorate.
For
Remove the protective tab to activate the remote control battery.
To replace the remote control battery:
1Open the battery compartment.
2Insert one CR2025 battery with correct polarity
10EN
Turn on
To turn on the unit,
•Press ![]() .
.
To turn off the unit,
•press and hold ![]() until the unit is turned off.
until the unit is turned off.
Set clock
1Press MENU repeatedly until current time is flashed.
2Rotate ![]() to set hour.
to set hour.
3Press ![]() to confirm.
to confirm.
4Rotate ![]() to set minute.
to set minute.
5Press ![]() to confirm.
to confirm.
Set clock format
1Press MENU.
2Press ![]() or
or ![]() repeatedly until [CLOCK FORMAT] is displayed.
repeatedly until [CLOCK FORMAT] is displayed.
3Rotate ![]() to select a setting:
to select a setting:
•[CLOCK 12H]
•[CLOCK 24H]