English
Basic Connections (continued)
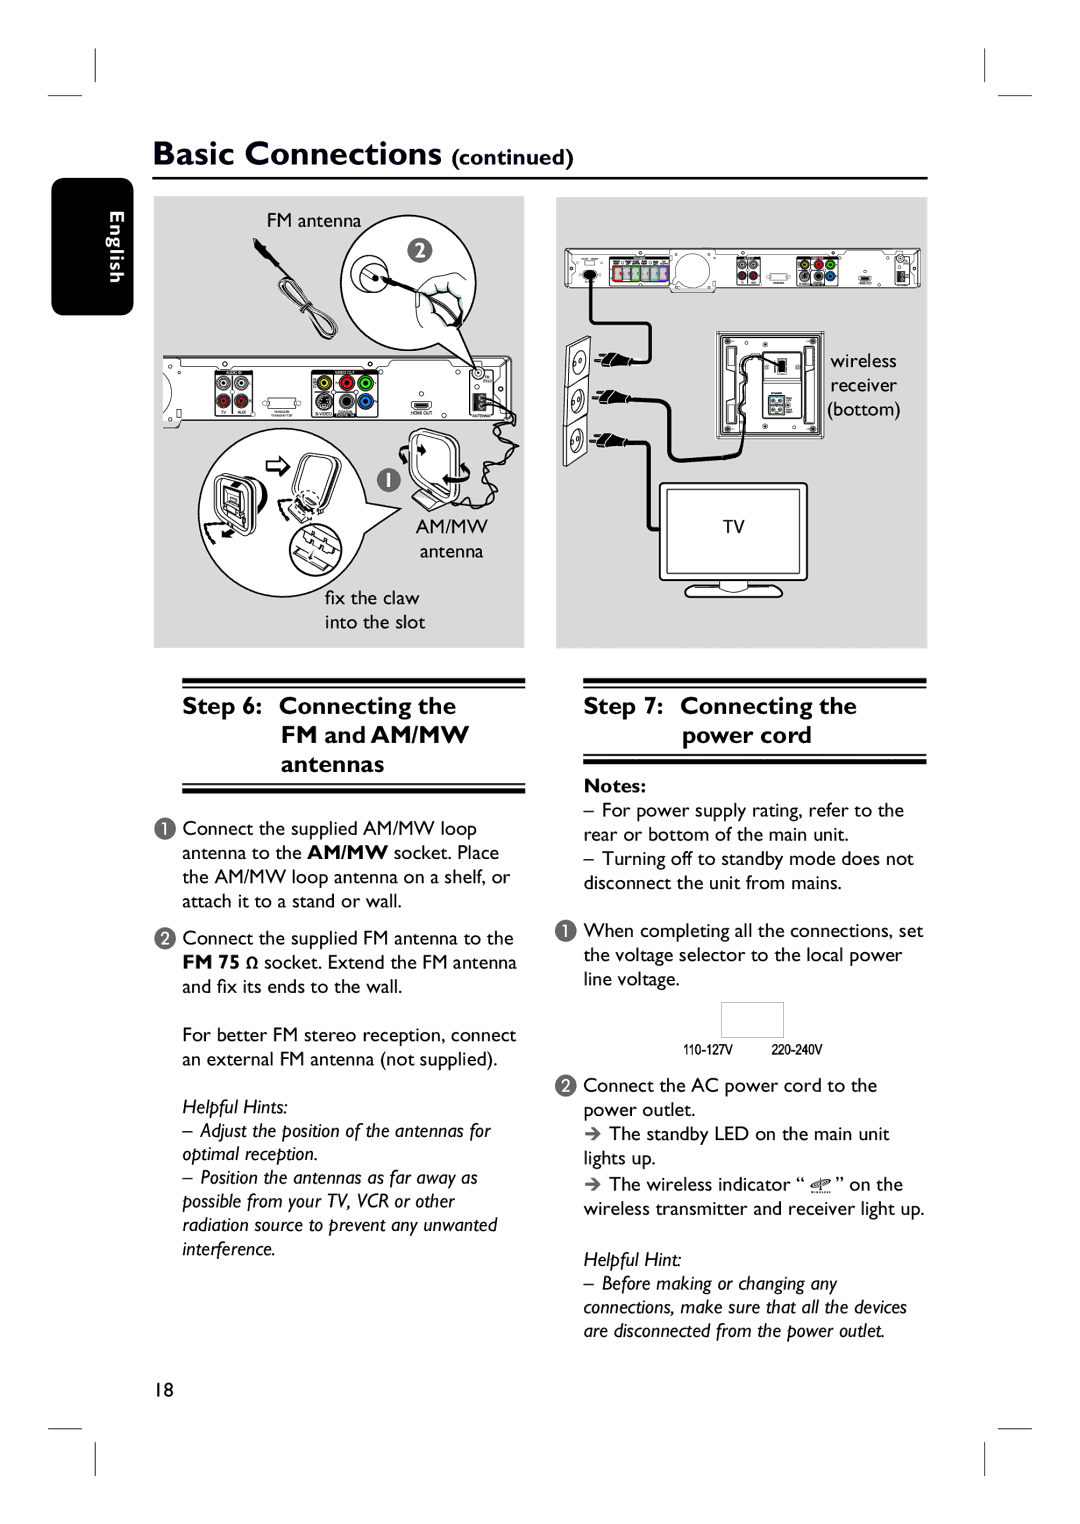
FM antenna
2
WIRELESS
TRANSMITTER
1
AM/MW
antenna
fix the claw into the slot
wireless receiver (bottom)
Step 6: Connecting the FM and AM/MW antennas
A Connect the supplied AM/MW loop antenna to the AM/MW socket. Place the AM/MW loop antenna on a shelf, or attach it to a stand or wall.
B Connect the supplied FM antenna to the FM 75 Ω socket. Extend the FM antenna and fix its ends to the wall.
For better FM stereo reception, connect an external FM antenna (not supplied).
Helpful Hints:
–Adjust the position of the antennas for optimal reception.
–Position the antennas as far away as possible from your TV, VCR or other radiation source to prevent any unwanted interference.
Step 7: Connecting the power cord
Notes:
–For power supply rating, refer to the rear or bottom of the main unit.
–Turning off to standby mode does not disconnect the unit from mains.
A When completing all the connections, set the voltage selector to the local power line voltage.
B Connect the AC power cord to the power outlet.
The standby LED on the main unit lights up.
The wireless indicator “ ![]()
![]() ” on the wireless transmitter and receiver light up.
” on the wireless transmitter and receiver light up.
Helpful Hint:
–Before making or changing any connections, make sure that all the devices are disconnected from the power outlet.
18