2. Setting up the monitor
2. Setting up the monitor
2.1 Installation
Package contents
| SMART | |
| 使用 | 前请阅读使用说明 |
01 |
| User’s Manual |
2 |
|
|
K | 保留备用 | Monitor drivers |
o |
| |
3 |
|
|
n |
| SmartControl software |
i |
|
|
n |
|
|
kl |
| |
i |
| |
j |
| |
k |
| |
e |
| |
P |
| |
hi |
| |
| li |
|
| p |
|
| s |
|
| N. |
|
| V. |
|
| A |
|
| llrig |
|
| hts |
|
| res |
|
| erve |
|
| d.Un |
|
| auth |
|
AC/DC Adapter | orized |
|
duplication is a violation of | ||
Audio Cable (Optional) | VGA Cable (Optional) |
Note
•Use only the AC/DC adapter provided by Philips.
•Do not install the SMART
•Save the original shipping carton and packing materials, as they will come in handy if you ever have to ship your monitor.
•For maximum protection, repackage your monitor as it was originally packed at the factory.
•To keep the SMART
a cloth lightly dampened with a mild detergent solution. Never use strong solvents such as thinner, benzene, or abrasive cleaners, since these will damage
the cabinet. As a safety precaution, always unplug the SMART
•Do not scratch the screen with hard things, it may cause permanent damage.
•Don’t leak liquid into monitor which will result in the damage of component.
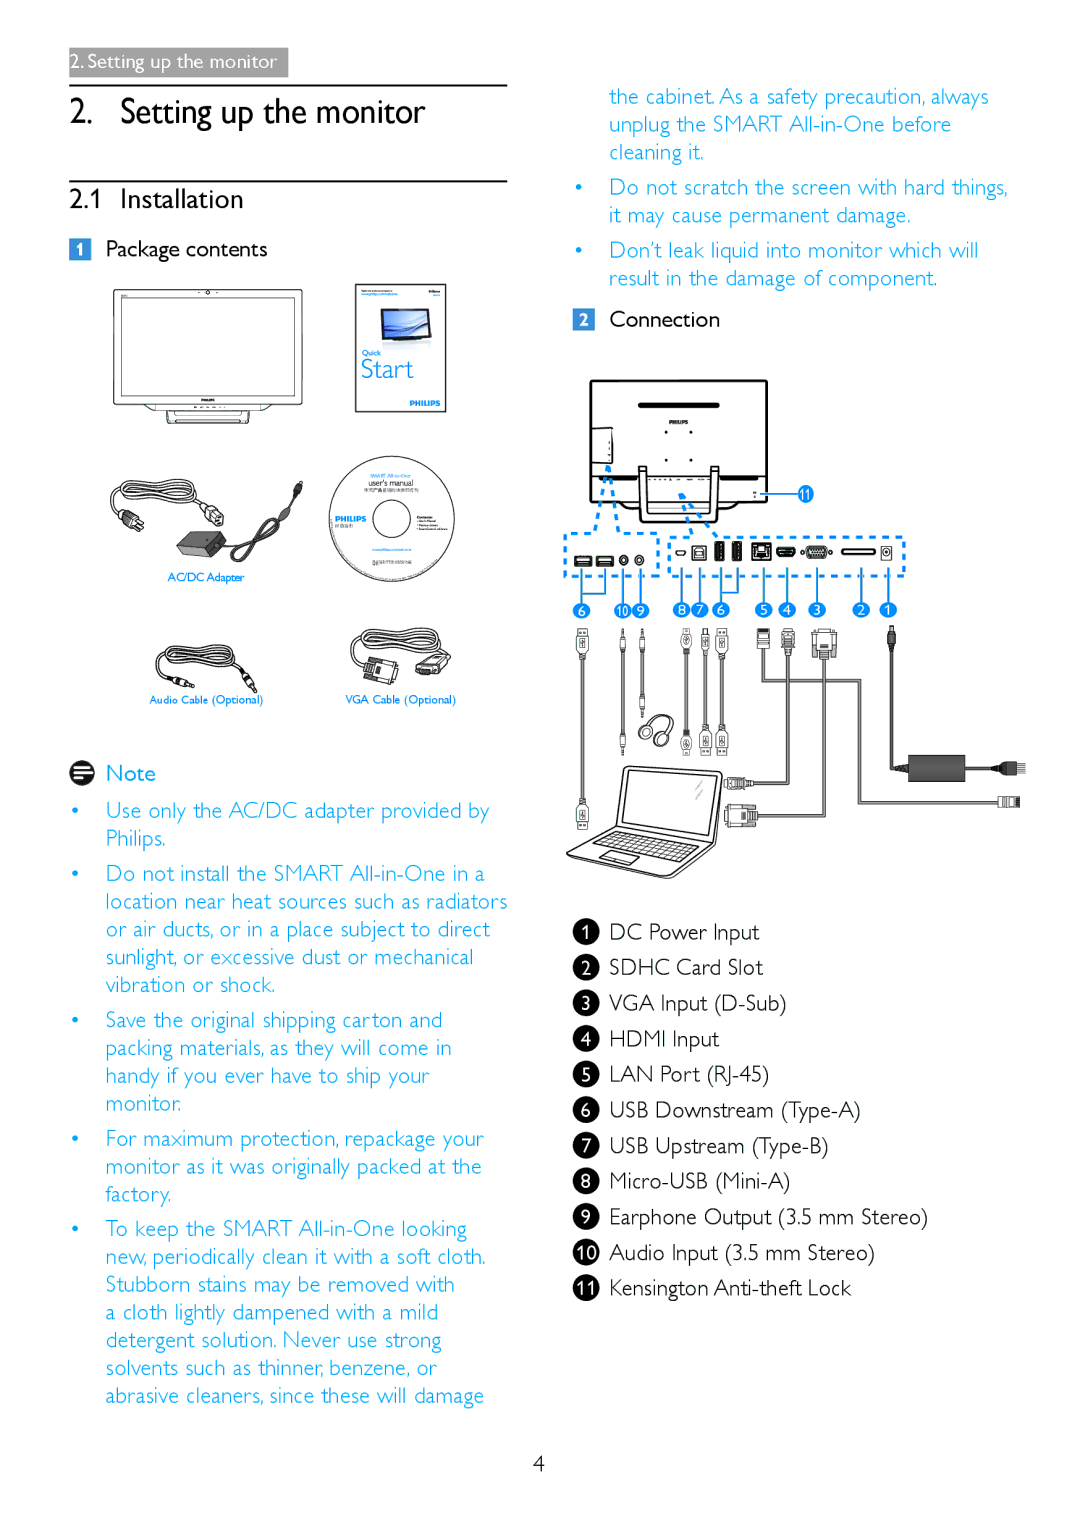
Connection
|
|
|
|
|
|
| 11 |
|
|
6 | 10 9 | 8 | 7 | 68 | 5 | 4 | 3 | 2 | 1 |
1DC Power Input
2SDHC Card Slot
3VGA Input
4HDMI Input
5LAN Port
6USB Downstream
7USB Upstream
8
9Earphone Output (3.5 mm Stereo)
10 Audio Input (3.5 mm Stereo)
11 Kensington
4