34ENGLISH
Chapter 11 - Overview of SL400i connections
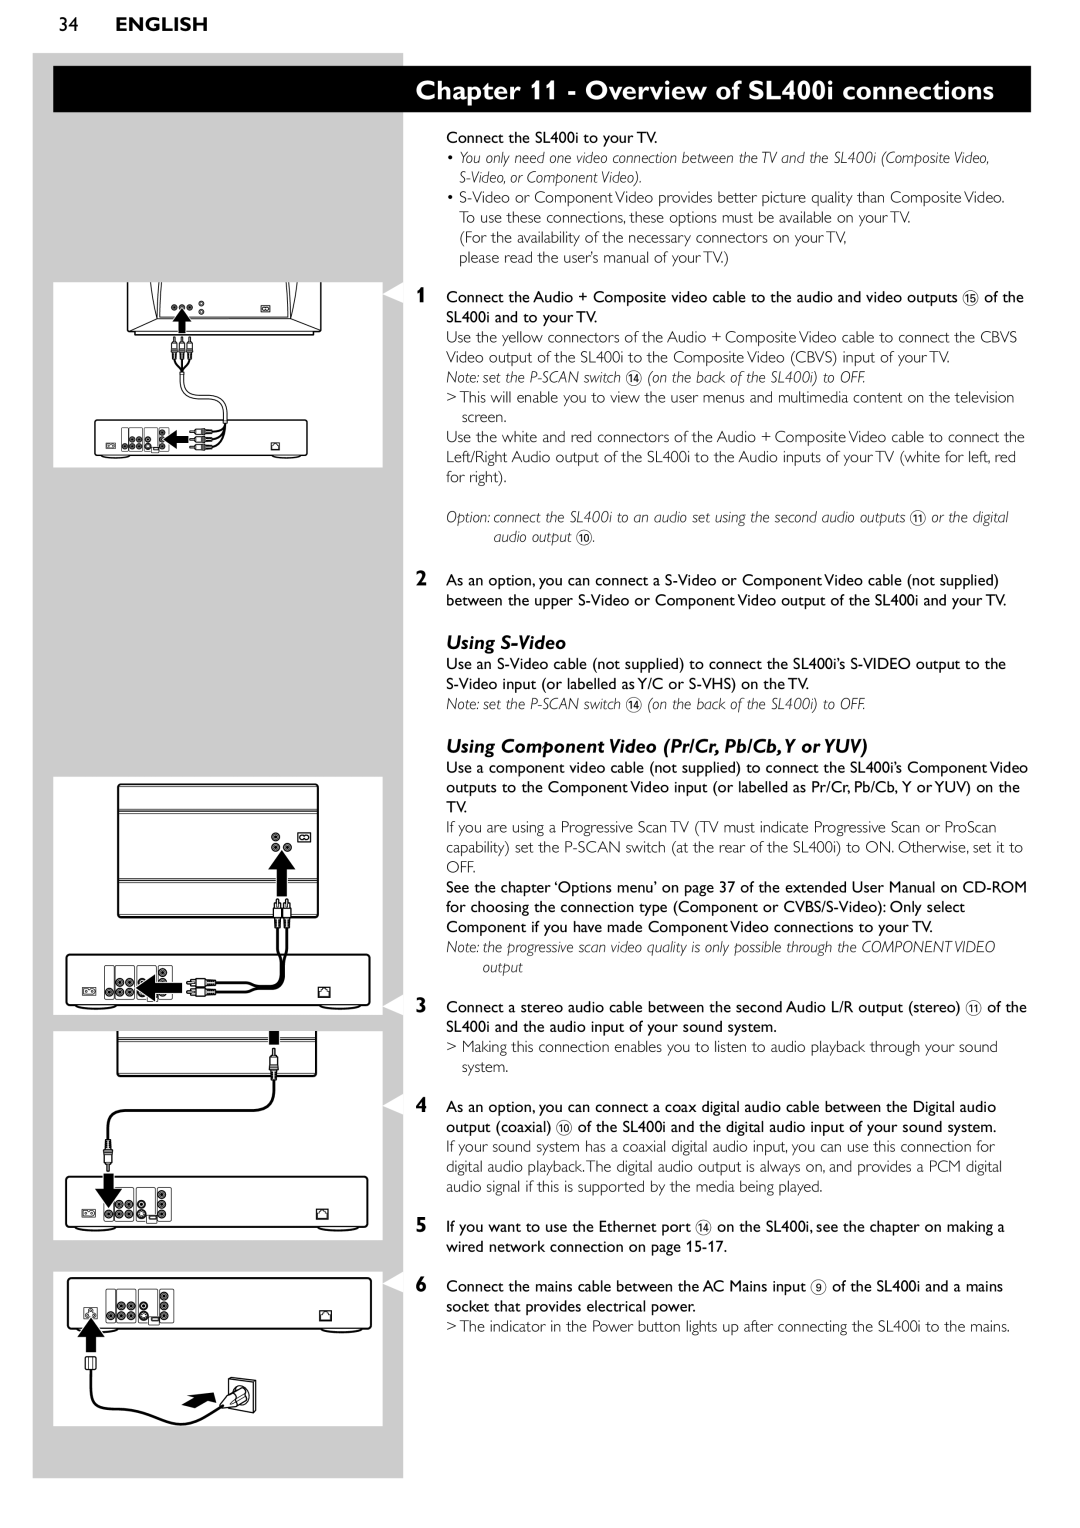
Connect the SL400i to your TV.
•You only need one video connection between the TV and the SL400i (Composite Video,
•
(For the availability of the necessary connectors on your TV, please read the user’s manual of your TV.)
1 Connect the Audio + Composite video cable to the audio and video outputs % of the SL400i and to your TV.
Use the yellow connectors of the Audio + Composite Video cable to connect the CBVS
Video output of the SL400i to the Composite Video (CBVS) input of your TV.
Note: set the
> This will enable you to view the user menus and multimedia content on the television screen.
Use the white and red connectors of the Audio + Composite Video cable to connect the Left/Right Audio output of the SL400i to the Audio inputs of your TV (white for left, red for right).
Option: connect the SL400i to an audio set using the second audio outputs ! or the digital audio output 0.
2As an option, you can connect a
Using S-Video
Use an
Note: set the
Using Component Video (Pr/Cr, Pb/Cb,Y or YUV)
Use a component video cable (not supplied) to connect the SL400i’s Component Video outputs to the Component Video input (or labelled as Pr/Cr, Pb/Cb, Y or YUV) on the TV.
If you are using a Progressive Scan TV (TV must indicate Progressive Scan or ProScan capability) set the
See the chapter ‘Options menu’ on page 37 of the extended User Manual on
Note: the progressive scan video quality is only possible through the COMPONENT VIDEO output
3 Connect a stereo audio cable between the second Audio L/R output (stereo) ! of the SL400i and the audio input of your sound system.
> Making this connection enables you to listen to audio playback through your sound system.
4 As an option, you can connect a coax digital audio cable between the Digital audio output (coaxial) 0 of the SL400i and the digital audio input of your sound system. If your sound system has a coaxial digital audio input, you can use this connection for digital audio playback.The digital audio output is always on, and provides a PCM digital audio signal if this is supported by the media being played.
5 If you want to use the Ethernet port $ on the SL400i, see the chapter on making a wired network connection on page
6 Connect the mains cable between the AC Mains input 9 of the SL400i and a mains socket that provides electrical power.
> The indicator in the Power button lights up after connecting the SL400i to the mains.