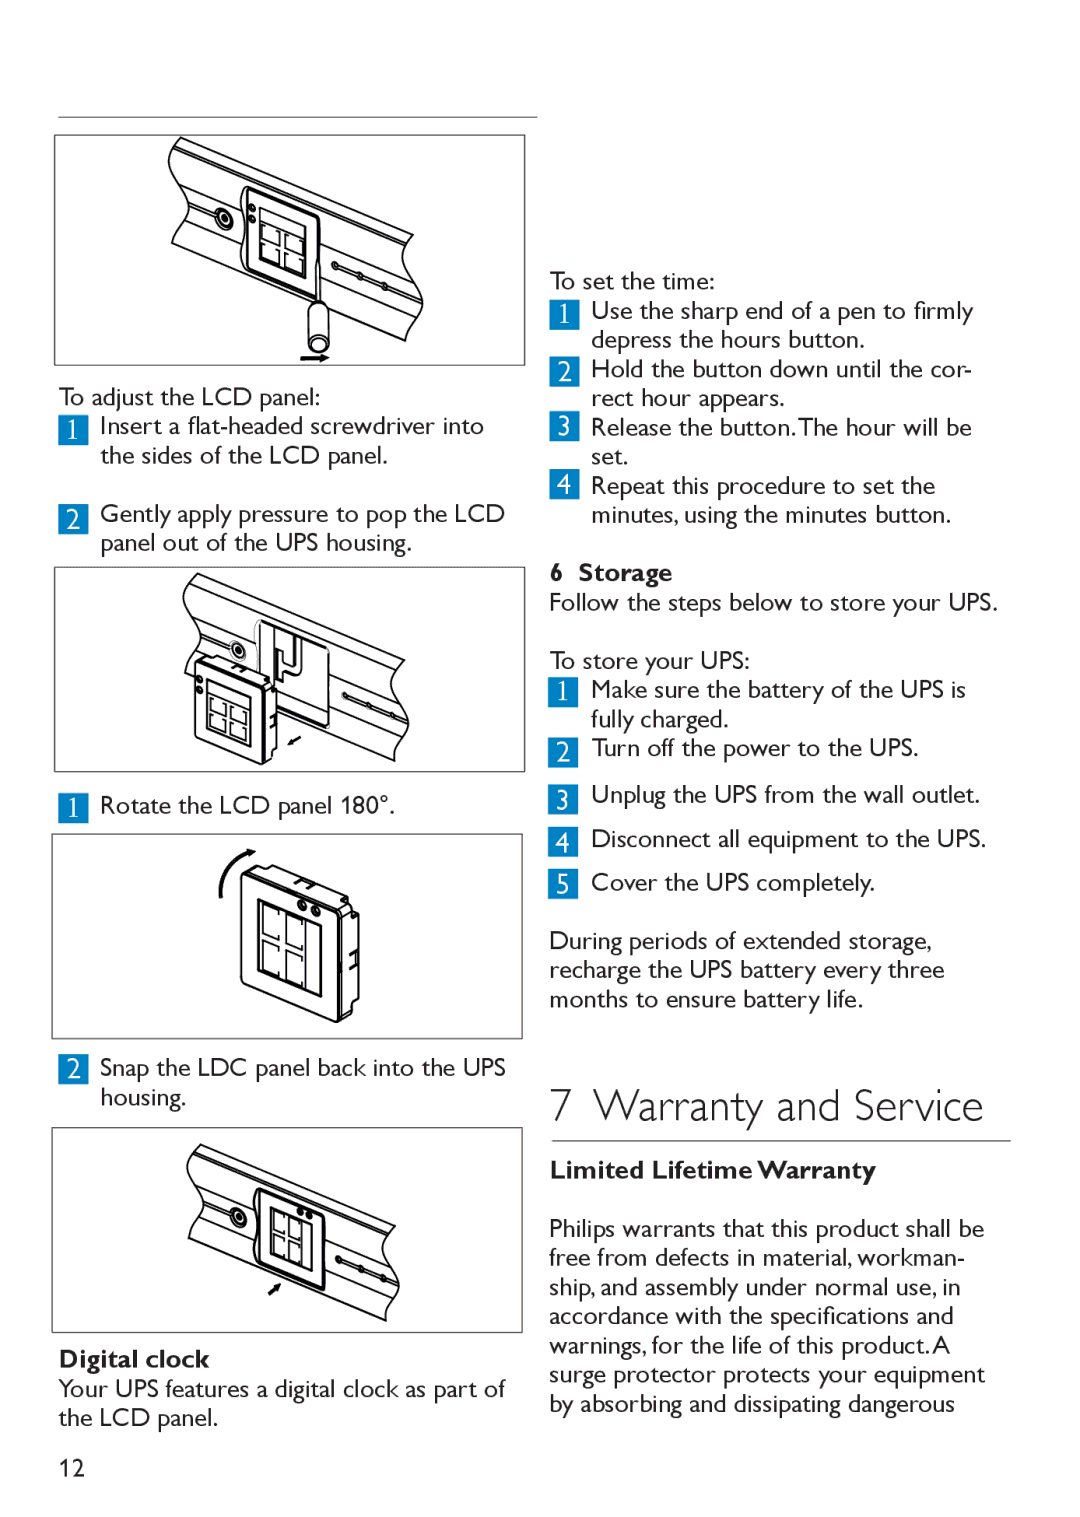
To adjust the LCD panel:
1Insert a
2Gently apply pressure to pop the LCD panel out of the UPS housing.
1Rotate the LCD panel 180°.
2Snap the LDC panel back into the UPS housing.
Digital clock
Your UPS features a digital clock as part of the LCD panel.
To set the time:
1Use the sharp end of a pen to firmly depress the hours button.
2 Hold the button down until the cor- rect hour appears.
3 Release the button.The hour will be set.
4 Repeat this procedure to set the minutes, using the minutes button.
6 Storage
Follow the steps below to store your UPS.
To store your UPS:
1Make sure the battery of the UPS is fully charged.
2Turn off the power to the UPS.
3Unplug the UPS from the wall outlet.
4Disconnect all equipment to the UPS.
5 Cover the UPS completely.
During periods of extended storage, recharge the UPS battery every three months to ensure battery life.
7 Warranty and Service
Limited Lifetime Warranty
Philips warrants that this product shall be free from defects in material, workman- ship, and assembly under normal use, in accordance with the specifications and warnings, for the life of this product.A surge protector protects your equipment by absorbing and dissipating dangerous
12
