2.INSTALLATION. HOW TO INSTALL YOUR VIDEO RECORDER.
Connecting the television/monitor |
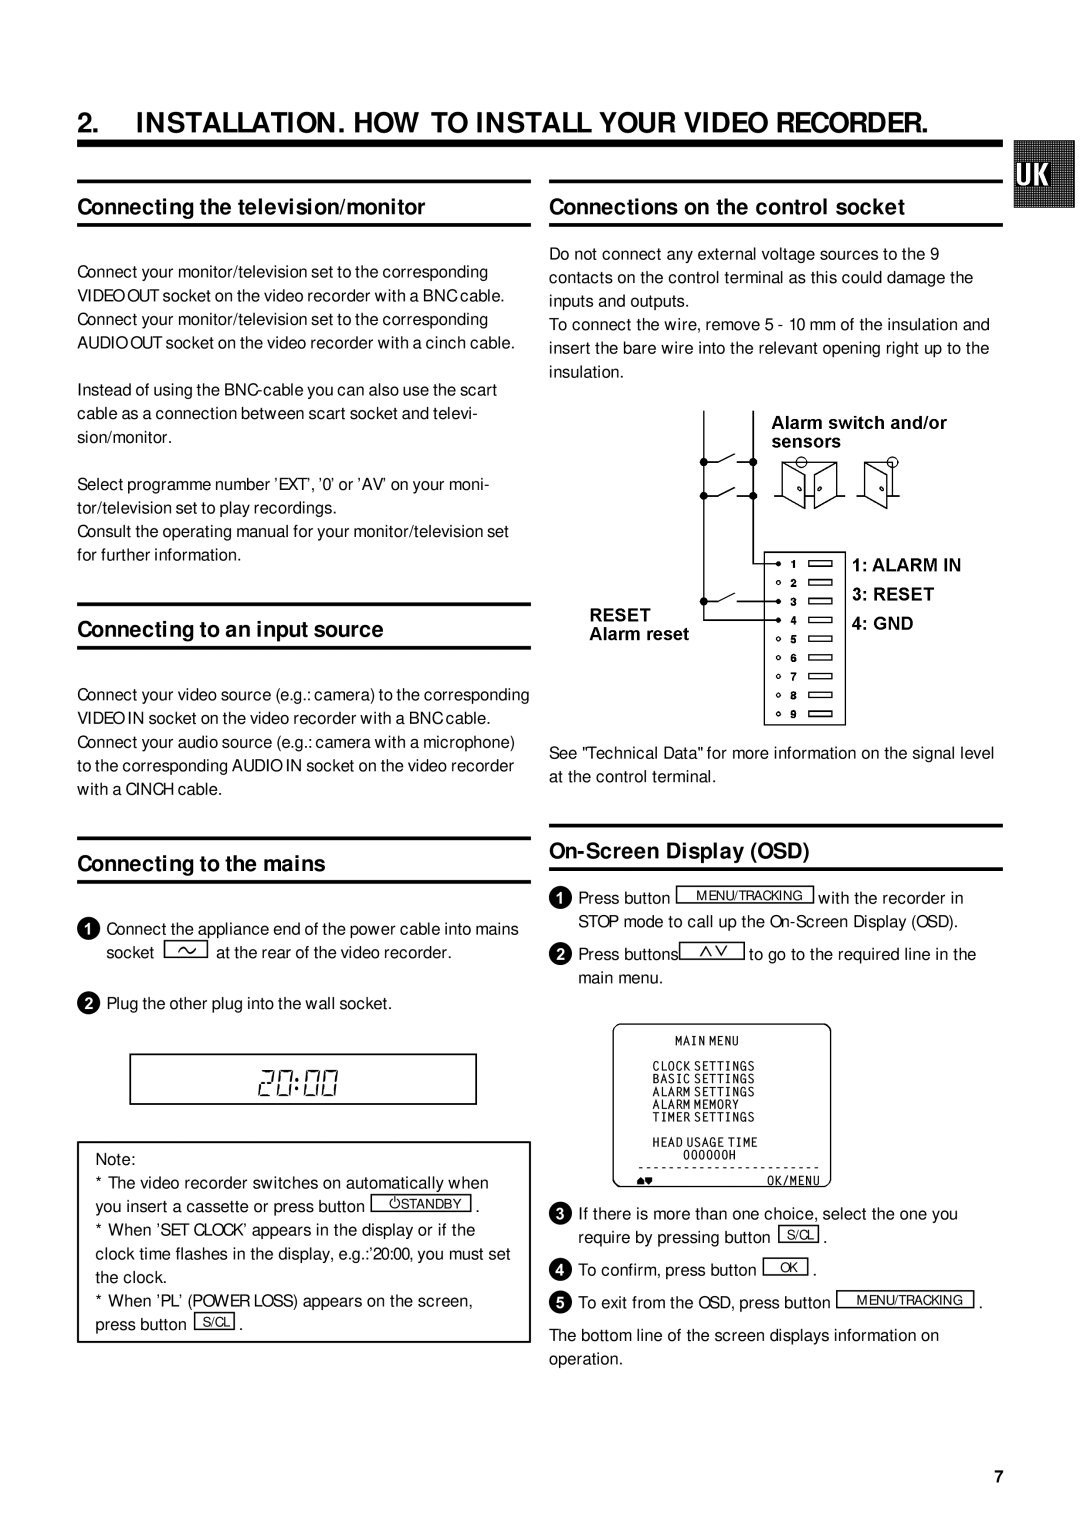
| Connections on the control socket |
Connect your monitor/television set to the corresponding VIDEO OUT socket on the video recorder with a BNC cable. Connect your monitor/television set to the corresponding AUDIO OUT socket on the video recorder with a cinch cable.
Instead of using the
Select programme number ’EXT’, ’0’ or ’AV’ on your moni- tor/television set to play recordings.
Consult the operating manual for your monitor/television set for further information.
Do not connect any external voltage sources to the 9 contacts on the control terminal as this could damage the inputs and outputs.
To connect the wire, remove 5 - 10 mm of the insulation and insert the bare wire into the relevant opening right up to the insulation.
Connecting to an input source
Connect your video source (e.g.: camera) to the corresponding VIDEO IN socket on the video recorder with a BNC cable. Connect your audio source (e.g.: camera with a microphone) to the corresponding AUDIO IN socket on the video recorder with a CINCH cable.
See "Technical Data" for more information on the signal level at the control terminal.
Connecting to the mains
1Connect the appliance end of the power cable into mains
socket 5 at the rear of the video recorder.
2Plug the other plug into the wall socket.
20:00
Note:
* The video recorder switches on automatically when
you insert a cassette or press button ![]()
![]() .
.
*When ’SET CLOCK’ appears in the display or if the clock time flashes in the display, e.g.:’20:00, you must set the clock.
*When ’PL’ (POWER LOSS) appears on the screen, press button S/CL .
On-Screen Display (OSD)
1Press button | MENU/TRACKING | with the recorder in | |
STOP mode to call up the | |||
2Press buttons |
| to go to the required line in the | |
XY | |||
main menu. |
|
|
|
MAIN MENU
CLOCK SETTINGS
BASIC SETTINGS
ALARM SETTINGS
ALARM MEMORY
TIMER SETTINGS
HEAD USAGE TIME 000000H
vwOK/MENU
3If there is more than one choice, select the one you
require by pressing button | S/CL | . | ||
|
| |||
4To confirm, press button |
|
| . | |
| OK | |||
|
| |||
5To exit from the OSD, press button MENU/TRACKING .
The bottom line of the screen displays information on operation.
7