5.PROGRAMMING RECORDINGS
TIMER settings
You can programme up to 7 TIMERS within any
The settings you made in the BASIC and ALARM SETTINGS menu will apply.
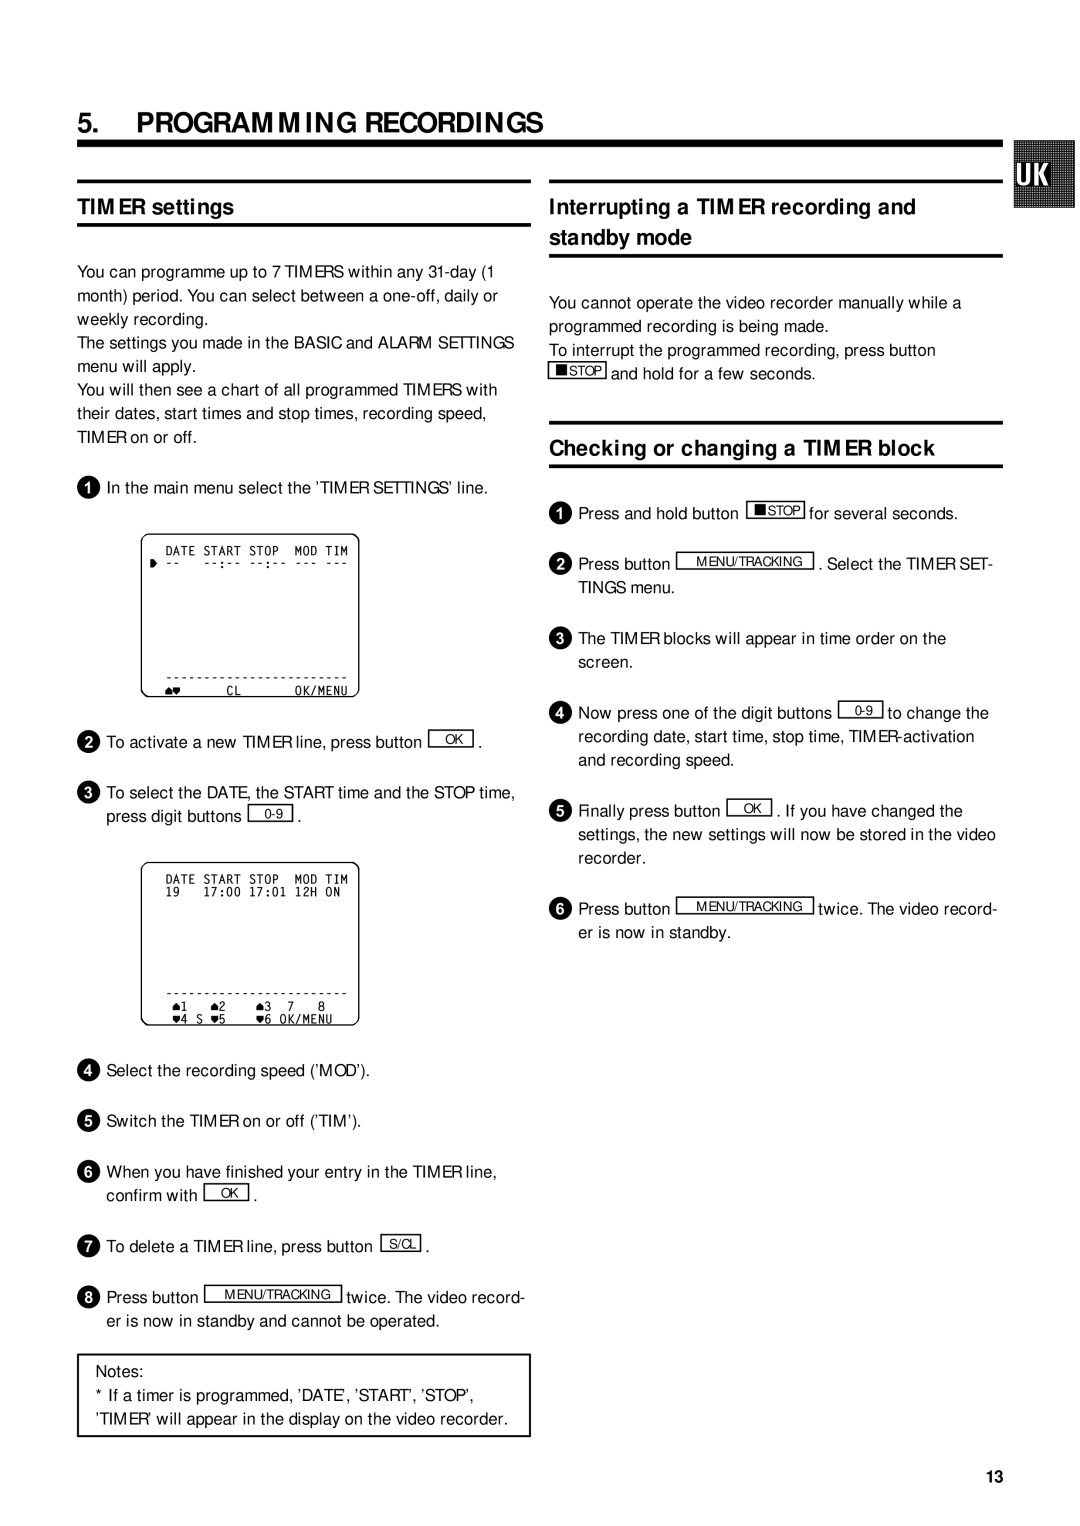
You will then see a chart of all programmed TIMERS with their dates, start times and stop times, recording speed, TIMER on or off.
1In the main menu select the ’TIMER SETTINGS’ line.
DATE START STOP MOD TIM
y
vw CL OK/MENU
2To activate a new TIMER line, press button OK .
3To select the DATE, the START time and the STOP time,
press digit buttons
DATE START STOP MOD TIM 19 17:00 17:01 12H ON
v1 | v2 | v3 | 7 8 |
w4 | S w5 | w6 | OK/MENU |
4Select the recording speed (’MOD’).
5Switch the TIMER on or off (’TIM’).
6When you have finished your entry in the TIMER line,
confirm with | OK | . |
|
|
|
| |||||
7To delete a TIMER line, press button |
| . | |||
S/CL | |||||
| |||||
8Press button |
| twice. The video record- | |||
MENU/TRACKING | |||||
er is now in standby and cannot be operated.
Notes:
*If a timer is programmed, ’DATE’, ’START’, ’STOP’, ’TIMER’ will appear in the display on the video recorder.
Interrupting a TIMER recording and standby mode
You cannot operate the video recorder manually while a programmed recording is being made.
To interrupt the programmed recording, press button mSTOP and hold for a few seconds.
Checking or changing a TIMER block
1Press and hold button | mSTOP | for several seconds. | ||
2Press button |
|
| . Select the TIMER SET- | |
MENU/TRACKING |
| |||
TINGS menu. |
|
| ||
3The TIMER blocks will appear in time order on the screen.
4Now press one of the digit buttons
5Finally press button OK . If you have changed the settings, the new settings will now be stored in the video recorder.
6Press button MENU/TRACKING twice. The video record- er is now in standby.
13
