Rerecording (Tape Duplication) 33
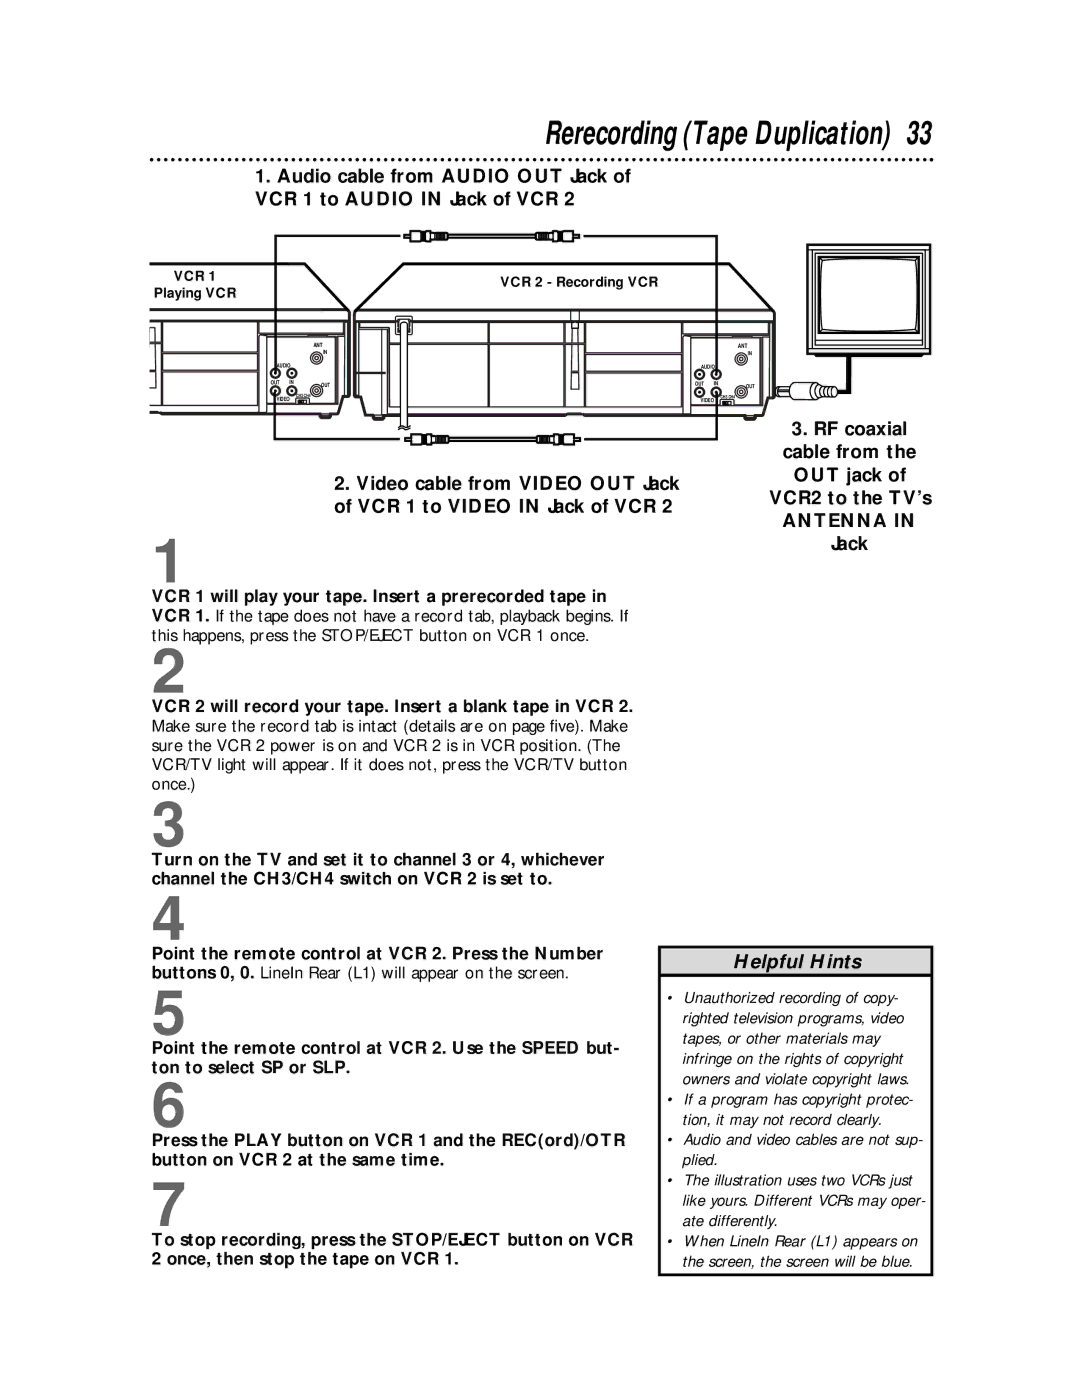
1.Audio cable from AUDIO OUT Jack of VCR 1 to AUDIO IN Jack of VCR 2
VCR 1
Playing VCR
|
| ANT |
|
| IN |
AUDIO |
| |
OUT | IN | OUT |
VIDEO | CH3 CH4 | |
| ||
VCR 2 - Recording VCR
|
| ANT |
|
| IN |
AUDIO |
| |
OUT | IN | OUT |
VIDEO | CH3 CH4 | |
| ||
2.Video cable from VIDEO OUT Jack of VCR 1 to VIDEO IN Jack of VCR 2
1
VCR 1 will play your tape. Insert a prerecorded tape in VCR 1. If the tape does not have a record tab, playback begins. If this happens, press the STOP/EJECT button on VCR 1 once.
2
VCR 2 will record your tape. Insert a blank tape in VCR 2. Make sure the record tab is intact (details are on page five). Make sure the VCR 2 power is on and VCR 2 is in VCR position. (The VCR/TV light will appear. If it does not, press the VCR/TV button once.)
3
Turn on the TV and set it to channel 3 or 4, whichever channel the CH3/CH4 switch on VCR 2 is set to.
3.RF coaxial cable from the OUT jack of
VCR2 to the TV’s
ANTENNA IN
Jack
4
Point the remote control at VCR 2. Press the Number buttons 0, 0. LineIn Rear (L1) will appear on the screen.
5
Point the remote control at VCR 2. Use the SPEED but- ton to select SP or SLP.
6
Press the PLAY button on VCR 1 and the REC(ord)/OTR button on VCR 2 at the same time.
7
To stop recording, press the STOP/EJECT button on VCR 2 once, then stop the tape on VCR 1.
Helpful Hints
•Unauthorized recording of copy- righted television programs, video tapes, or other materials may infringe on the rights of copyright owners and violate copyright laws.
•If a program has copyright protec- tion, it may not record clearly.
•Audio and video cables are not sup- plied.
•The illustration uses two VCRs just like yours. Different VCRs may oper- ate differently.
•When LineIn Rear (L1) appears on the screen, the screen will be blue.
