3 Prepare
1 Open the battery compartment.
2 Insert 2 AAA batteries with correct polarity
3 Close the battery compartment.
Position the WAC7500
![]()
![]()
![]() Caution
Caution
•Risk of product damage! Place the WAC7500 on a surface that is level, flat, and strong enough to support the WAC7500.
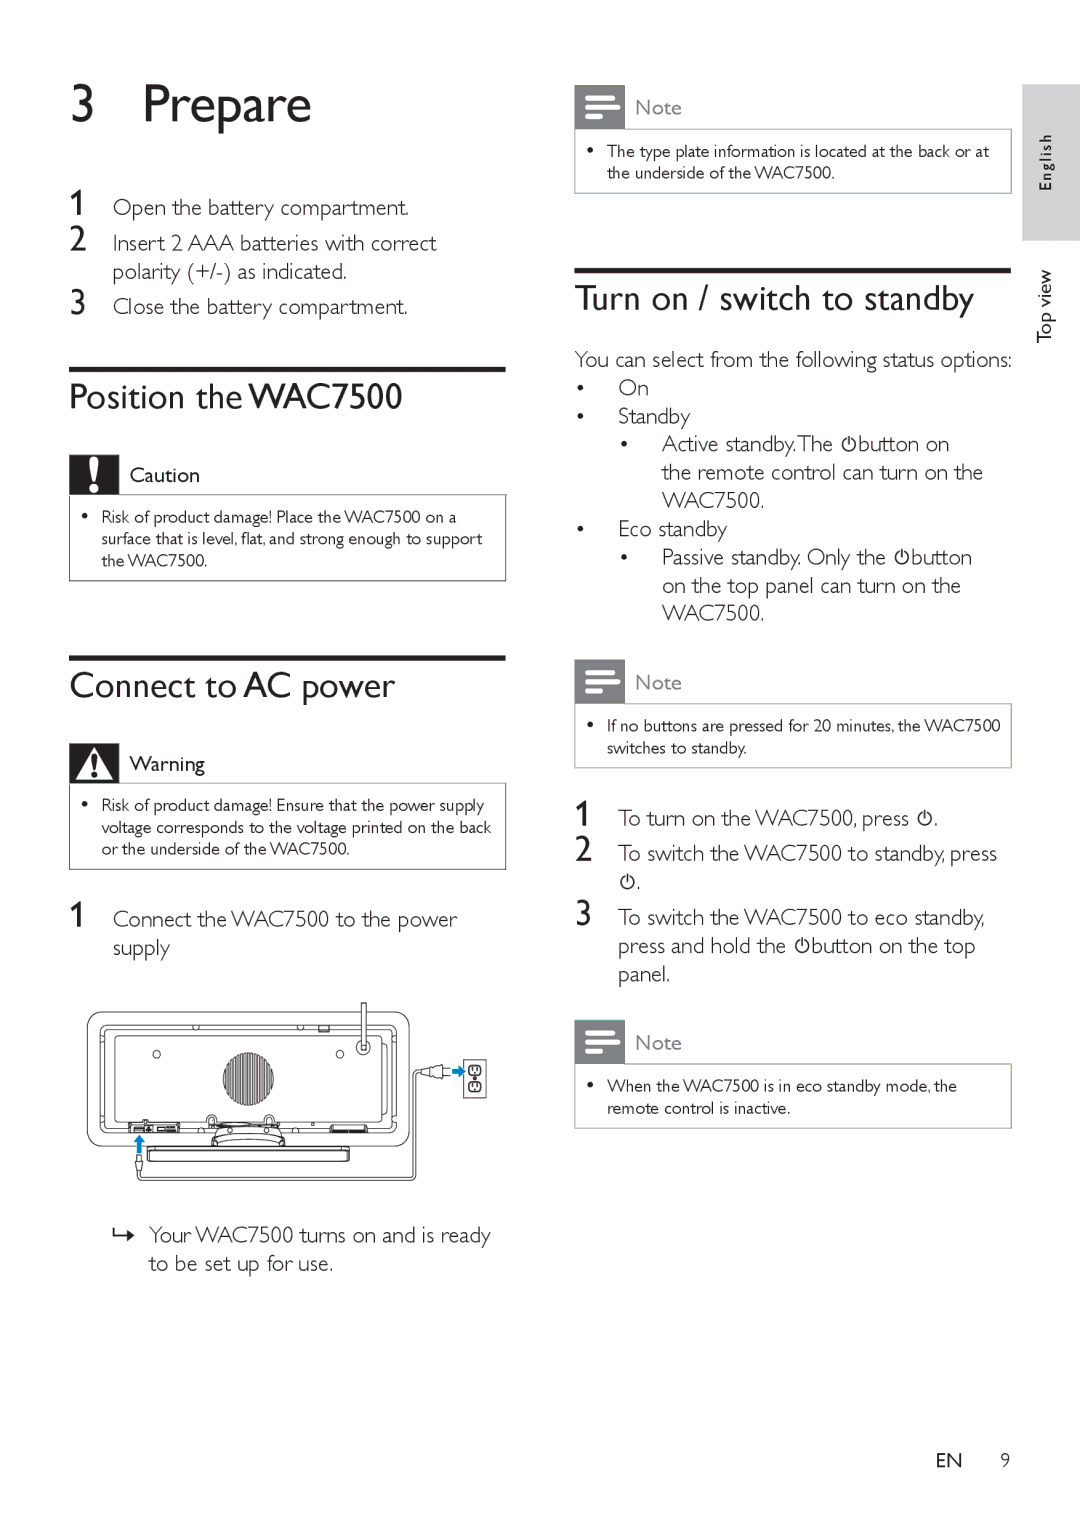
Connect to AC power
![]()
![]()
![]() Warning
Warning
•Risk of product damage! Ensure that the power supply voltage corresponds to the voltage printed on the back or the underside of the WAC7500.
1Connect the WAC7500 to the power supply
»Your WAC7500 turns on and is ready to be set up for use.
| Note |
| |
|
| ish | |
• The type plate information is located at the back or at | |||
the underside of the WAC7500. | ngl | ||
|
| E | |
|
| view | |
Turn on / switch to standby | |||
Top | |||
|
| ||
You can select from the following status options:
•On
•Standby
• Active standby.The ![]() button on the remote control can turn on the WAC7500.
button on the remote control can turn on the WAC7500.
•Eco standby
• Passive standby. Only the ![]() button on the top panel can turn on the WAC7500.
button on the top panel can turn on the WAC7500.
![]() Note
Note
•If no buttons are pressed for 20 minutes, the WAC7500 switches to standby.
1 | To turn on the WAC7500, press . |
2 | To switch the WAC7500 to standby, press |
3 | . |
To switch the WAC7500 to eco standby, |
press and hold the ![]() button on the top panel.
button on the top panel.
![]() Note
Note
•When the WAC7500 is in eco standby mode, the remote control is inactive.
EN
