Installation
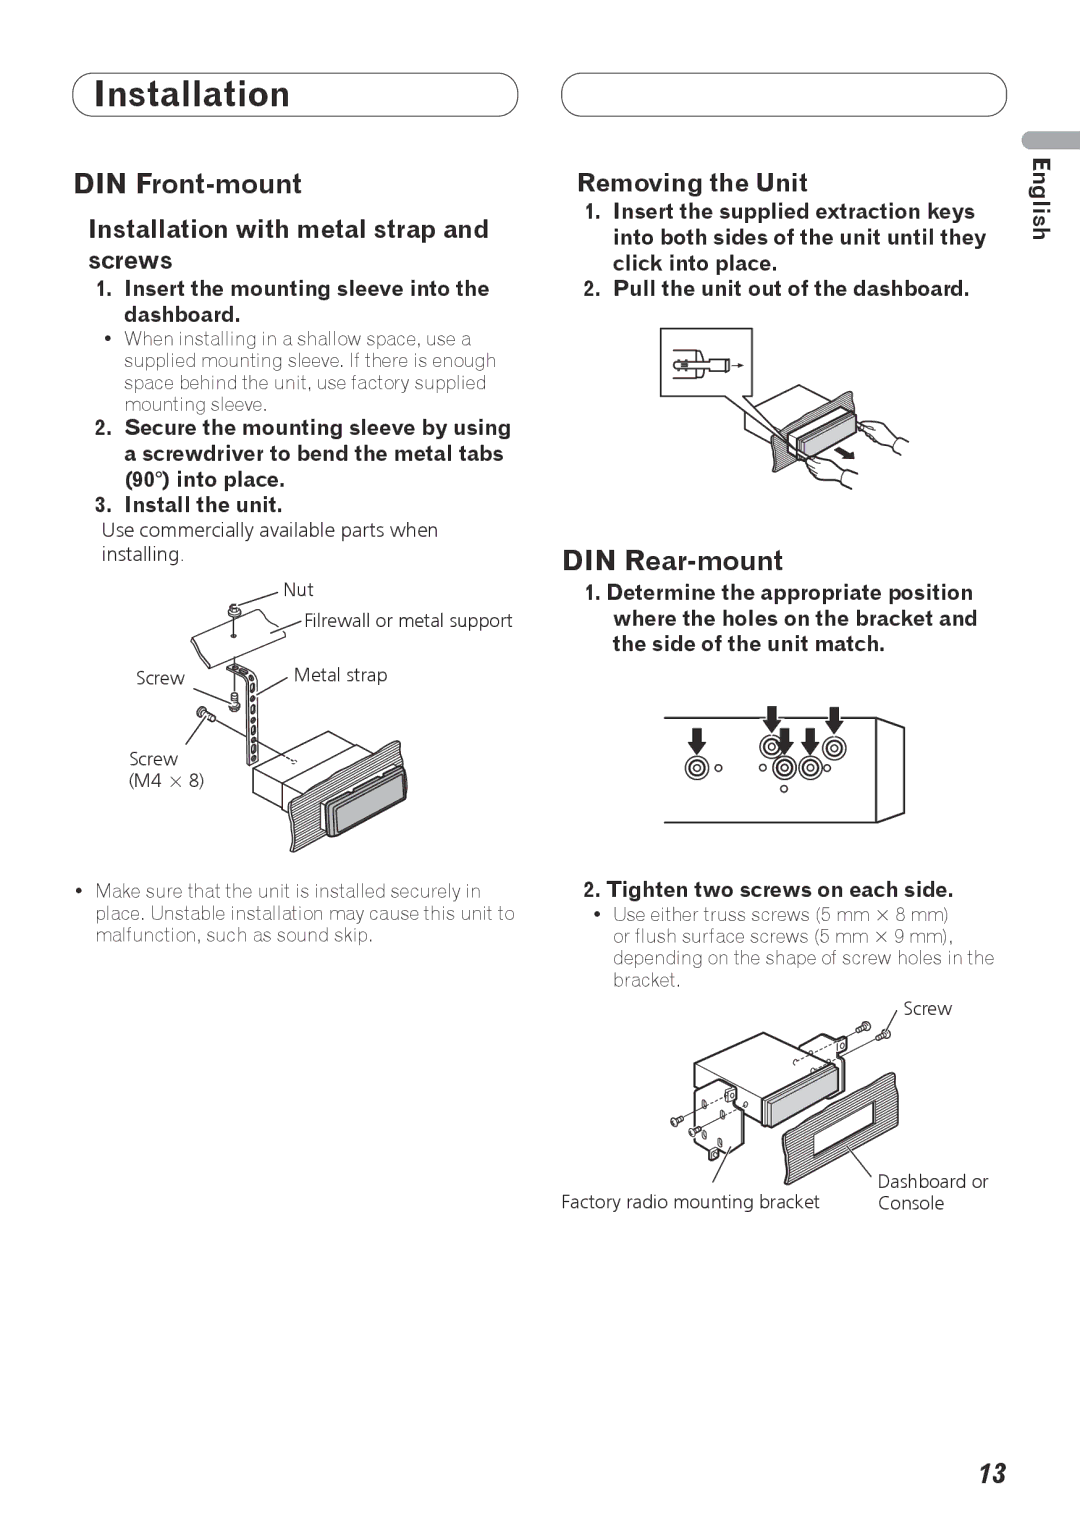
DIN Front-mount
Installation with metal strap and screws
1.Insert the mounting sleeve into the dashboard.
•When installing in a shallow space, use a supplied mounting sleeve. If there is enough space behind the unit, use factory supplied mounting sleeve.
2.Secure the mounting sleeve by using a screwdriver to bend the metal tabs (90°) into place.
3.Install the unit.
Use commercially available parts when installing.
Nut
![]() Filrewall or metal support
Filrewall or metal support
Screw | Metal strap |
Screw (M4 × 8)
•Make sure that the unit is installed securely in place. Unstable installation may cause this unit to malfunction, such as sound skip.
Removing the Unit | English | |||
| ||||
1. | Insert the supplied extraction keys |
| ||
| into both sides of the unit until they |
| ||
2. | click into place. |
| ||
Pull the unit out of the dashboard. |
| |||
|
|
|
|
|
DIN Rear-mount
1.Determine the appropriate position where the holes on the bracket and the side of the unit match.
2.Tighten two screws on each side.
•Use either truss screws (5 mm × 8 mm) or flush surface screws (5 mm × 9 mm), depending on the shape of screw holes in the bracket.
Screw
Factory radio mounting bracket | Dashboard or |
Console |
13
