5 minute guide

02

Problems when using the Auto MCACC Setup

If the room environment is not optimal for the Auto MCACC Setup (too much background noise, echo off the walls, obstacles blocking the speakers from the microphone) the final settings may be incorrect. Check for household appliances (air conditioner, fridge, fan, etc.), that may be affecting the environment and switch them off if necessary. If there are any instructions showing in the front panel display, please follow them.

Some older TVs may interfere with the operation of the microphone. If this seems to be happening, switch off the TV when doing the Auto MCACC Setup.

Playing a source

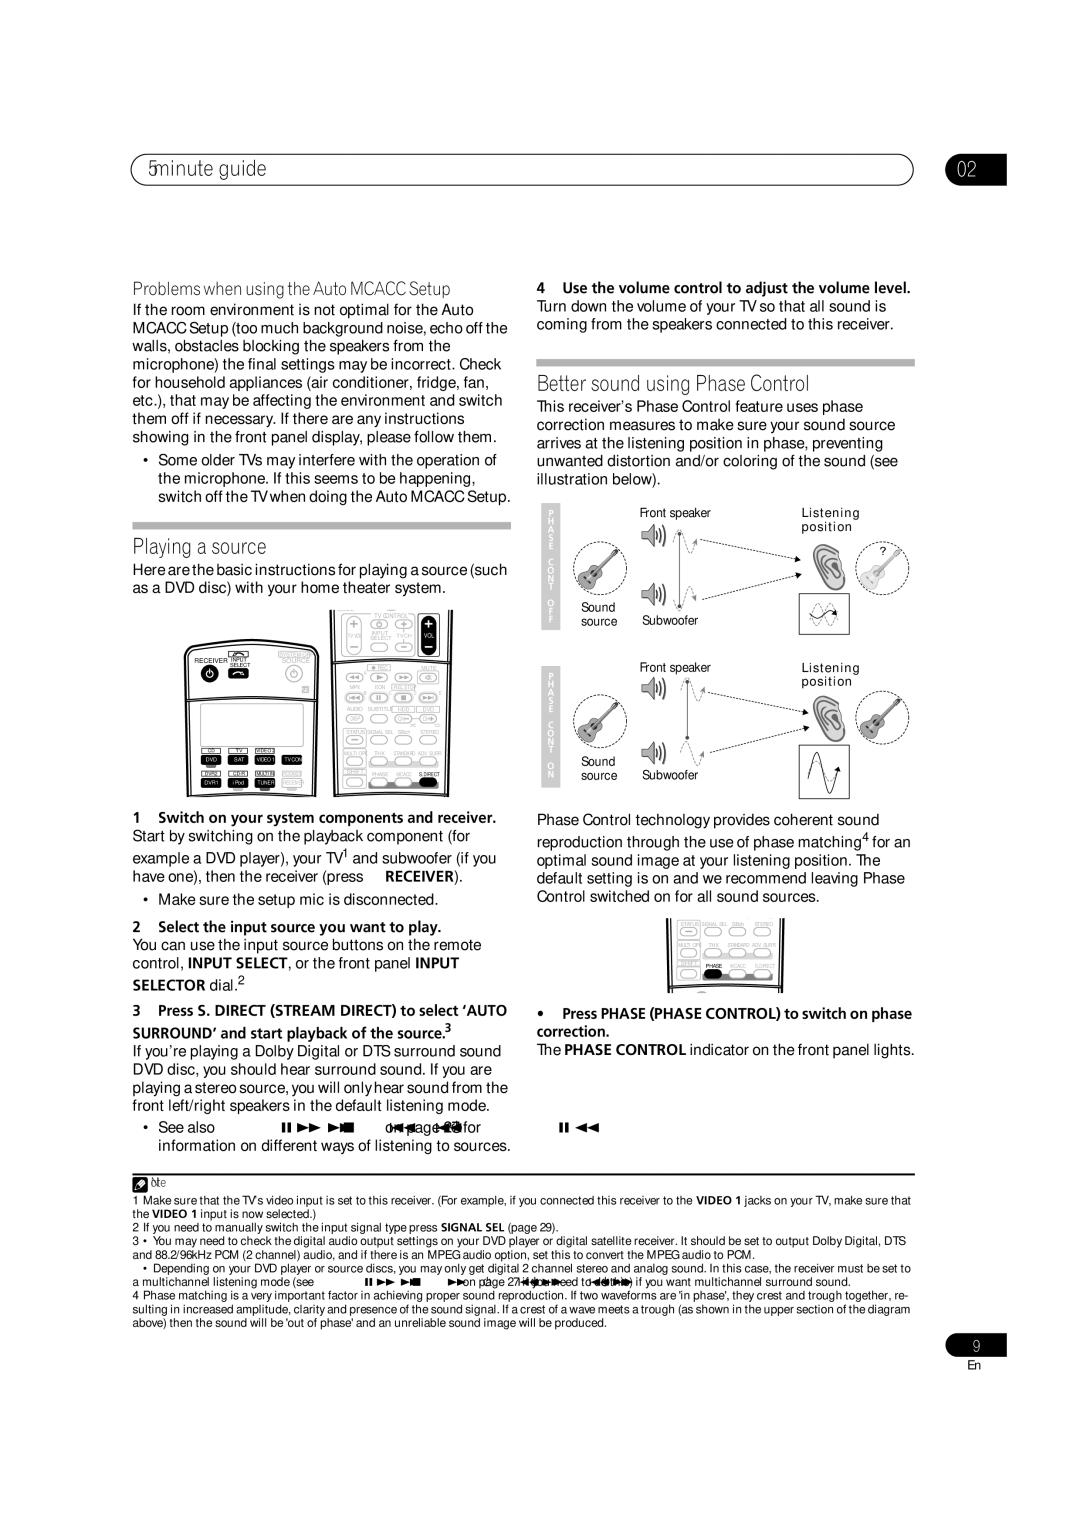
Here are the basic instructions for playing a source (such as a DVD disc) with your home theater system.


GUIDE


TV CONTROL


TV VOL

INPUT

TV CH

VOL


SELECT


RECEIVER

INPUT


SYSTEM OFF


SOURCE


SELECT


REC


MUTE


A


MPX

EON

REC STOP


B

C

D

E


AUDIO

SUBTITLE

HDD

DVD


DISP


CH

CH


STATUS

SIGNAL SEL

SBch

STEREO

CD

TV

VIDEO 2


MULTI OPE

THX

STANDARD

ADV. SURR


DVD

SAT

VIDEO1

TVCONT


DVR2

CD-R

MULTI IN

ROOM2/3

SHIFT

PHASE

MCACC

S.DIRECT


DVR1

iPod

TUNER

RECEIVER


4Use the volume control to adjust the volume level. Turn down the volume of your TV so that all sound is coming from the speakers connected to this receiver.

Better sound using Phase Control

This receiver’s Phase Control feature uses phase correction measures to make sure your sound source arrives at the listening position in phase, preventing unwanted distortion and/or coloring of the sound (see illustration below).

P


Front speaker

Listening

H


position

A


S


E


?

C


O


N


T


O

Sound


F

Subwoofer


F

source


P


Front speaker

Listening


position

H


A


S


E


C

O

N

T

OSound

N source Subwoofer

1Switch on your system components and receiver. Start by switching on the playback component (for

example a DVD player), your TV1 and subwoofer (if you have one), then the receiver (press RECEIVER).

• Make sure the setup mic is disconnected.

2 Select the input source you want to play.

You can use the input source buttons on the remote control, INPUT SELECT, or the front panel INPUT

SELECTOR dial.2

3 Press S. DIRECT (STREAM DIRECT) to select ‘AUTO SURROUND’ and start playback of the source.3

If you’re playing a Dolby Digital or DTS surround sound DVD disc, you should hear surround sound. If you are playing a stereo source, you will only hear sound from the front left/right speakers in the default listening mode.

See also Listening to your system on page 27 for information on different ways of listening to sources.

Phase Control technology provides coherent sound

reproduction through the use of phase matching4 for an optimal sound image at your listening position. The default setting is on and we recommend leaving Phase Control switched on for all sound sources.

STATUS

SIGNAL SEL

SBch

STEREO

MULTI OPE

THX

STANDARD

ADV. SURR

SHIFT PHASE MCACC S.DIRECT

Press PHASE (PHASE CONTROL) to switch on phase correction.

The PHASE CONTROL indicator on the front panel lights.

Note

1Make sure that the TV’s video input is set to this receiver. (For example, if you connected this receiver to the VIDEO 1 jacks on your TV, make sure that the VIDEO 1 input is now selected.)

2If you need to manually switch the input signal type press SIGNAL SEL (page 29).

3• You may need to check the digital audio output settings on your DVD player or digital satellite receiver. It should be set to output Dolby Digital, DTS and 88.2/96kHz PCM (2 channel) audio, and if there is an MPEG audio option, set this to convert the MPEG audio to PCM.

Depending on your DVD player or source discs, you may only get digital 2 channel stereo and analog sound. In this case, the receiver must be set to a multichannel listening mode (see Listening in surround sound on page 27 if you need to do this) if you want multichannel surround sound.

4Phase matching is a very important factor in achieving proper sound reproduction. If two waveforms are 'in phase', they crest and trough together, re- sulting in increased amplitude, clarity and presence of the sound signal. If a crest of a wave meets a trough (as shown in the upper section of the diagram above) then the sound will be 'out of phase' and an unreliable sound image will be produced.

9

En

Page 9
Image 9
Pioneer VSX-AX4AVi-G, VSX-AX2AV-G manual Minute guide, Playing a source, Better sound using Phase Control

VSX-AX4AVi-G, VSX-AX2AV-G specifications

The Pioneer VSX-AX4AVi-G and VSX-AX2AV-G are two impressive receivers that exemplify Pioneer’s commitment to high-fidelity audio performance and advanced home theater technology. Both models cater to audio enthusiasts and casual listeners alike with their robust feature sets and innovative technologies.

The VSX-AX4AVi-G is a flagship model that boasts a powerful 7.1 channel surround sound system, delivering an immersive audio experience. With 130 watts per channel, it ensures that even the most demanding soundtracks are reproduced with clarity and strength. Supporting various surround sound formats, including Dolby TrueHD and DTS-HD Master Audio, the receiver creates a cinema-like experience at home. The inclusion of Pioneer's proprietary MCACC (Multi-Channel Acoustic Calibration System) enables automatic speaker setup and calibration, optimizing audio quality based on the specific characteristics of the room.

In contrast, the VSX-AX2AV-G is designed for those seeking high-end audio without a plethora of features. While it also supports 7.1 channel playback, it focuses on delivering a more straightforward user experience. The AX2AV-G offers similar power output per channel, ensuring rich and full-bodied sound reproduction. Its straightforward user interface makes it accessible for users who want quality audio without the complexity.

Both models feature advanced video processing capabilities and support high-definition video formats. They can upscale standard-definition content to 1080p through HDMI, ensuring that users get the best quality possible from their video sources. The HDMI connectivity allows for multiple input sources and supports 4K video resolution, making both receivers future-proof for evolving home theater setups.

In terms of connectivity, the VSX-AX4AVi-G and VSX-AX2AV-G offer a wide range of inputs and outputs, including multiple HDMI ports, component video inputs, and composite connections, accommodating various devices such as Blu-ray players, gaming consoles, and streaming devices. The receivers also feature advanced digital signal processing, enhancing sound quality and making music playback more enjoyable.

Additionally, these receivers come equipped with a range of audio enhancement features such as Phase Control and Advanced Sound Retriever, which help to improve audio playback by enhancing high frequencies and restoring lost details, especially when streaming compressed audio formats.

In summary, the Pioneer VSX-AX4AVi-G and VSX-AX2AV-G represent two excellent options in the receiver market. With their combined focus on high-quality audio, advanced video processing, and user-friendly operation, they provide an ideal solution for anyone looking to enhance their home entertainment experience.