INSTALLATION

1.Remove the two self-drilling screws from the top, back area of the appliance.

2.Position the heat deflector so that the angled portion of the deflector is facing toward the front of appliance. Secure the heat deflector to the back of the unit using the two previously removed fasteners.

3.When properly installed the angled section of the heat deflector will extend over the flue opening to redirect the heat. It SHOULD NOT cover the flue opening. Never allow anything to block the flue opening; this will cause the appliance to over heat and inhibit proper combustion, which could produce dangerous gases.

CAUTION

To prevent equipment damage and/or personal injury, do not tilt the appliance onto any two of its casters or legs, or pull the appliance by the splash back.

1.4. LEG/CASTER INSTALLATION AND LEVELING

When you receive your appliance it is completely assembled with the possible exception of the legs (or casters). This appliance must be installed with legs or casters; it cannot be curb mounted. Curb mounting will seriously inhibit this appliance’s ability to effect proper component ventilation. The legs/casters must be installed before connecting the appliance to the power supply. The legs provide the necessary height to meet sanitation requirements and assure adequate air supply to the combustion system. Use the following procedure.

WARNING

This appliance must be installed with the legs or casters provided by the manufacturer.

Required tools: 7/16 “ (12 mm) wrench and socket and a large pair of water pump pliers.

1.Lay the appliance on its back, being careful not to damage the splash back by pulling on it. Protect the outside of the appliance with cardboard or a drop cloth when laying it down.

2.Attach each leg/caster with the hex head screws and nuts supplied. Each leg/caster requires four ¼-20 x 5/8” hex head screws and nuts. Insure that all screws are tight.

3.Mount the screws from the inside of the appliance with the nut on the outside (bottom) of the appliance. The nuts have lock washers attached to them, therefore it is not necessary to use separate lock washers.

WARNING

DO NOT install legs or casters, or perform leveling procedure when appliance is in operation or full of hot liquids. Serious injury could result.

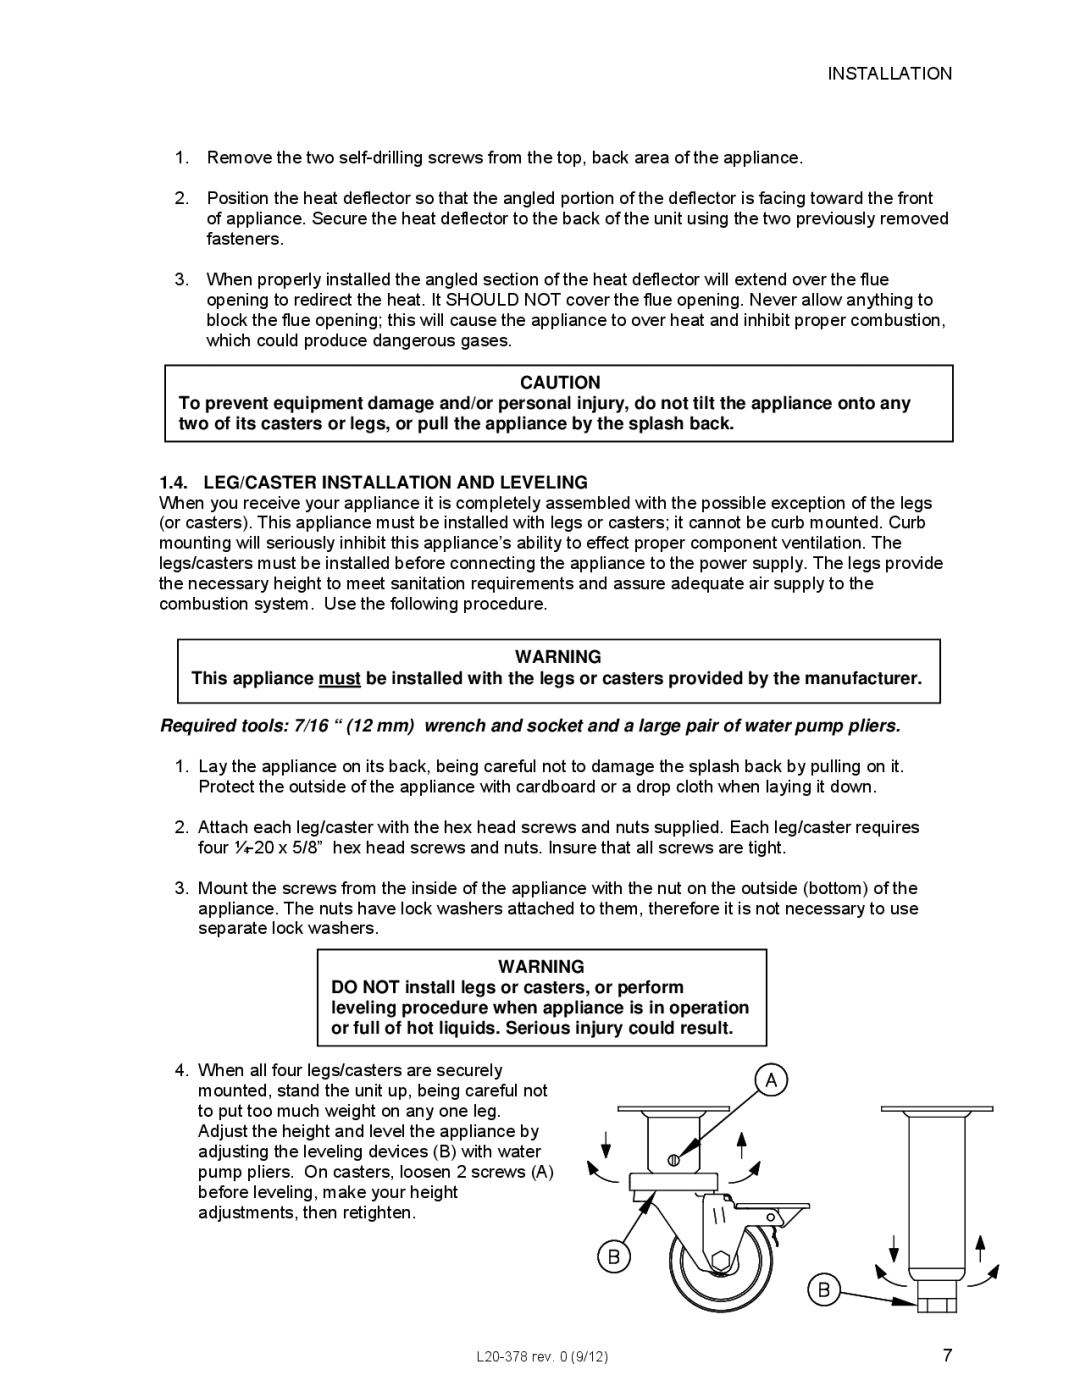
4. When all four legs/casters are securely mounted, stand the unit up, being careful not to put too much weight on any one leg. Adjust the height and level the appliance by adjusting the leveling devices (B) with water pump pliers. On casters, loosen 2 screws (A) before leveling, make your height adjustments, then retighten.

L20-378 rev. 0 (9/12)

7

Page 7
Image 7
Pitco Frialator L20-378 operation manual LEG/CASTER Installation and Leveling

L20-378 specifications

The Pitco Frialator L20-378 is a highly regarded piece of commercial kitchen equipment, specifically designed for high-volume frying operations. Renowned for its efficiency and durability, the L20-378 meets the demands of busy restaurants, fast food chains, and catering operations that require consistent performance and outstanding results.

One of the standout features of the L20-378 is its impressive fry tank capacity. With a 40-pound oil capacity, it can handle a significant amount of product at once, allowing for simultaneous frying and the ability to serve large volumes quickly. This efficiency not only enhances productivity but also helps streamline kitchen operations during peak hours.

The L20-378 utilizes advanced heating technology known as "Heat exchanger" design. This technology maximizes heat transfer from the burners to the oil, ensuring that food cooks evenly and consistently. As a result, operators benefit from faster cooking times and exceptional product quality, with crispy exteriors and tender interiors.

Moreover, the unit's durable construction is a key characteristic. Built with stainless steel, the L20-378 is not only resistant to corrosion but also easy to clean and maintain. This durability extends the life of the fryer, making it a valuable investment for any kitchen. The fryer also features a convenient drain valve, enabling easy oil changing and maintenance, which is crucial for keeping the frying environment clean.

The L20-378 is equipped with user-friendly controls that allow for precise temperature settings and consistent frying results. This ease of use ensures that even less experienced staff can operate the fryer efficiently, minimizing the risk of mistakes during crucial cooking processes.

Another important aspect of the Pitco Frialator L20-378 is its safety features. These include built-in automatic temperature controls and high-limit protection to prevent overheating, contributing to a safer working environment. Additionally, the fryer is designed with a cool zone that helps catch food particles, reducing the likelihood of oil breakdown and extending the oil life.

In summary, the Pitco Frialator L20-378 is an exceptional fryer that combines large capacity, advanced heating technology, durable construction, and user-friendly controls. Its focus on efficiency and safety makes it a preferred choice for busy kitchens that demand reliable frying solutions capable of producing high-quality food consistently.