Step 2 - Mounting the Monitor
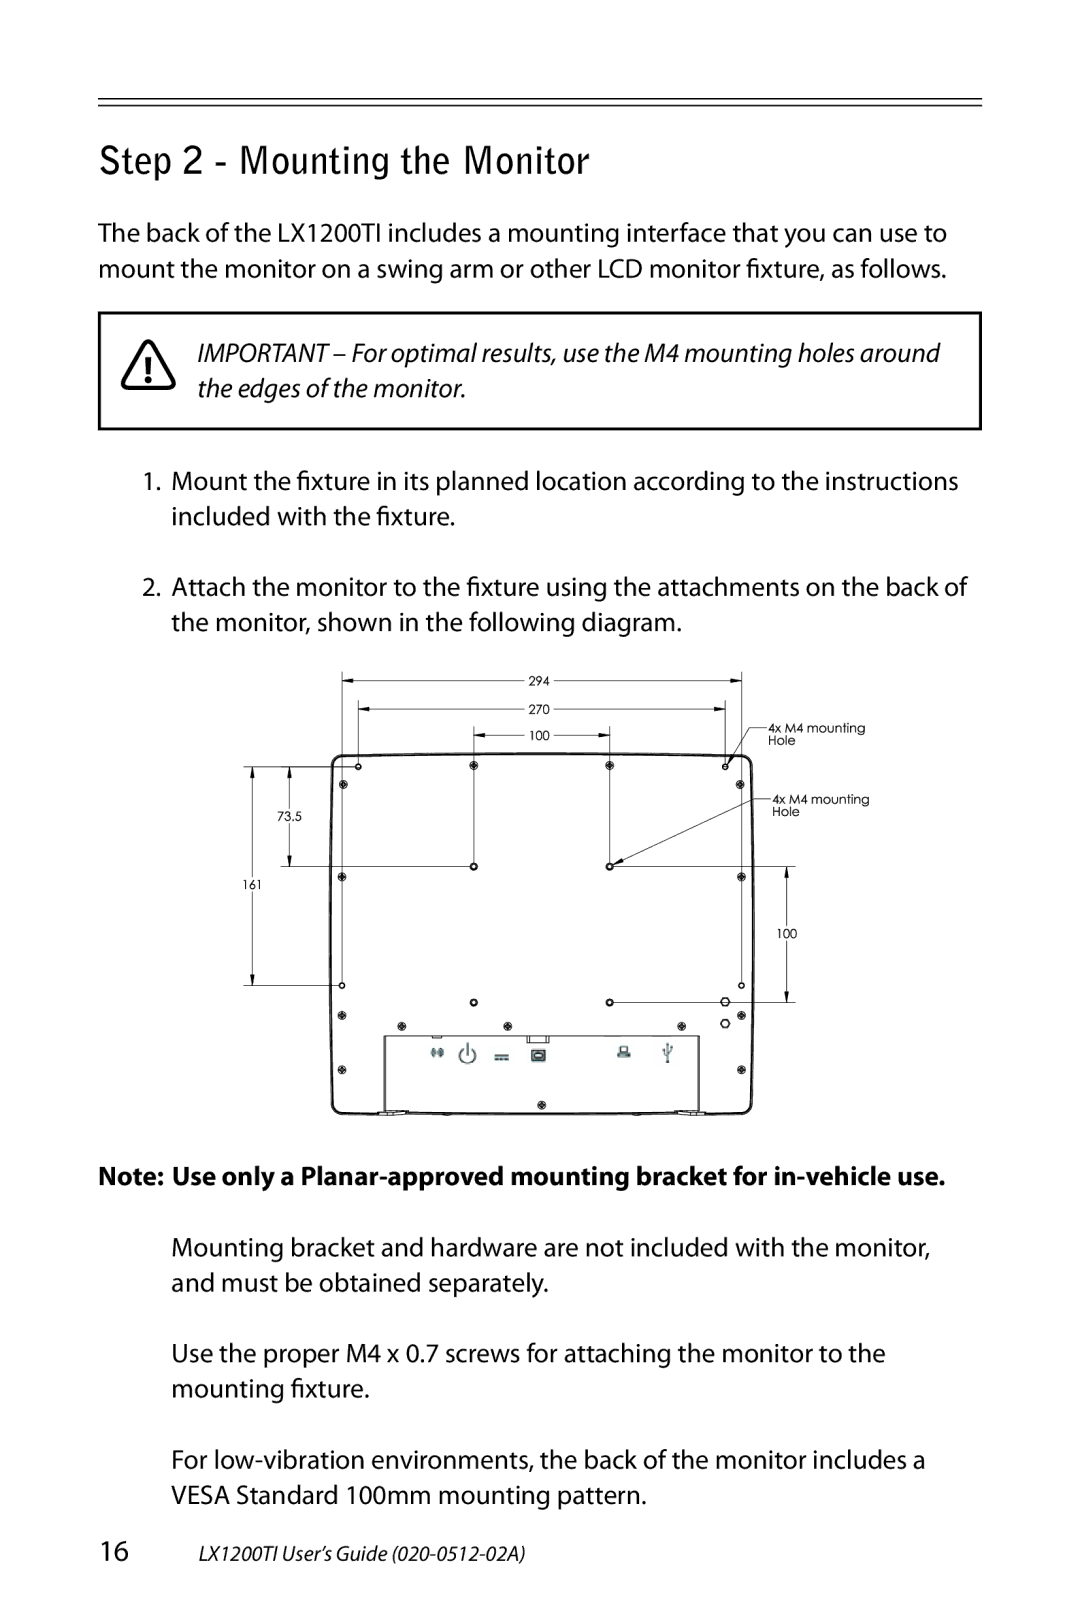
The back of the LX1200TI includes a mounting interface that you can use to mount the monitor on a swing arm or other LCD monitor fixture, as follows.
! | IMPORTANT – For optimal results, use the M4 mounting holes around | |
the edges of the monitor. | ||
| ||
|
|
1.Mount the fixture in its planned location according to the instructions included with the fixture.
2.Attach the monitor to the fixture using the attachments on the back of the monitor, shown in the following diagram.
Note: Use only a
Mounting bracket and hardware are not included with the monitor, and must be obtained separately.
Use the proper M4 x 0.7 screws for attaching the monitor to the mounting fixture.
For
16LX1200TI User’s Guide