Button |
| Function Description | |
Select | (1) | Turn on OSD menu while it is off. | |
(2) | Execute the function selected in the OSD menu. | ||
| |||
| (3) | Hold down for 2 sec will clear OSD menu. | |
Up (△) | (1) | Item selection move upward or | |
| increasing. (in Main Menu). | ||
| (2) | Brightness | |
|
|
| |
Down (▽) | (1) | Item selection move downward, | |
| decreasing (in Main Menu) | ||
| (2) | Auto Setup | |
|
|
|
Making the Connections
Before connecting any cables, make sure that the computer and display are turn off.
To connect the power and video signal cables:
1.Locate the AC power adapter with attached power cable.
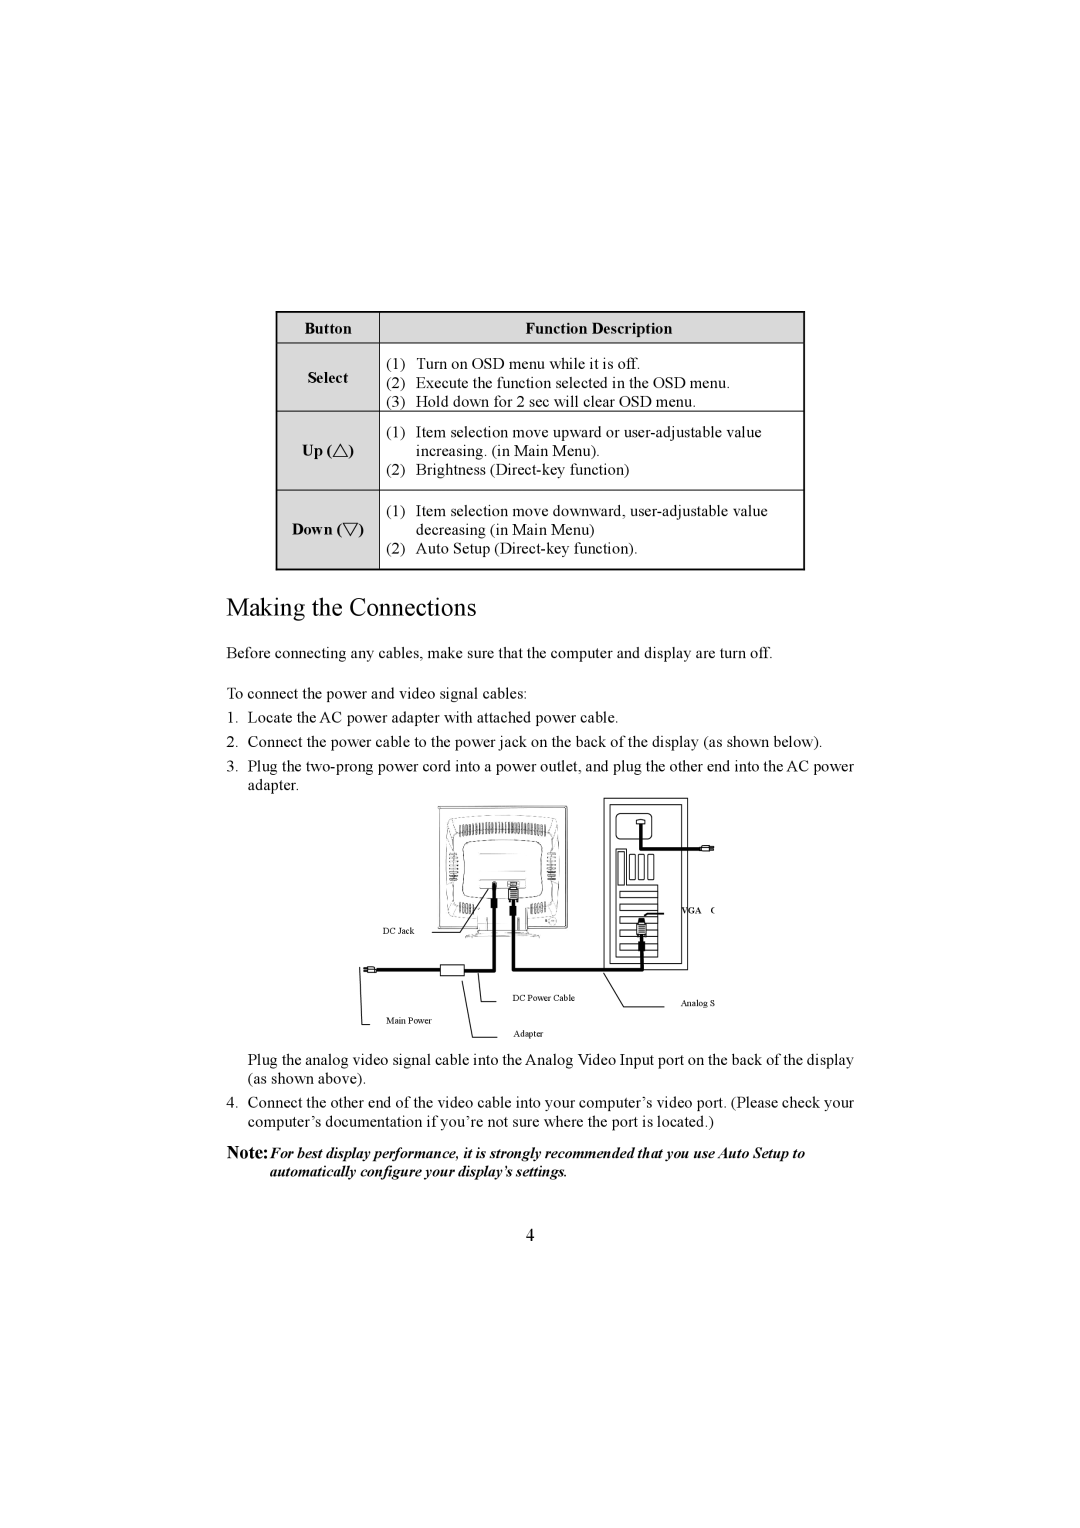
2.Connect the power cable to the power jack on the back of the display (as shown below).
3.Plug the
DC Jack
Main Power
DC Power Cable
Adapter
VGA C |
Analog S |
Plug the analog video signal cable into the Analog Video Input port on the back of the display (as shown above).
4.Connect the other end of the video cable into your computer’s video port. (Please check your computer’s documentation if you’re not sure where the port is located.)
Note:For best display performance, it is strongly recommended that you use Auto Setup to automatically configure your display’s settings.
4
