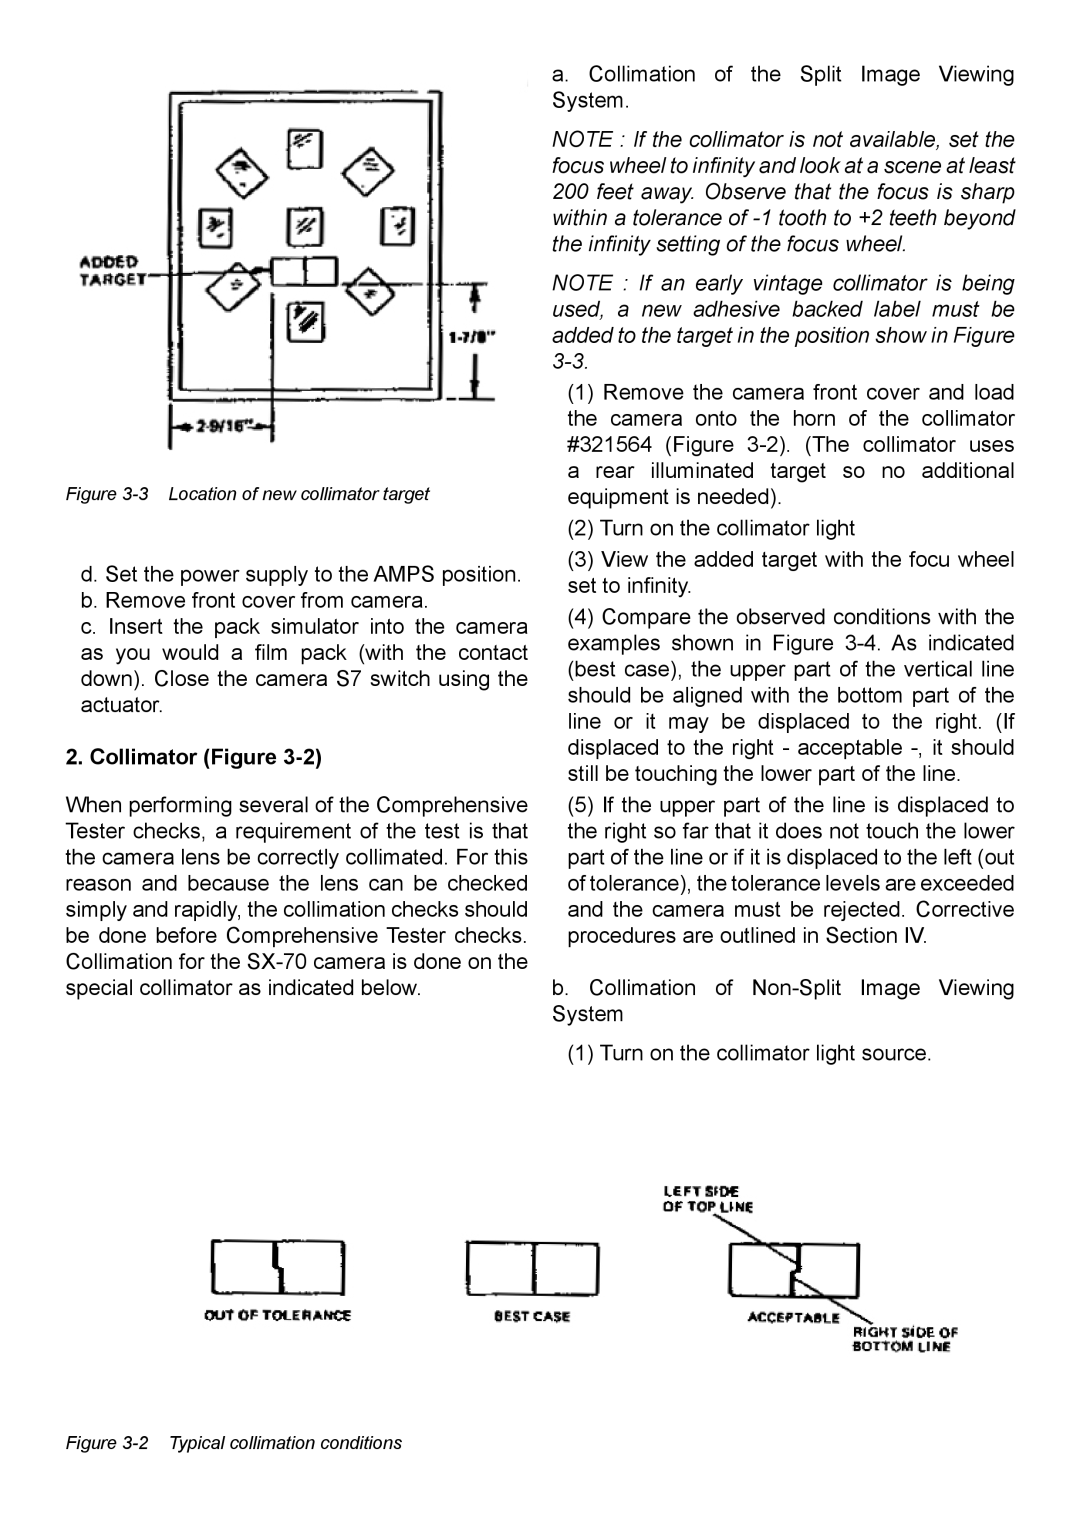
Figure 3-3 Location of new collimator target
d. Set the power supply to the AMPS position. b. Remove front cover from camera.
c. Insert the pack simulator into the camera as you would a film pack (with the contact down). Close the camera S7 switch using the actuator.
2. Collimator (Figure 3-2)
When performing several of the Comprehensive Tester checks, a requirement of the test is that the camera lens be correctly collimated. For this reason and because the lens can be checked simply and rapidly, the collimation checks should be done before Comprehensive Tester checks. Collimation for the
a. Collimation of the Split Image Viewing System.
NOTE : If the collimator is not available, set the focus wheel to infinity and look at a scene at least 200 feet away. Observe that the focus is sharp within a tolerance of
NOTE : If an early vintage collimator is being used, a new adhesive backed label must be added to the target in the position show in Figure
(1)Remove the camera front cover and load the camera onto the horn of the collimator #321564 (Figure
(2)Turn on the collimator light
(3)View the added target with the focu wheel set to infinity.
(4)Compare the observed conditions with the examples shown in Figure
(5)If the upper part of the line is displaced to the right so far that it does not touch the lower part of the line or if it is displaced to the left (out of tolerance), the tolerance levels are exceeded and the camera must be rejected. Corrective procedures are outlined in Section IV.
b. Collimation of
(1)Turn on the collimator light source.