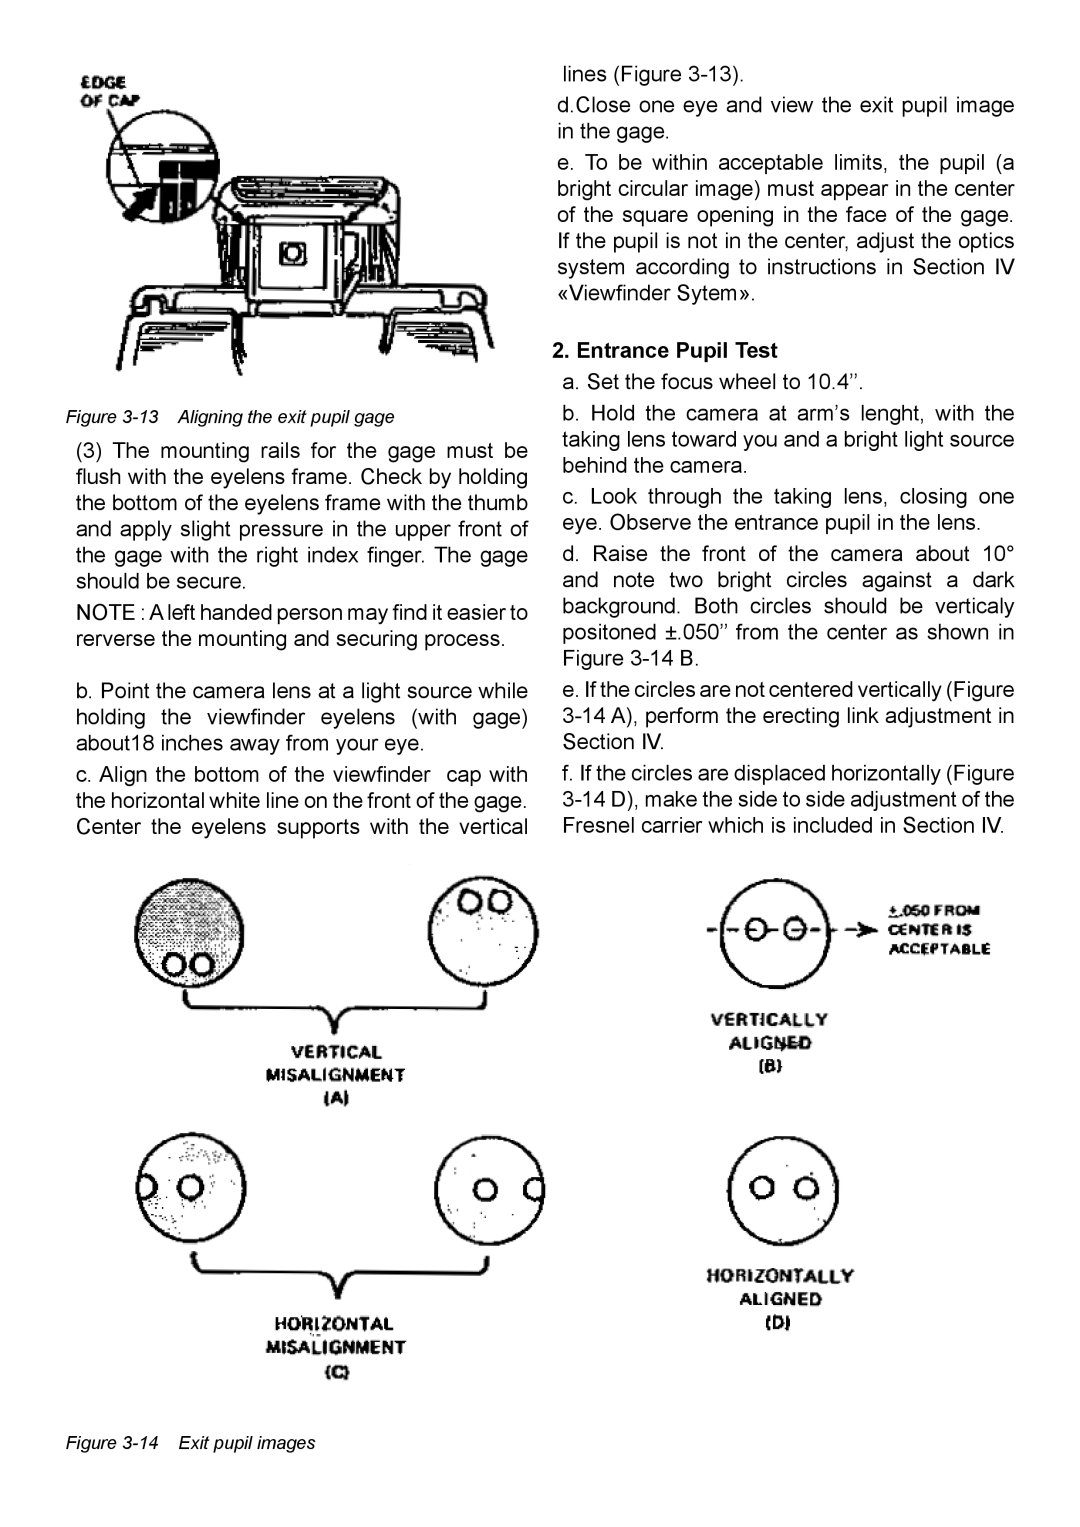
Figure 3-13 Aligning the exit pupil gage
(3)The mounting rails for the gage must be flush with the eyelens frame. Check by holding the bottom of the eyelens frame with the thumb and apply slight pressure in the upper front of the gage with the right index finger. The gage should be secure.
NOTE : A left handed person may find it easier to rerverse the mounting and securing process.
b. Point the camera lens at a light source while holding the viewfinder eyelens (with gage) about18 inches away from your eye.
c. Align the bottom of the viewfinder cap with the horizontal white line on the front of the gage. Center the eyelens supports with the vertical
lines (Figure
d.Close one eye and view the exit pupil image in the gage.
e. To be within acceptable limits, the pupil (a bright circular image) must appear in the center of the square opening in the face of the gage. If the pupil is not in the center, adjust the optics system according to instructions in Section IV «Viewfinder Sytem».
2.Entrance Pupil Test
a.Set the focus wheel to 10.4’’.
b.Hold the camera at arm’s lenght, with the taking lens toward you and a bright light source behind the camera.
c.Look through the taking lens, closing one eye. Observe the entrance pupil in the lens.
d.Raise the front of the camera about 10° and note two bright circles against a dark background. Both circles should be verticaly positoned ±.050’’ from the center as shown in Figure
e.If the circles are not centered vertically (Figure
f.If the circles are displaced horizontally (Figure