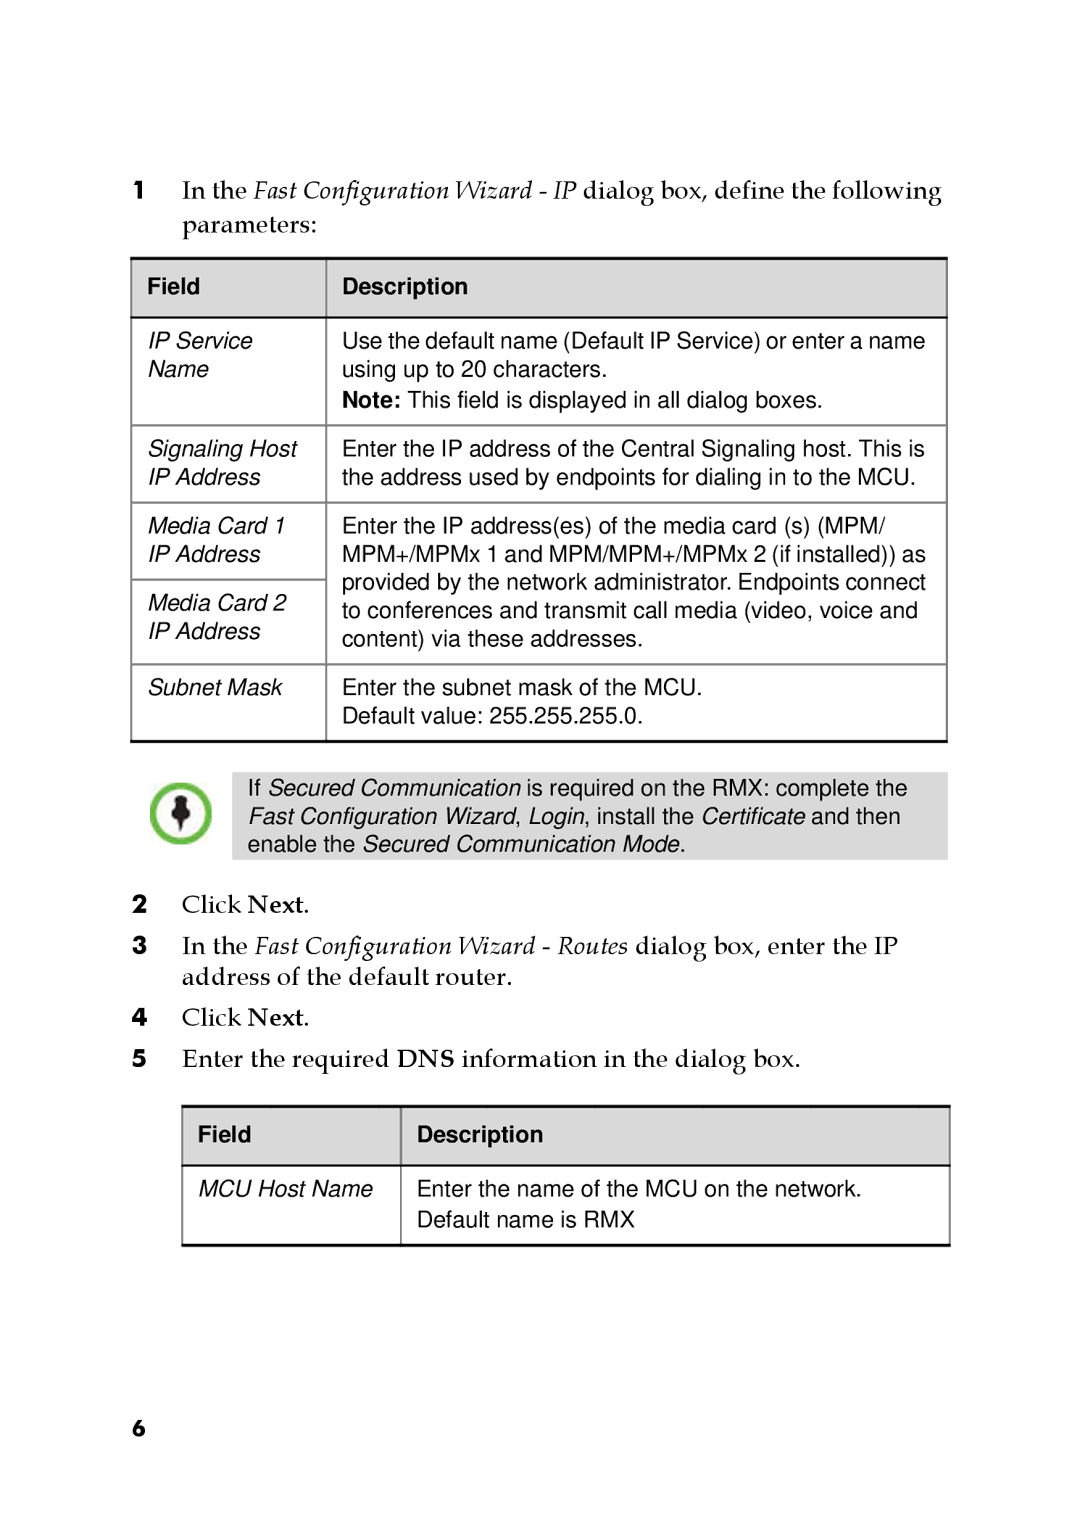
1In the Fast Configuration Wizard - IP dialog box, define the following parameters:
Field | Description | |
|
| |
IP Service | Use the default name (Default IP Service) or enter a name | |
Name | using up to 20 characters. | |
| Note: This field is displayed in all dialog boxes. | |
|
| |
Signaling Host | Enter the IP address of the Central Signaling host. This is | |
IP Address | the address used by endpoints for dialing in to the MCU. | |
|
| |
Media Card 1 | Enter the IP address(es) of the media card (s) (MPM/ | |
IP Address | MPM+/MPMx 1 and MPM/MPM+/MPMx 2 (if installed)) as | |
| provided by the network administrator. Endpoints connect | |
Media Card 2 | ||
to conferences and transmit call media (video, voice and | ||
IP Address | ||
content) via these addresses. | ||
| ||
|
| |
Subnet Mask | Enter the subnet mask of the MCU. | |
| Default value: 255.255.255.0. | |
|
|
If Secured Communication is required on the RMX: complete the Fast Configuration Wizard, Login, install the Certificate and then enable the Secured Communication Mode.
2Click Next.
3In the Fast Configuration Wizard - Routes dialog box, enter the IP address of the default router.
4Click Next.
5Enter the required DNS information in the dialog box.
Field | Description |
|
|
MCU Host Name | Enter the name of the MCU on the network. |
| Default name is RMX |
|
|
6
