OPERATING CONTROLS AND ADJUSTMENTS
STARTING AND STOPPING DRILL PRESS
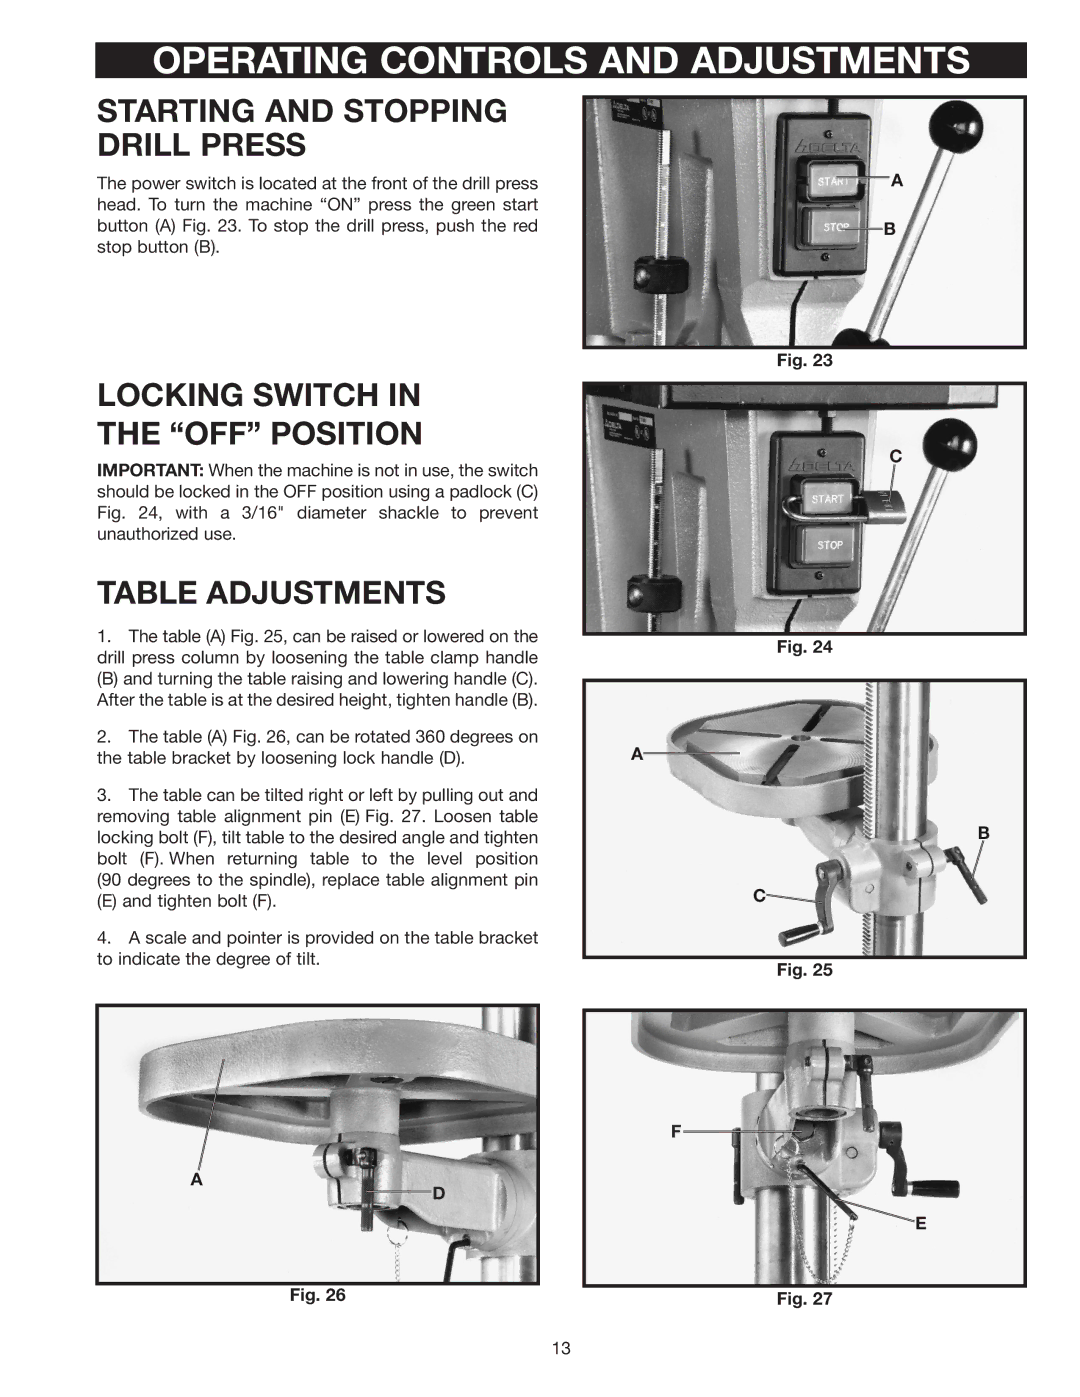
The power switch is located at the front of the drill press head. To turn the machine “ON” press the green start button (A) Fig. 23. To stop the drill press, push the red stop button (B).
A
B
Fig. 23
LOCKING SWITCH IN
THE “OFF” POSITION
IMPORTANT: When the machine is not in use, the switch should be locked in the OFF position using a padlock (C) Fig. 24, with a 3/16" diameter shackle to prevent unauthorized use.
TABLE ADJUSTMENTS
1.The table (A) Fig. 25, can be raised or lowered on the drill press column by loosening the table clamp handle
(B) and turning the table raising and lowering handle (C). After the table is at the desired height, tighten handle (B).
2.The table (A) Fig. 26, can be rotated 360 degrees on the table bracket by loosening lock handle (D).
3.The table can be tilted right or left by pulling out and removing table alignment pin (E) Fig. 27. Loosen table locking bolt (F), tilt table to the desired angle and tighten bolt (F). When returning table to the level position (90 degrees to the spindle), replace table alignment pin
(E) and tighten bolt (F).
4.A scale and pointer is provided on the table bracket to indicate the degree of tilt.
A
D
C
Fig. 24
A
B
C![]()
Fig. 25
F
E
Fig. 26 | Fig. 27 |
13
