ELECTRIC START
This generator model is provided with both electric start and recoil start capabilities. The charger is a low amperage (1A) maintenance type charger. It will charge your battery as your generator runs. Avoid prolonged cranking, as it can damage the engine.
The battery provided is a nominal 12 volt sealed rechargeable
Length = 7.14 inches, Width = 3.03 inches, Height = 6.59
inches | Weight = 12.56 lbs |
|
18AH Rating |
| |
UL Recognized |
| |
Battery Kit Parts List |
| |
Item | Description | Qty |
A | Bolt, M5 x M12 | 2 |
B. | Nut 5MM | 2 |
C. | Washer Flat M5 | 2 |
*All parts are standard parts at your local hardware store.
Note: Brand New Generators are shipped with the Battery Connections disconnected. The Positive and Negative Terminals must be connected to the Battery before the Electric Start Feature will work.
Initial Battery Connection - Refer to the Installation Instructions Below.
Battery Removal & Installation:
Removal: Remove the two screws holding down the battery tray cover. Remove the cover by lifting up on the front and pulling backward until the tabs clear the slots exposing the battery. Remove the nut and bolt from the negative and positive post, being careful not to short across the terminals. (Shorting the terminals together can cause sparks, damage to the battery or generator or even burns or explosions.) Always abide by the safety warnings provided with the battery.
•Do not
•Do not charge in a sealed container.
•Keep sparks, flame away.
Remove the battery from the tray and
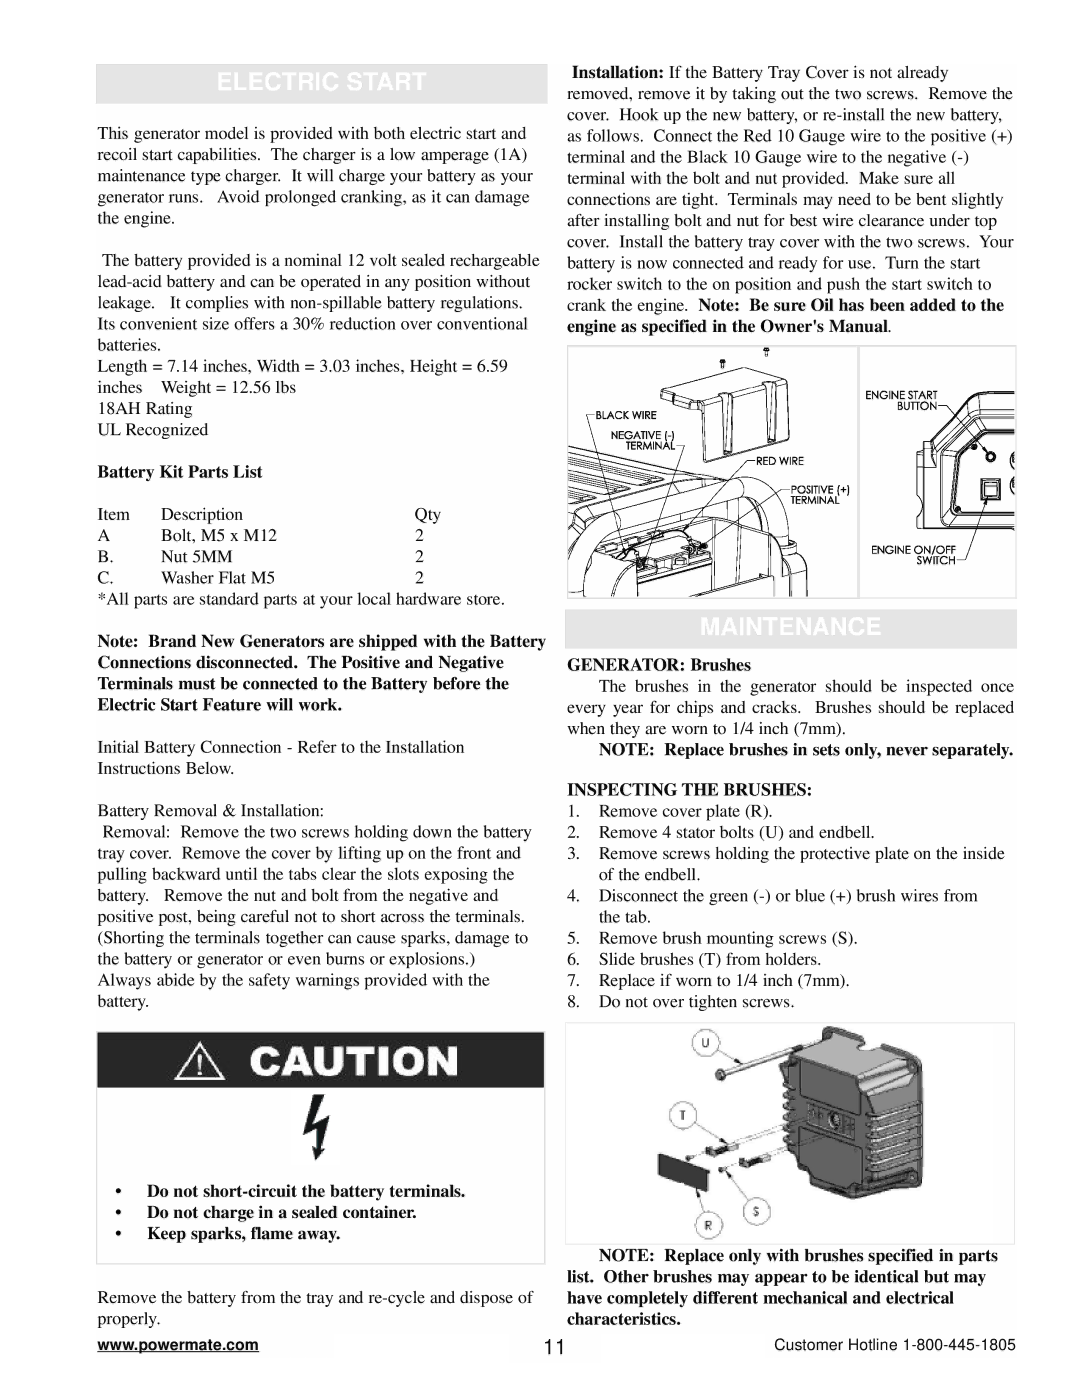
Installation: If the Battery Tray Cover is not already removed, remove it by taking out the two screws. Remove the cover. Hook up the new battery, or
MAINTENANCE
GENERATOR: Brushes
The brushes in the generator should be inspected once every year for chips and cracks. Brushes should be replaced when they are worn to 1/4 inch (7mm).
NOTE: Replace brushes in sets only, never separately.
INSPECTING THE BRUSHES:
1.Remove cover plate (R).
2.Remove 4 stator bolts (U) and endbell.
3.Remove screws holding the protective plate on the inside of the endbell.
4.Disconnect the green
5.Remove brush mounting screws (S).
6.Slide brushes (T) from holders.
7.Replace if worn to 1/4 inch (7mm).
8.Do not over tighten screws.
NOTE: Replace only with brushes specified in parts list. Other brushes may appear to be identical but may have completely different mechanical and electrical characteristics.
www.powermate.com |
| 11 |
| Customer Hotline |
|
|
|
|
|