PP-FCTA-QL specifications
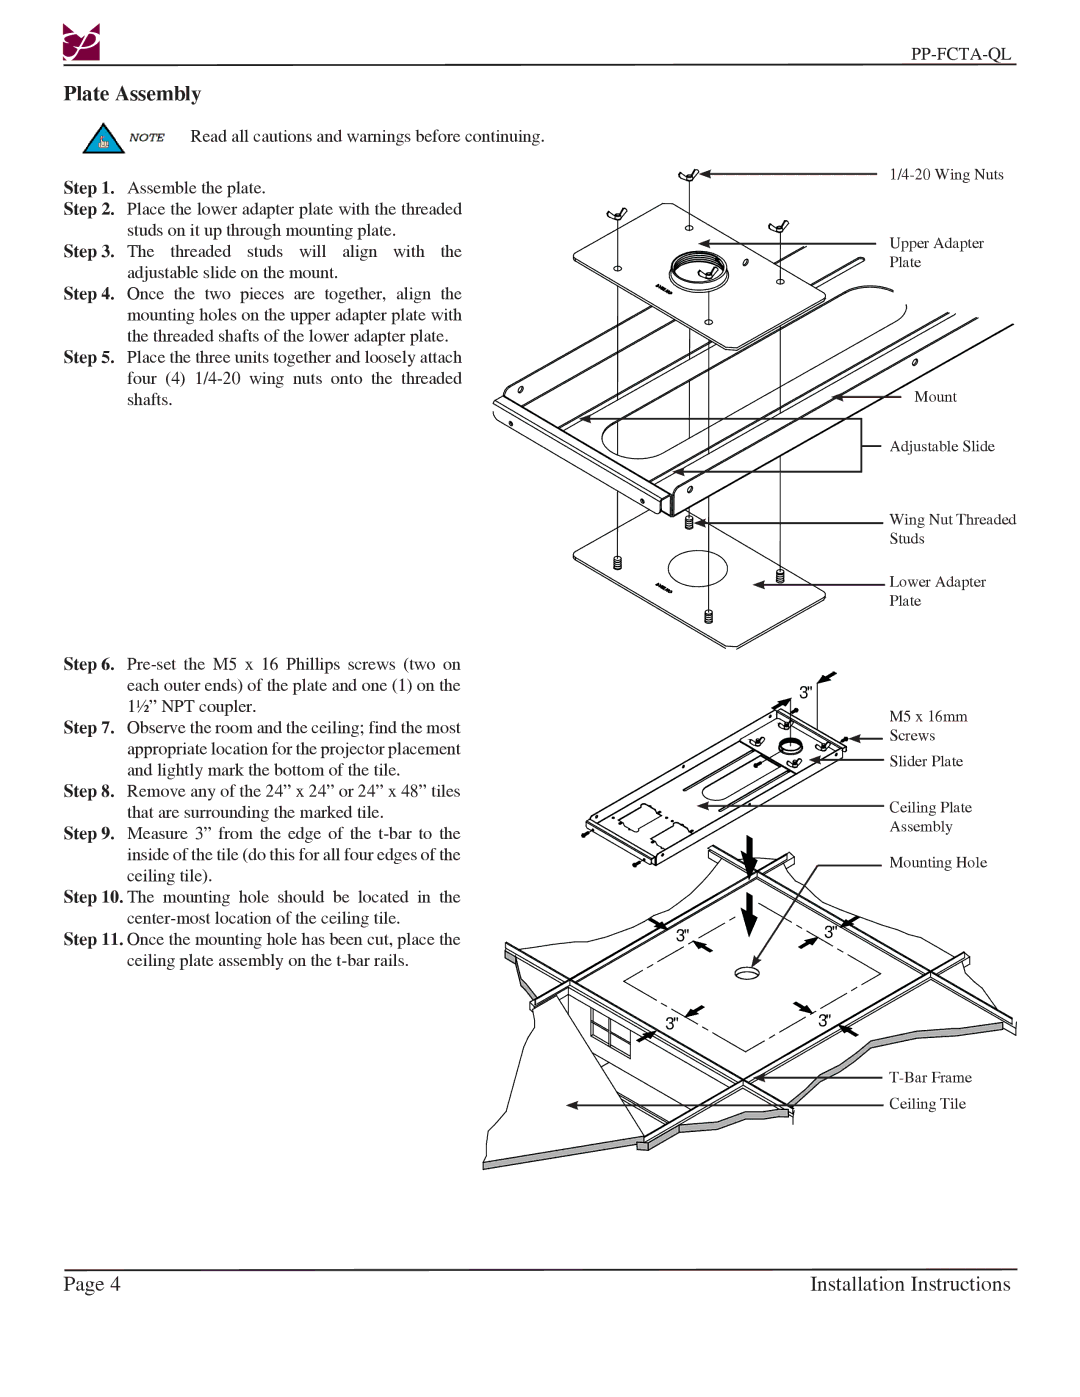
The Premier Mounts PP-FCTA-QL is an innovative mounting solution designed to simplify the installation of flat-panel displays. This product is engineered specifically for professional audio-visual environments, making it a popular choice for commercial applications such as conference rooms, classrooms, and digital signage.One of the standout features of the PP-FCTA-QL is its quick-release design, which streamlines the process of attaching and detaching displays. This feature is particularly beneficial in scenarios where screens may need to be frequently removed for maintenance or upgrades. Users can easily manage their displays without requiring extensive technical knowledge or tools, enhancing versatility and efficiency in presentation setups.
Moreover, the PP-FCTA-QL supports a wide range of mounting options, accommodating various sizes and weights of flat-panel TVs. With a weight capacity that allows for substantial displays, users can rest assured that their equipment is secure and stable. The design also ensures compatibility with VESA mounting standards, making it adaptable to numerous screen models available in the market.
From a technological standpoint, Premier Mounts incorporates innovative features that enhance usability. The integrated cable management system keeps all wiring neatly organized, minimizing clutter and ensuring a clean installation. This attention to detail extends to the mount's aesthetics, with a sleek, modern design that integrates seamlessly into any professional environment.
Furthermore, the PP-FCTA-QL includes adjustable tilt and swivel capabilities, providing users with optimal viewing angles. This flexibility is crucial in environments where audience locations may vary, allowing for a customizable viewing experience that caters to different settings.
Durability is another hallmark of this product. Constructed from high-quality materials, the PP-FCTA-QL exhibits strong resistance to wear and tear, guaranteeing longevity in demanding environments. It stands up well to the test of time, reducing the need for frequent replacements and offering a good return on investment.
In summary, the Premier Mounts PP-FCTA-QL is a top-of-the-line mounting solution that delivers functionality, adaptability, and modern aesthetics. With its quick-release mechanism, robust weight capacity, integrated cable management, and adjustable viewing features, it is ideally suited for a range of professional applications. This mount not only enhances the display experience but also elevates the overall efficiency and visual appeal of any audio-visual setup.

