I I I . I N S T A L L A T I O N
BOOM-ARM ADJUSTMENT
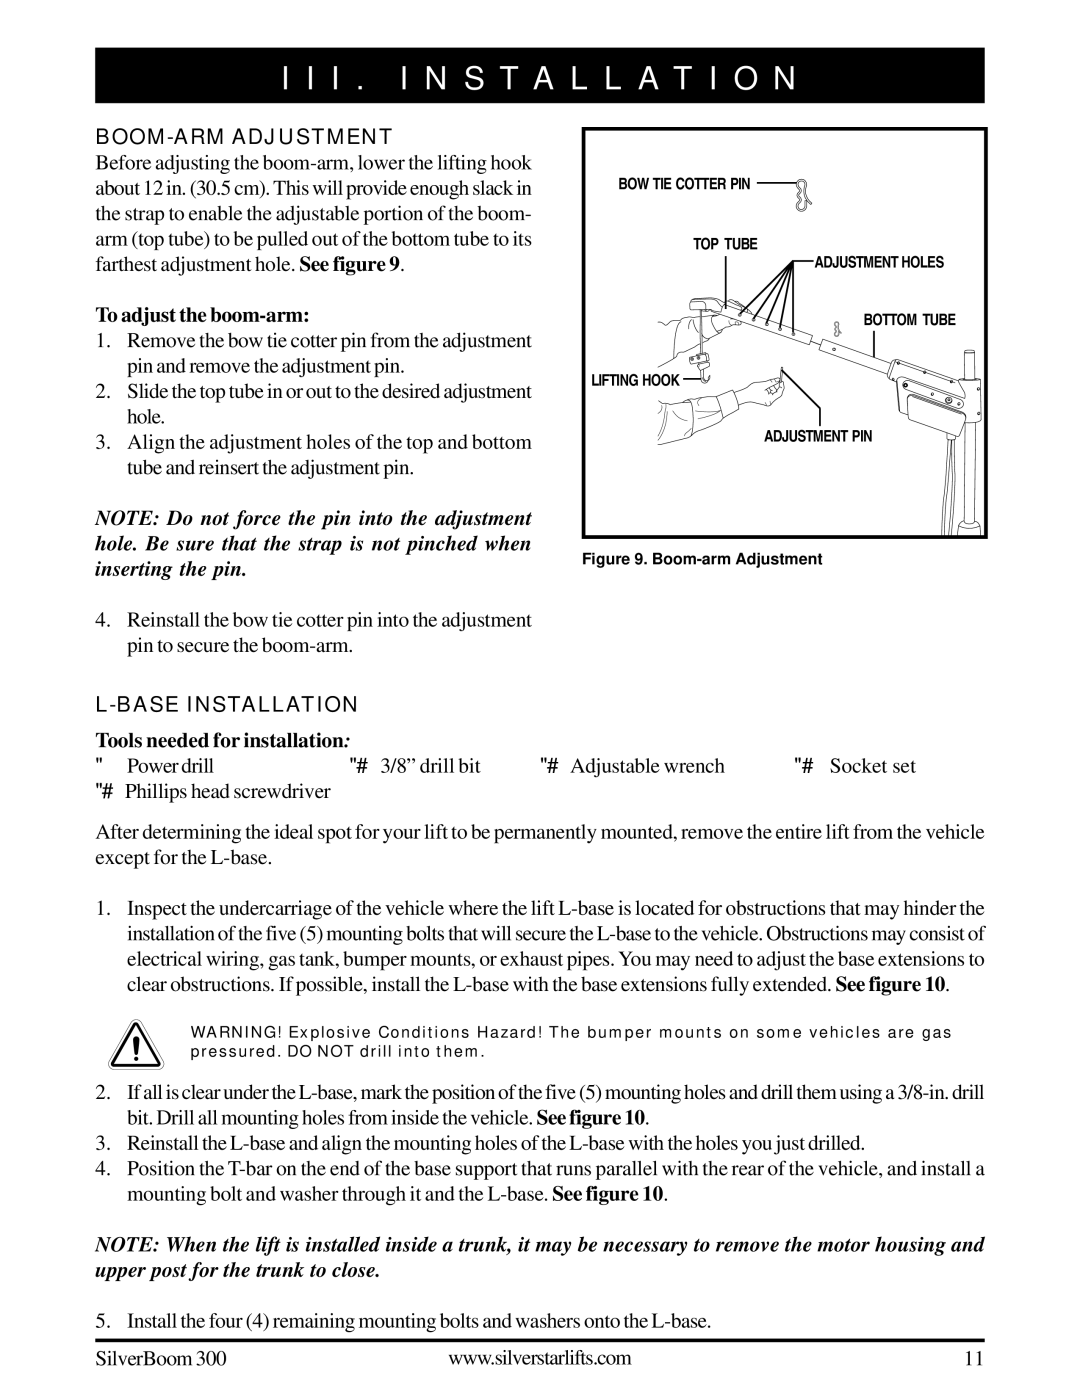
Before adjusting the
To adjust the boom-arm:
1.Remove the bow tie cotter pin from the adjustment pin and remove the adjustment pin.
2.Slide the top tube in or out to the desired adjustment hole.
3.Align the adjustment holes of the top and bottom tube and reinsert the adjustment pin.
NOTE: Do not force the pin into the adjustment hole. Be sure that the strap is not pinched when inserting the pin.
4.Reinstall the bow tie cotter pin into the adjustment pin to secure the
BOW TIE COTTER PIN ![]()
TOP TUBE
ADJUSTMENT HOLES
BOTTOM TUBE
LIFTING HOOK ![]()
![]()
ADJUSTMENT PIN
Figure 9. Boom-arm Adjustment
|
|
| |
Tools needed for installation: |
|
| |
∀ Power drill | ∀ 3/8” drill bit | ∀ Adjustable wrench | ∀ Socket set |
∀Phillips head screwdriver
After determining the ideal spot for your lift to be permanently mounted, remove the entire lift from the vehicle except for the
1.Inspect the undercarriage of the vehicle where the lift
WARNING! Explosive Conditions Hazard! The bumper mounts on some vehicles are gas pressured. DO NOT drill into them.
2.If all is clear under the
3.Reinstall the
4.Position the
NOTE: When the lift is installed inside a trunk, it may be necessary to remove the motor housing and upper post for the trunk to close.
5. Install the four (4) remaining mounting bolts and washers onto the
SilverBoom 300 | www.silverstarlifts.com | 11 |
