I I I . I N S T A L L A T I O N
NOTE: Choosing the correct length bolt allows enough
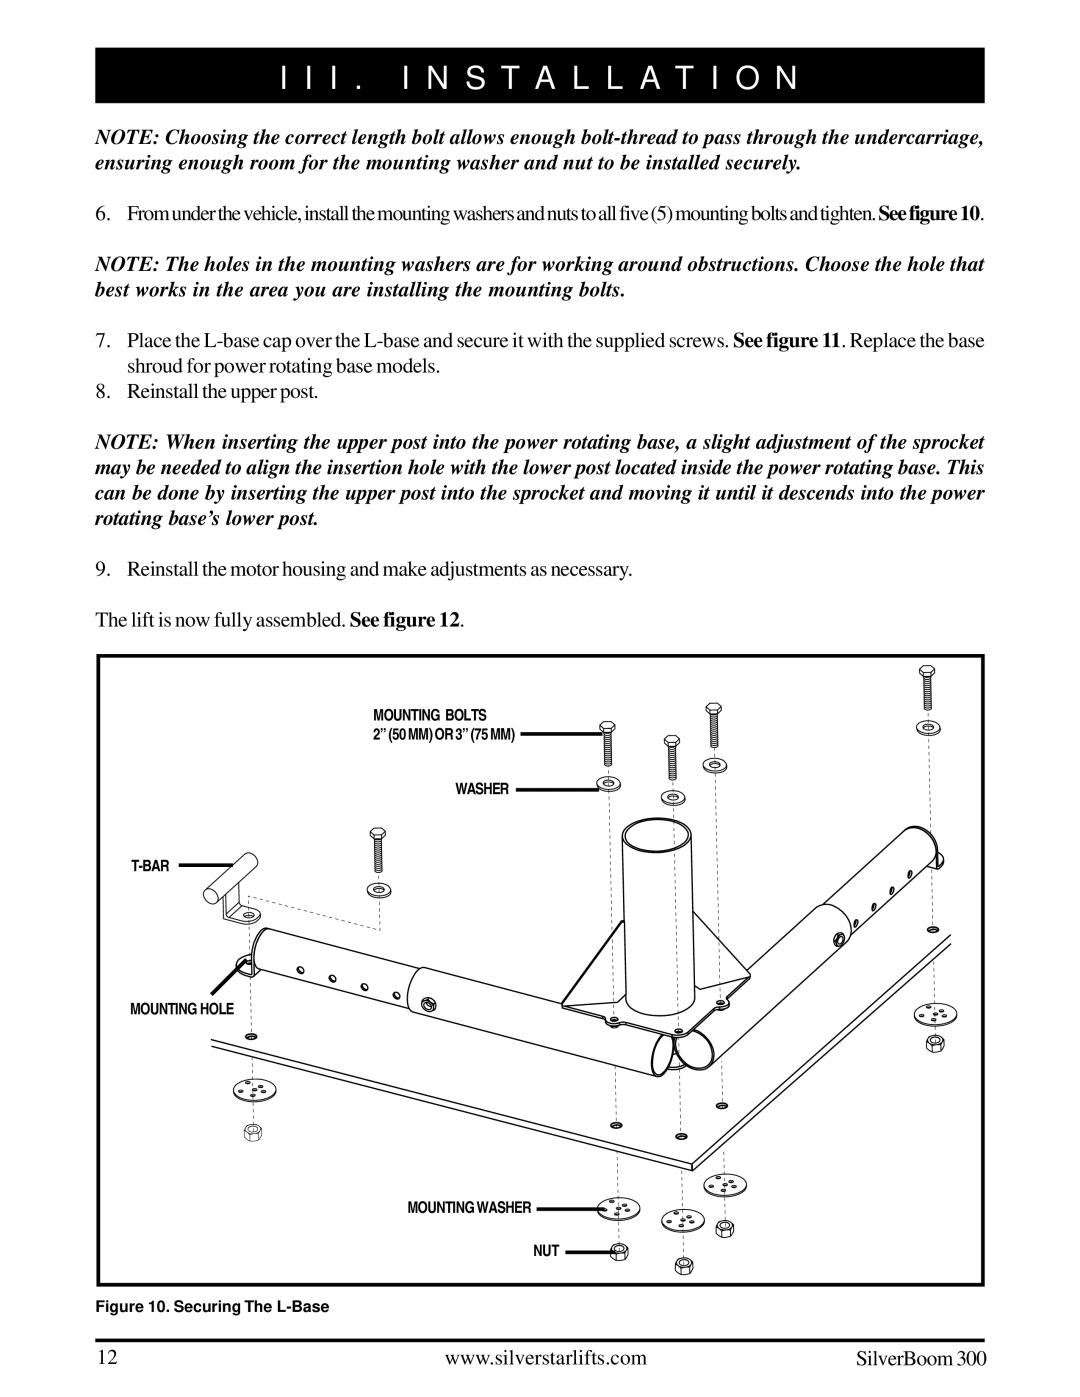
6. From under the vehicle, install the mounting washers and nuts to all five (5) mounting bolts and tighten. See figure 10.
NOTE: The holes in the mounting washers are for working around obstructions. Choose the hole that best works in the area you are installing the mounting bolts.
7.Place the
8.Reinstall the upper post.
NOTE: When inserting the upper post into the power rotating base, a slight adjustment of the sprocket may be needed to align the insertion hole with the lower post located inside the power rotating base. This can be done by inserting the upper post into the sprocket and moving it until it descends into the power rotating base’s lower post.
9.Reinstall the motor housing and make adjustments as necessary.
The lift is now fully assembled. See figure 12.
MOUNTING BOLTS |
2” (50 MM) OR 3” (75 MM) |
WASHER |
MOUNTING HOLE |
MOUNTING WASHER |
NUT |
Figure 10. Securing The L-Base
12 | www.silverstarlifts.com | SilverBoom 300 |