I I I . Y O U R T R A V E L S C O O T E R
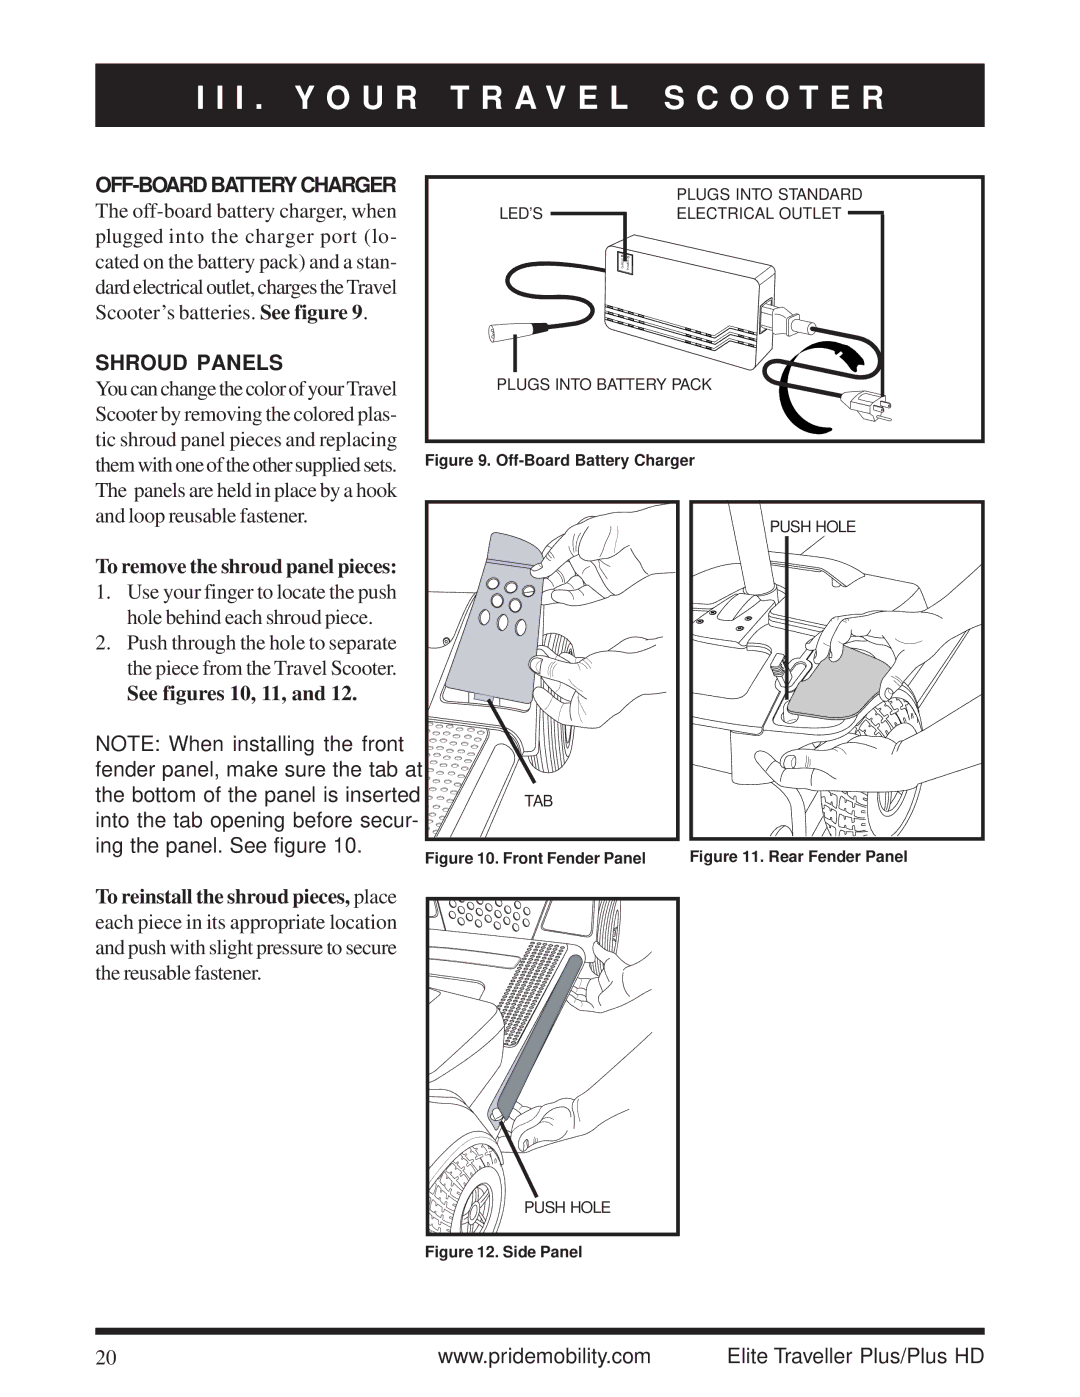
OFF-BOARD BATTERY CHARGER
The
SHROUD PANELS
You can change the color of your Travel Scooter by removing the colored plas- tic shroud panel pieces and replacing them with one of the other supplied sets. The panels are held in place by a hook
| PLUGS INTO STANDARD |
LED’S | ELECTRICAL OUTLET |
| CHARGER POWER |
PLUGS INTO BATTERY PACK
Figure 9. Off-Board Battery Charger
and loop reusable fastener.
To remove the shroud panel pieces:
1.Use your finger to locate the push hole behind each shroud piece.
2.Push through the hole to separate the piece from the Travel Scooter.
See figures 10, 11, and 12.
NOTE: When installing the front fender panel, make sure the tab at the bottom of the panel is inserted into the tab opening before secur- ing the panel. See figure 10.
TAB
Figure 10. Front Fender Panel
PUSH HOLE |
Figure 11. Rear Fender Panel
To reinstall the shroud pieces, place
each piece in its appropriate location and push with slight pressure to secure the reusable fastener.
PUSH HOLE
Figure 12. Side Panel
20 | www.pridemobility.com | Elite Traveller Plus/Plus HD |