II specifications
Primera Technology II is a leading manufacturer in the field of specialty printing equipment, renowned for its innovative solutions tailored to a variety of industries. Established with a commitment to quality and performance, the company has successfully developed products that meet the diverse needs of businesses ranging from small enterprises to large corporations.A standout feature of Primera Technology II is its extensive range of printers, which includes label printers, digital printers, and finishing equipment. The most notable product lines include the LX-Series inkjet label printers, which are designed for high-quality color label printing on demand. These printers boast an impressive resolution, ensuring that labels are not only vibrant but also precise, which is crucial for branding and product identification.
One of the key technologies employed by Primera is the advanced inkjet printing technology, allowing for high-speed printing without compromising quality. This technology is particularly beneficial for businesses that require fast turnaround times while maintaining exceptional print quality. Additionally, Primera’s proprietary software solutions enhance the functionality of their printers, enabling users to design and print labels with ease.
Primera Technology II’s printers are characterized by their user-friendly interfaces and ease of integration into existing workflows. Many models feature plug-and-play capabilities and can connect seamlessly to various devices, including PCs and Macs. This ensures that users can start printing quickly without extensive setup or training.
Another notable characteristic of Primera printers is their ability to handle a variety of media types and sizes. From small labels for product packaging to larger banners, Primera’s equipment is versatile enough to cater to a wide array of printing requirements. This adaptability is especially important for businesses that need to produce different types of outputs without investing in multiple printers.
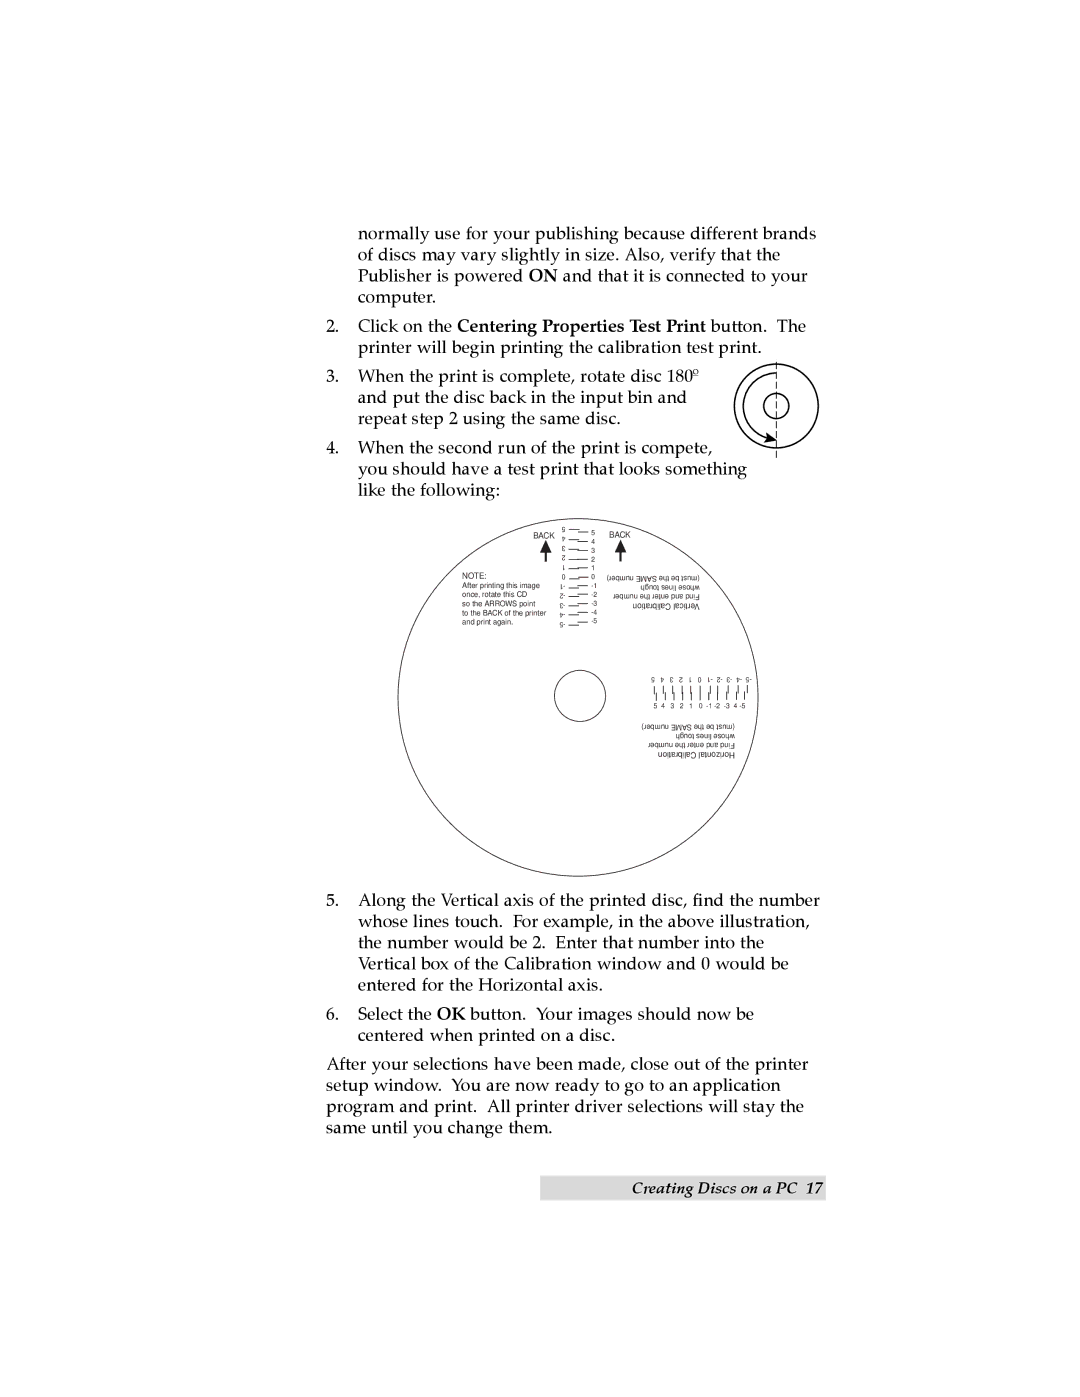
In terms of sustainability, Primera Technology II is committed to reducing environmental impact. The company employs eco-friendly inks and materials whenever possible, and their printers are designed for efficiency, minimizing waste during the printing process.
Overall, Primera Technology II stands out in the specialty printing industry with its innovative products, advanced technologies, and commitment to quality and sustainability. Businesses looking for reliable, high-performance printing solutions will find that Primera offers an impressive array of options that can be tailored to their specific needs.