OPERATING YOUR HEATER

NON-THERMOSTAT MODELS

FOR YOUR SAFETY

READ BEFORE LIGHTING

WARNING: If you do not follow these instructions exactly, a fire or explosion may result causing property damage, personal injury or loss of life.

A.When lighting the pilot, follow these instructions exactly.

B.BEFORE LIGHTING smell all around the appliance area for gas. Be sure to smell next to the floor because some gas is heavier than air and will settle on the floor.

WHAT TO DO IF YOU SMELL GAS

Do not try to light any appliance.

Do not touch any electric switch; do not use any phone in your building.

Immediately call your gas supplier from a neighbor’s phone . Follow the gas supplier’s instructions.

if you cannot reach your gas

supplier, call the fire department.

C.Use only your hand to push in or turn the gas control knob. Never use tools. If the knob will not push in or turn by hand, don’t try to repair it , call a qualified service technician or gas supplier. Force or attempted repair may result in a fire or explosion.

D.Do not use this appliance if any part has been under water. Immediately call a qualified service

t e c h n i c i a n t o i n s p e c t t h e appliance and to replace any part of the control system and any gas control which has been under water.

LIGHTING

INSTRUCTIONS

1. STOP! Read

the

safety

information, on

the

side of

heater.


2.Make sure equipment shutoff valve is fully open.

3.Push in control knob slightly

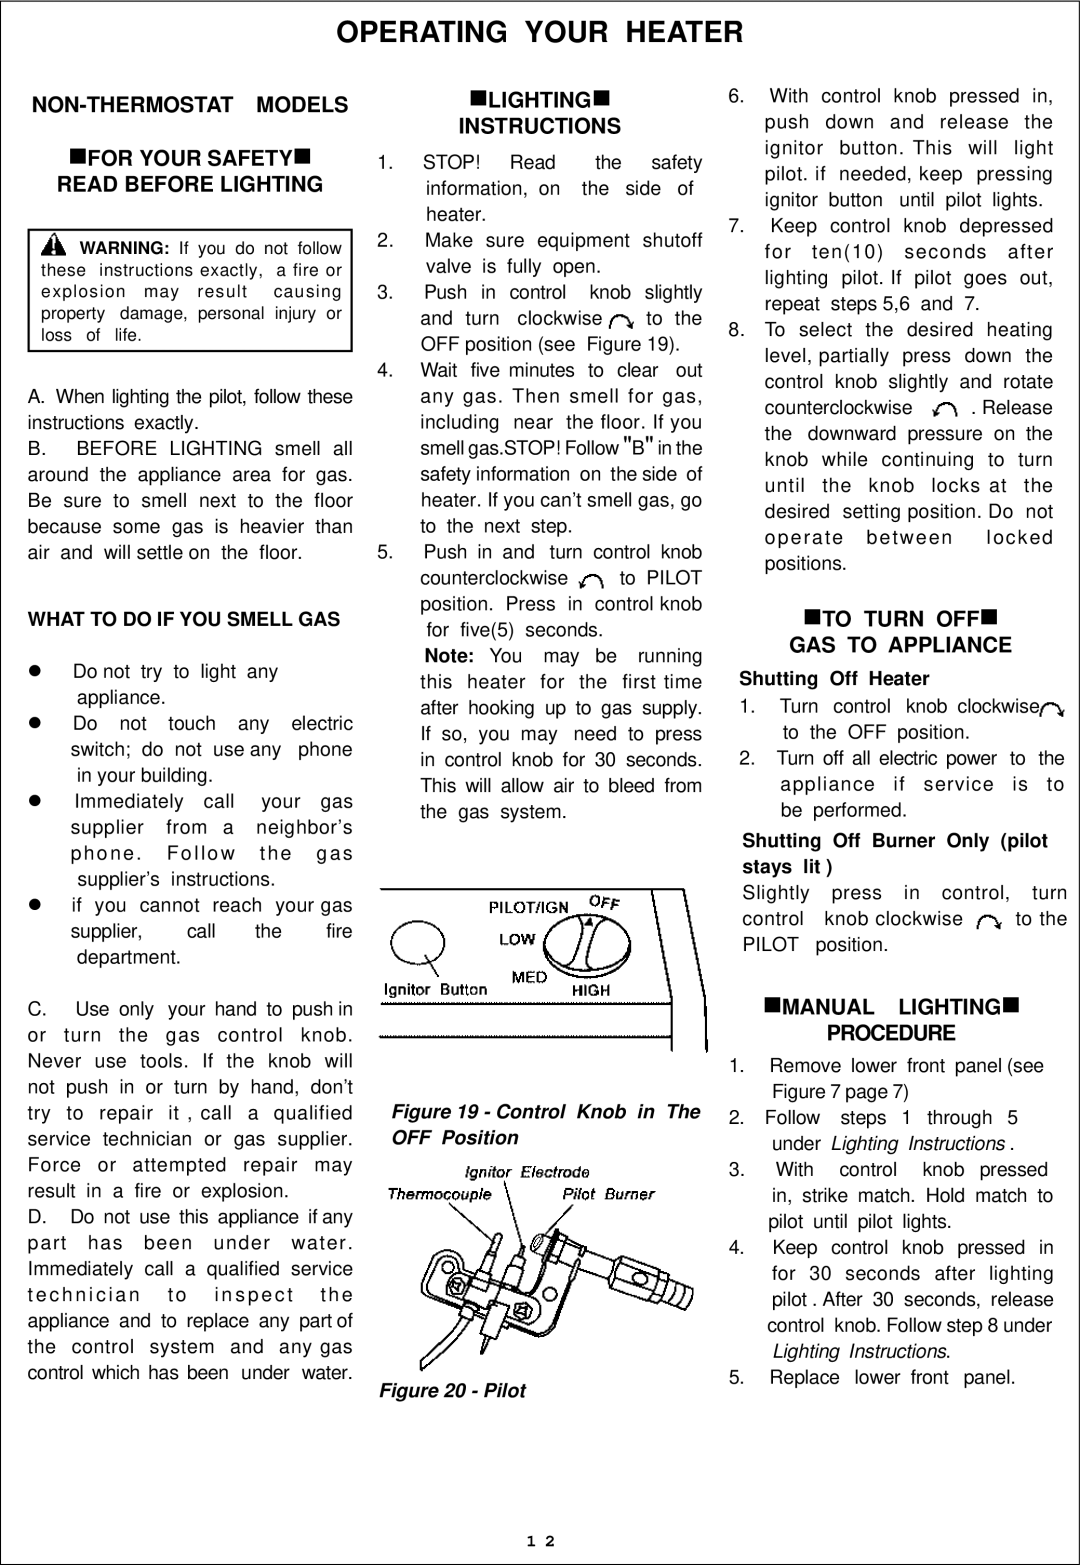
and turn clockwise to the OFF position (see Figure 19).

4.Wait five minutes to clear out any gas. Then smell for gas,

including near the floor. If you smell gas.STOP! Follow "B" in the

safety information on the side of heater. If you can’t smell gas, go to the next step.

5.Push in and turn control knob

counterclockwise to PILOT position. Press in control knob

for five(5) seconds.

Note: You may be running this heater for the first time after hooking up to gas supply. If so, you may need to press in control knob for 30 seconds. This will allow air to bleed from the gas system.

Figure 19 - Control Knob in The OFF Position

Figure 20 - Pilot

6.With control knob pressed in, push down and release the ignitor button. This will light pilot. if needed, keep pressing ignitor button until pilot lights.

7.Keep control knob depressed for ten(10) seconds after lighting pilot. If pilot goes out, repeat steps 5,6 and 7.

8.To select the desired heating level, partially press down the control knob slightly and rotate

counterclockwise . Release the downward pressure on the knob while continuing to turn until the knob locks at the desired setting position. Do not operate between locked positions.

TO TURN OFF

GAS TO APPLIANCE

Shutting Off Heater

1.Turn control knob clockwise to the OFF position.

2.Turn off all electric power to the appliance if service is to be performed.

Shutting Off Burner Only (pilot stays lit )

Slightly press in control, turn

control knob clockwise to the PILOT position.

MANUAL LIGHTING

PROCEDURE

1.Remove lower front panel (see Figure 7 page 7)

2.Follow steps 1 through 5 under Lighting Instructions .

3.With control knob pressed in, strike match. Hold match to pilot until pilot lights.

4.Keep control knob pressed in for 30 seconds after lighting pilot . After 30 seconds, release control knob. Follow step 8 under Lighting Instructions.

5.Replace lower front panel.

1 2

Page 12
Image 12
Procom ML300HBA, ML200TBA, ML300TBA Operating Your Heater, NON-THERMOSTAT Models For Your Safety Read Before Lighting

ML200HBA, ML300TBA, ML300HBA, ML200TBA specifications

The Procom ML300HBA, ML200TBA, ML300TBA, and ML200HBA are innovative solutions designed to meet the demands of modern data management and communication environments. Each model is tailored for specific applications, ensuring versatility, performance, and reliability across various sectors.

The Procom ML300HBA is particularly highlighted for its expansive bandwidth capabilities, making it essential for high-data-rate applications. With a user-friendly interface, it supports multiple connections, enabling streamlined data flow and minimizing latency. Its built-in redundancy features ensure that data integrity is maintained, even in challenging conditions. This device is ideal for environments where continuous operation is critical, such as broadcasting and telecommunications.

In contrast, the Procom ML200TBA offers a robust solution for applications that require high-frequency signal transmission. It provides a compact design without compromising performance. The ML200TBA is engineered with advanced noise reduction technologies, allowing it to maintain signal quality even in densely populated frequency environments. This model is particularly suitable for use in urban settings or areas with high electromagnetic interference.

The Procom ML300TBA combines the best features of the aforementioned models, offering broad bandwidth alongside high-frequency capabilities. This dual functionality makes it a standout choice for users needing flexibility in their communication systems. The ML300TBA is also equipped with sophisticated thermal management systems, ensuring optimal performance under varying environmental conditions.

Finally, the Procom ML200HBA emphasizes durability and high performance in harsh environments. Its rugged design means it can withstand adverse weather conditions, making it an excellent choice for outdoor applications. The focus on reliability ensures that users can depend on the ML200HBA for critical operations without the fear of signal loss or degradation.

In summary, the Procom ML300HBA, ML200TBA, ML300TBA, and ML200HBA are distinguished by their specific features and technologies. Each model caters to unique demands, providing exceptional performance, reliability, and flexibility that make them invaluable in today's high-stakes data environments. Whether for broadcasting, telecommunications, or rugged outdoor communications, Procom’s ML series stands ready to deliver superior performance and adaptability.