ASSEMBLY
Before beginning assembly, carefully read the following information and instructions:
•Assembly will be easier with two people.
•Place all parts of the
•Read each assembly step before you begin.
•During assembly, make sure that all parts are ori- ented as shown in the drawings.
•Tighten all parts as you assemble them, unless instructed to do otherwise.
THE FOLLOWING TOOLS (NOT INCLUDED) ARE REQUIRED FOR ASSEMBLY:
One (1) pair of pliers
One (1) phillips screwdriver
One (1) rubber mallet
Lubricant, such as grease or petroleum jelly, and soapy water will also be needed.
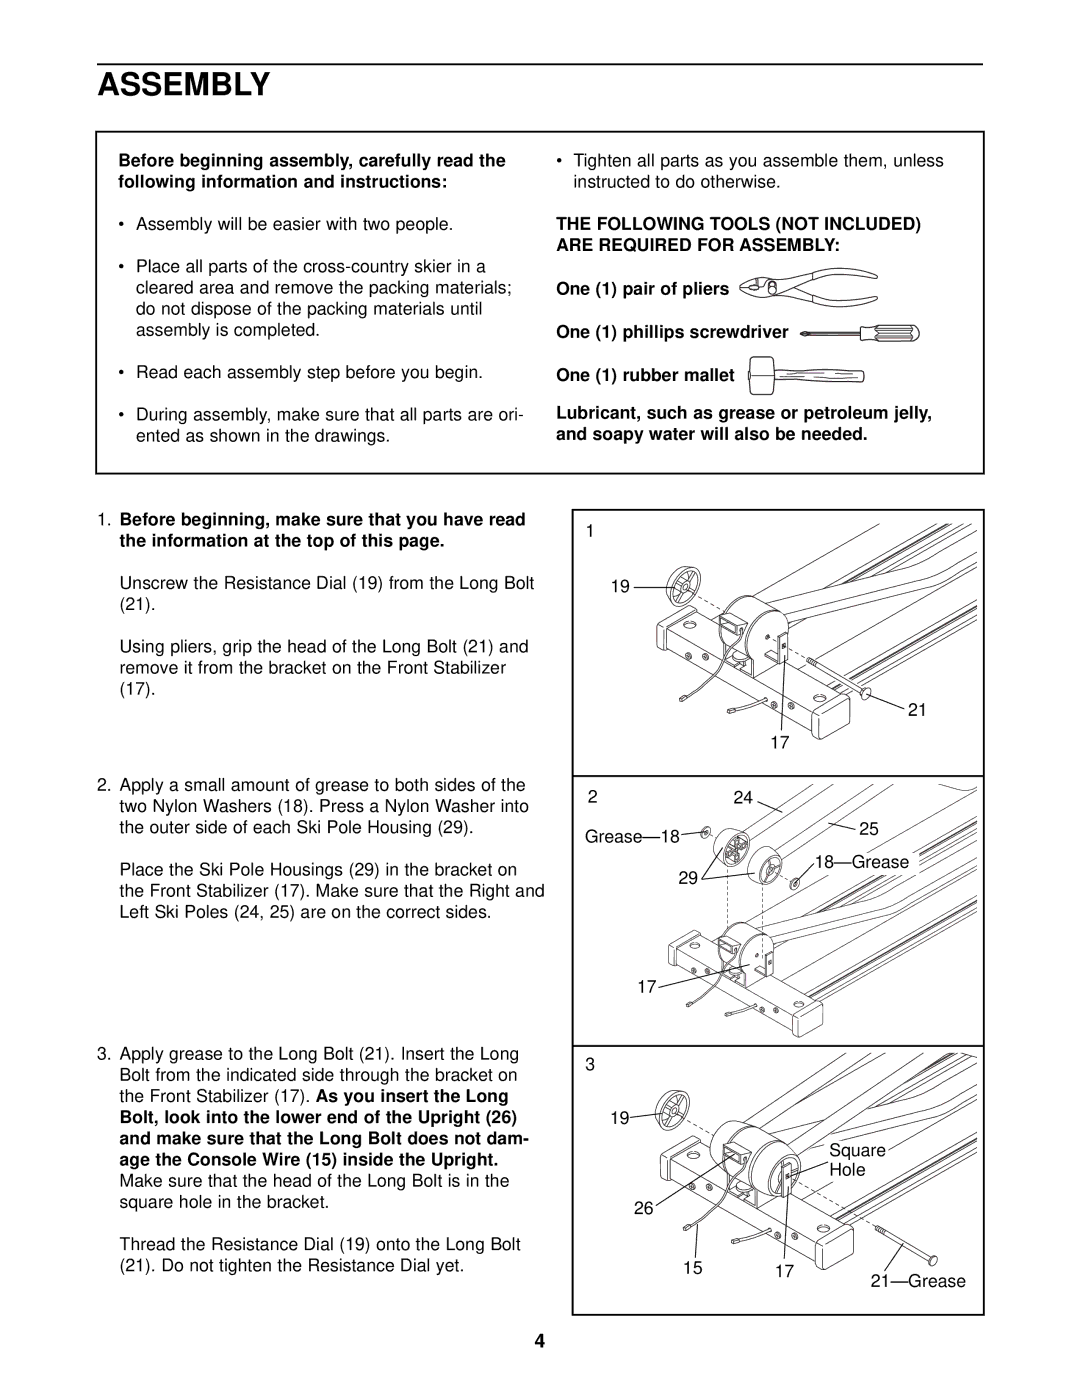
1.Before beginning, make sure that you have read the information at the top of this page.
Unscrew the Resistance Dial (19) from the Long Bolt (21).
Using pliers, grip the head of the Long Bolt (21) and remove it from the bracket on the Front Stabilizer (17).
2.Apply a small amount of grease to both sides of the two Nylon Washers (18). Press a Nylon Washer into the outer side of each Ski Pole Housing (29).
Place the Ski Pole Housings (29) in the bracket on the Front Stabilizer (17). Make sure that the Right and Left Ski Poles (24, 25) are on the correct sides.
3.Apply grease to the Long Bolt (21). Insert the Long Bolt from the indicated side through the bracket on the Front Stabilizer (17). As you insert the Long
Bolt, look into the lower end of the Upright (26) and make sure that the Long Bolt does not dam- age the Console Wire (15) inside the Upright. Make sure that the head of the Long Bolt is in the square hole in the bracket.
Thread the Resistance Dial (19) onto the Long Bolt (21). Do not tighten the Resistance Dial yet.
1 |
|
|
19 |
|
|
|
| 21 |
| 17 |
|
2 | 24 |
|
| 25 | |
|
| |
29 |
| |
|
| |
17 |
|
|
3 |
|
|
19 |
|
|
|
| Square |
|
| Hole |
26 |
|
|
15 | 17 | |
|
|
4