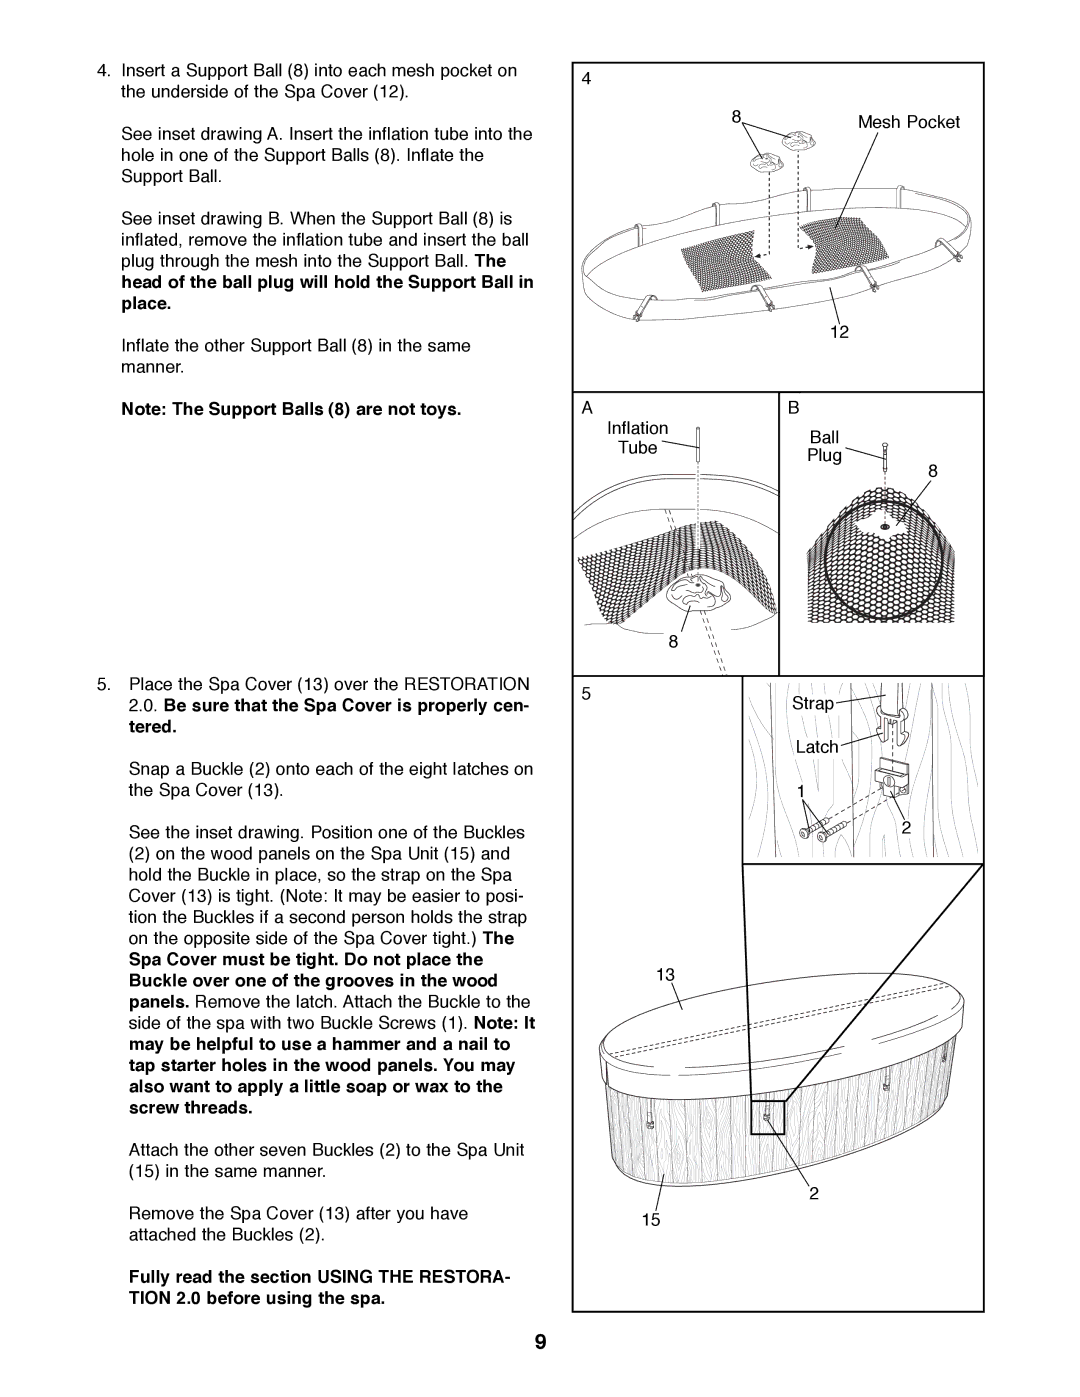
4.Insert a Support Ball (8) into each mesh pocket on the underside of the Spa Cover (12).
See inset drawing A. Insert the inflation tube into the hole in one of the Support Balls (8). Inflate the Support Ball.
See inset drawing B. When the Support Ball (8) is inflated, remove the inflation tube and insert the ball plug through the mesh into the Support Ball. The head of the ball plug will hold the Support Ball in place.
Inflate the other Support Ball (8) in the same manner.
Note: The Support Balls (8) are not toys.
5.Place the Spa Cover (13) over the RESTORATION 2.0. Be sure that the Spa Cover is properly cen- tered.
Snap a Buckle (2) onto each of the eight latches on the Spa Cover (13).
See the inset drawing. Position one of the Buckles
(2)on the wood panels on the Spa Unit (15) and hold the Buckle in place, so the strap on the Spa Cover (13) is tight. (Note: It may be easier to posi- tion the Buckles if a second person holds the strap on the opposite side of the Spa Cover tight.) The
Spa Cover must be tight. Do not place the Buckle over one of the grooves in the wood panels. Remove the latch. Attach the Buckle to the side of the spa with two Buckle Screws (1). Note: It may be helpful to use a hammer and a nail to tap starter holes in the wood panels. You may also want to apply a little soap or wax to the screw threads.
Attach the other seven Buckles (2) to the Spa Unit (15) in the same manner.
Remove the Spa Cover (13) after you have attached the Buckles (2).
Fully read the section USING THE RESTORA- TION 2.0 before using the spa.
9
4 |
|
|
|
|
| 8 | Mesh Pocket |
|
|
| |
|
|
| 12 |
A |
|
| B |
| Inflation |
| Ball |
| Tube |
| |
|
| Plug | |
|
|
| |
|
|
| 8 |
| 8 |
|
|
5 |
|
| Strap |
|
|
| |
|
|
| Latch |
|
|
| 1 |
|
|
| 2 |
| 13 |
|
|
|
|
| 2 |
| 15 |
|
|