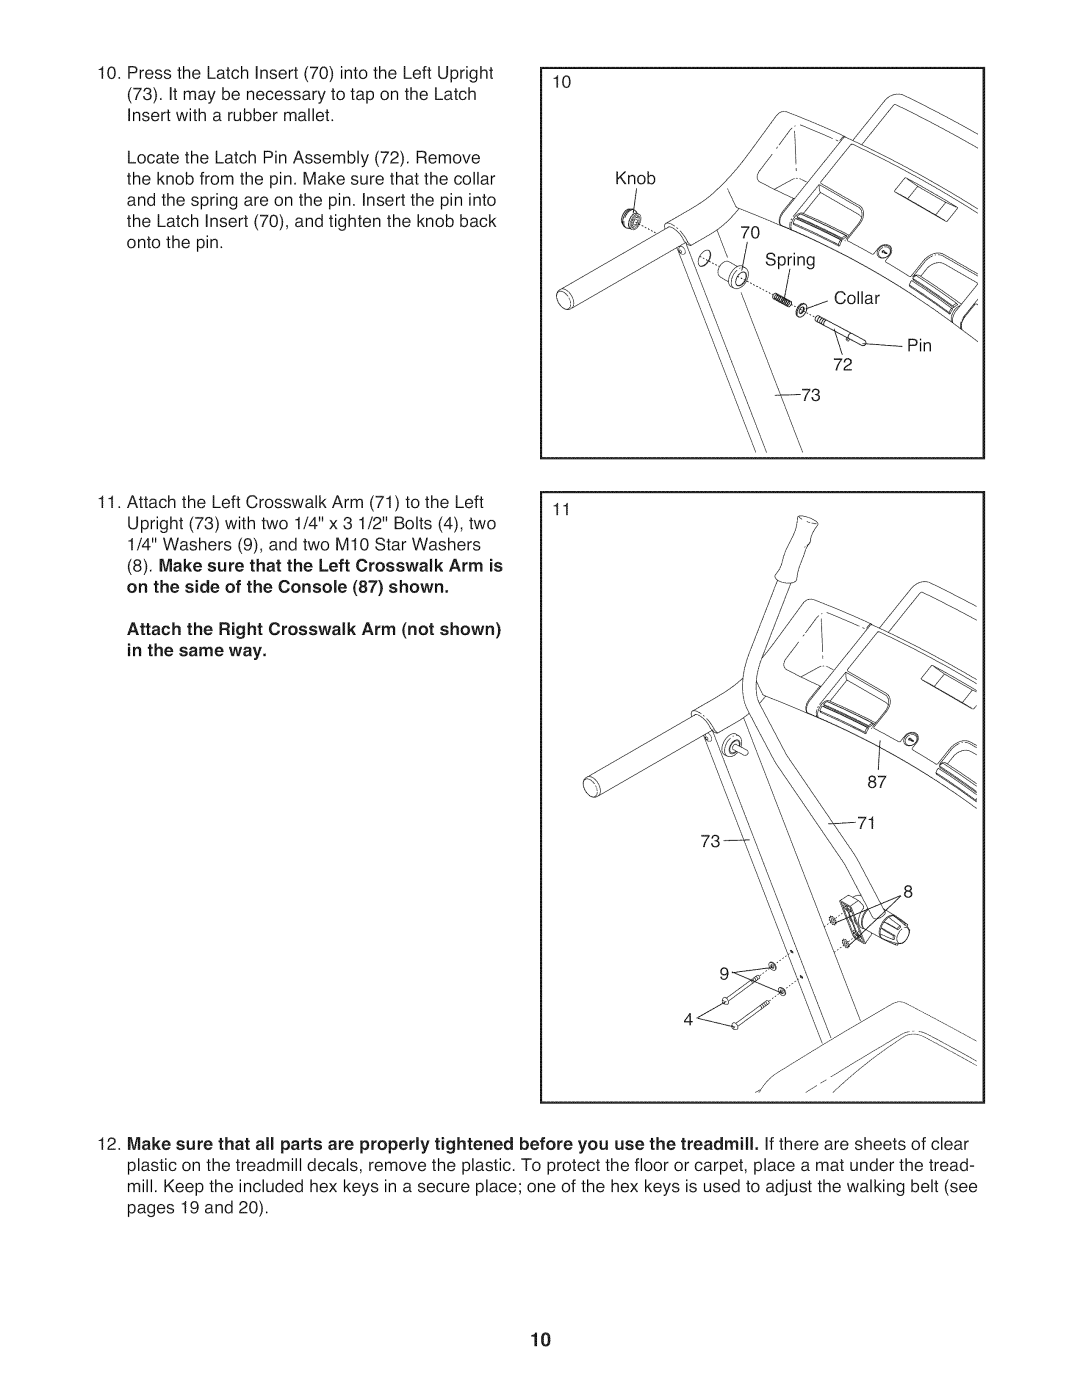
10. Press the Latch Insert (70) into the Left Upright | 10 | |
(73). It may be necessary to tap on the Latch | ||
| ||
Insert with a rubber mallet. |
| |
Locate the Latch Pin Assembly (72). Remove | Knob | |
the knob from the pin. Make sure that the collar | ||
and the spring are on the pin. Insert the pin into |
| |
the Latch Insert (70), and tighten the knob back |
| |
onto the pin. |
|
72
11. Attach the Left Crosswalk Arm (71) to the Left | 11 | |
Upright (73) with two 1/4" x 3 1/2" Bolts (4), two | ||
| ||
1/4" Washers (9), and two M10 Star Washers |
| |
(8). Make sure that the Left Crosswalk Arm is |
| |
on the side of the Console (87) shown. |
| |
Attach the Right Crosswalk Arm (not shown) |
| |
in the same way. |
|
12.Make sure that all parts are properly tightened plastic on the treadmill decals, remove the plastic. mill. Keep the included hex keys in a secure place; pages 19 and 20).
before you use the treadmill. If there are sheets of clear To protect the floor or carpet, place a mat under the tread- one of the hex keys is used to adjust the walking belt (see
10