4Adjust the pedaling resistance as desired.
As you exercise, adjust the pedaling
resistance by press- ing the resistance but- tons. The indicators
on the left side of the
console will show which resistance level
is selected. When the
lowest indicator is dimly lit, resistance
level 1 is selected; when the lowest indicator is brightly lit, resistance level 2 is selected; when the second indicator is dimly lit, resistance level 3 is selected; when the second indicator is brightly lit, resistance level 4 is selected; and so forth. When the highest indicator is brightly lit, resis- tance level 10, the most difficult level, is selected.
5Follow your progress with the monitor modes.
The scan modeÑTo select the scan mode,
repeatedly press the mode button until an arrow appears under the scan symbol. When the scan mode is selected, the con-
sole will display the
speed, time, distance, fat calorie, and calorie modes, for 5 seconds each, in a continuous cycle. A second arrow will show which mode is currently displayed.
The speed, time, dis- tance, fat calorie, or
calorie modeÑTo select a single mode for continuous display, repeatedly press the
mode button until an arrow appears by the desired symbol. Make
sure that there is not an arrow under the scan symbol.
The pulse modeÑTo use the pulse mode, see step 6.
To reset the modes, press the on/reset button.
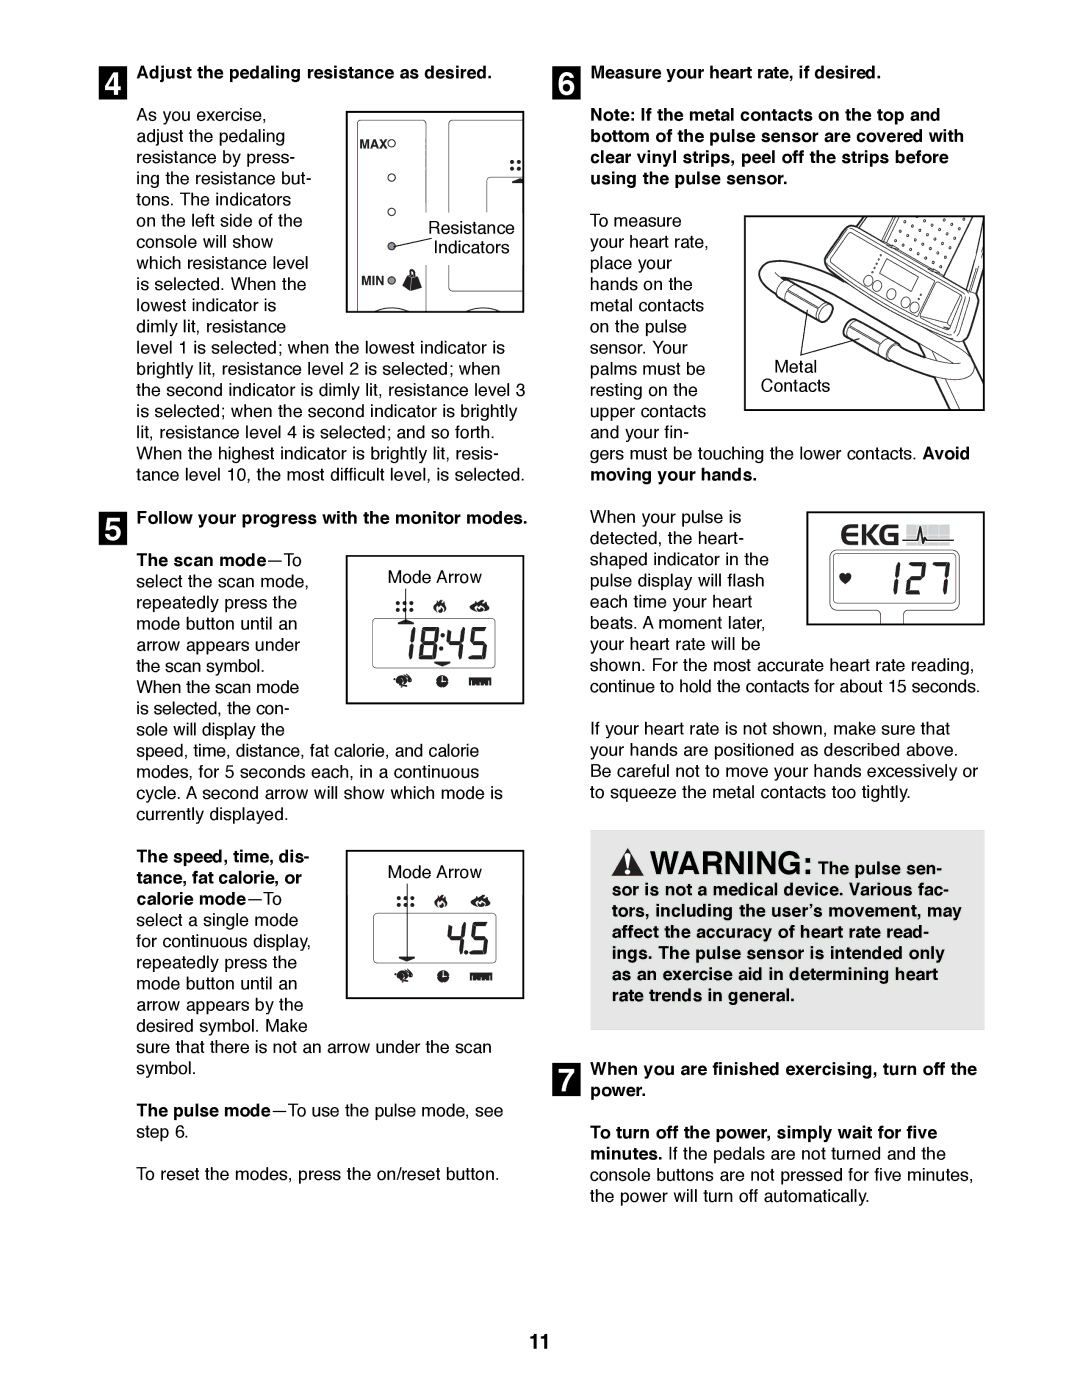
6Measure your heart rate, if desired.
Note: If the metal contacts on the top and bottom of the pulse sensor are covered with clear vinyl strips, peel off the strips before using the pulse sensor.
To measure |
|
your heart rate, |
|
place your |
|
hands on the |
|
metal contacts |
|
on the pulse |
|
sensor. Your | Metal |
palms must be | |
resting on the | Contacts |
upper contacts |
|
and your fin- |
|
gers must be touching the lower contacts. Avoid moving your hands.
When your pulse is
detected, the heart- shaped indicator in the pulse display will flash each time your heart
beats. A moment later, your heart rate will be
shown. For the most accurate heart rate reading, continue to hold the contacts for about 15 seconds.
If your heart rate is not shown, make sure that your hands are positioned as described above. Be careful not to move your hands excessively or to squeeze the metal contacts too tightly.
![]() WARNING: The pulse sen- sor is not a medical device. Various fac- tors, including the userÕs movement, may affect the accuracy of heart rate read- ings. The pulse sensor is intended only as an exercise aid in determining heart rate trends in general.
WARNING: The pulse sen- sor is not a medical device. Various fac- tors, including the userÕs movement, may affect the accuracy of heart rate read- ings. The pulse sensor is intended only as an exercise aid in determining heart rate trends in general.
7power.
To turn off the power, simply wait for five minutes. If the pedals are not turned and the
console buttons are not pressed for five minutes, the power will turn off automatically.When you are finished exercising, turn off the
11