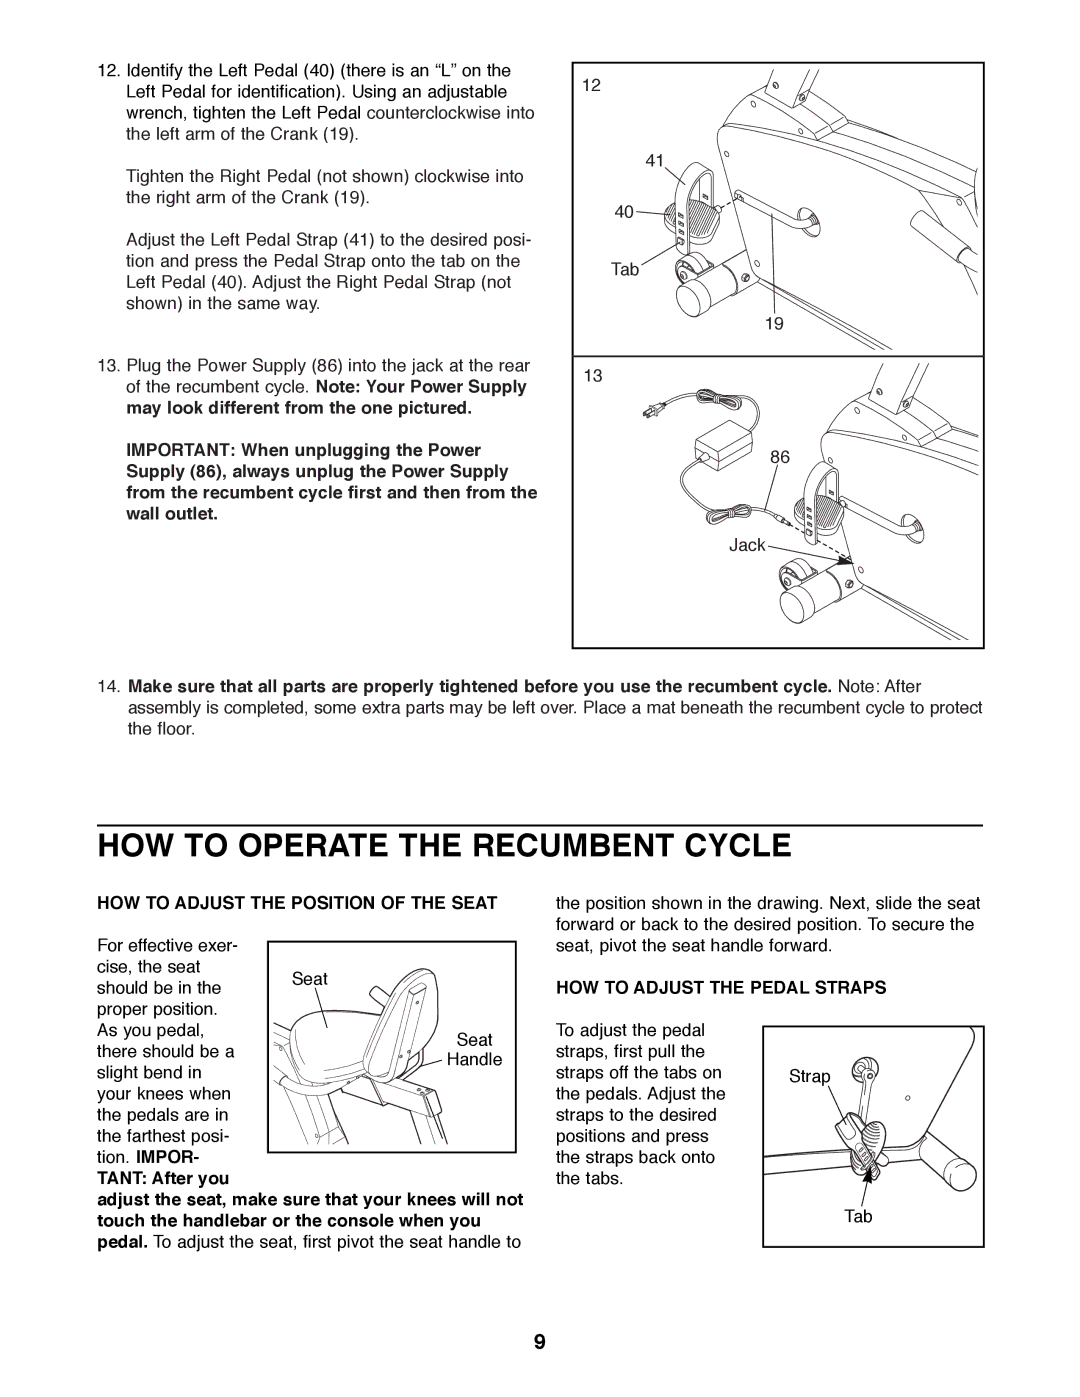
12.Identify the Left Pedal (40) (there is an ÒLÓ on the Left Pedal for identification). Using an adjustable wrench, tighten the Left Pedal counterclockwise into the left arm of the Crank (19).
Tighten the Right Pedal (not shown) clockwise into the right arm of the Crank (19).
Adjust the Left Pedal Strap (41) to the desired posi- tion and press the Pedal Strap onto the tab on the Left Pedal (40). Adjust the Right Pedal Strap (not shown) in the same way.
13.Plug the Power Supply (86) into the jack at the rear of the recumbent cycle. Note: Your Power Supply may look different from the one pictured.
IMPORTANT: When unplugging the Power Supply (86), always unplug the Power Supply from the recumbent cycle first and then from the wall outlet.
12 |
41 |
40 |
Tab |
19 |
13 |
86 |
Jack |
14.Make sure that all parts are properly tightened before you use the recumbent cycle. Note: After assembly is completed, some extra parts may be left over. Place a mat beneath the recumbent cycle to protect the floor.
HOW TO OPERATE THE RECUMBENT CYCLE
HOW TO ADJUST THE POSITION OF THE SEAT
For effective exer- |
| |
cise, the seat | Seat | |
should be in the | ||
| ||
proper position. |
| |
As you pedal, | Seat | |
there should be a | ||
Handle | ||
slight bend in | ||
| ||
your knees when |
| |
the pedals are in |
| |
the farthest posi- |
| |
tion. IMPOR- |
|
TANT: After you
adjust the seat, make sure that your knees will not touch the handlebar or the console when you pedal. To adjust the seat, first pivot the seat handle to
the position shown in the drawing. Next, slide the seat forward or back to the desired position. To secure the seat, pivot the seat handle forward.
HOW TO ADJUST THE PEDAL STRAPS
To adjust the pedal straps, first pull the
straps off the tabs on Strap the pedals. Adjust the
straps to the desired positions and press the straps back onto the tabs.
Tab
9