10 PROLINE RANGE HOODS
WALL HOOD INSTALLATION
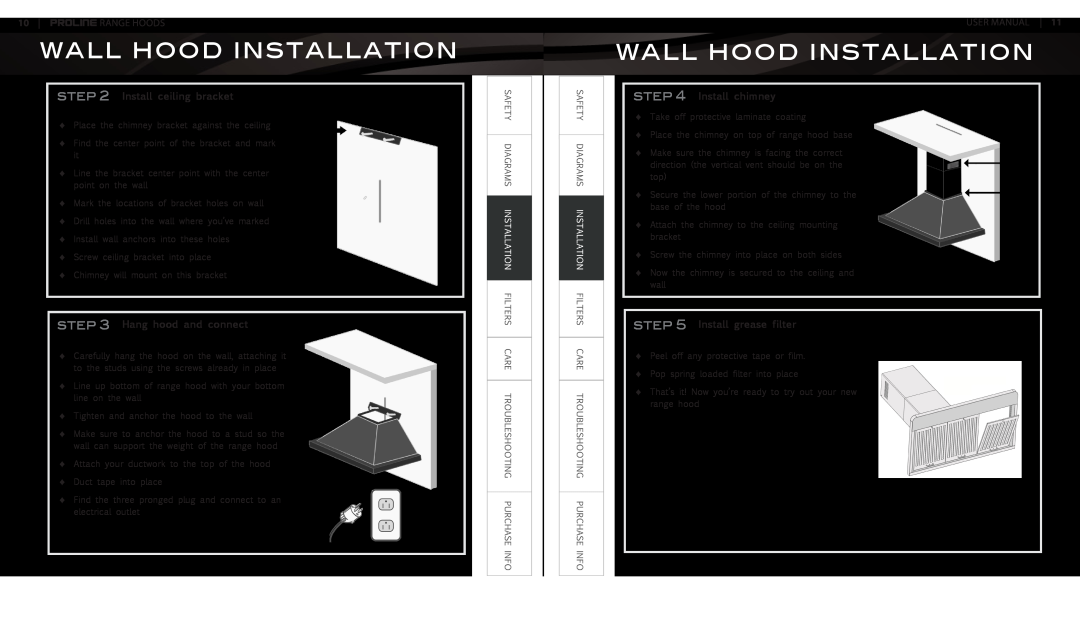
STEP 2 Install ceiling bracket
♦♦ Place the chimney bracket against the ceiling
♦♦ Find the center point of the bracket and mark it
♦♦ Line the bracket center point with the center point on the wall
♦♦ Mark the locations of bracket holes on wall ♦♦ Drill holes into the wall where you’ve marked ♦♦ Install wall anchors into these holes
♦♦ Screw ceiling bracket into place
♦♦ Chimney will mount on this bracket
STEP 3 Hang hood and connect
♦♦ Carefully hang the hood on the wall, attaching it to the studs using the screws already in place
♦♦ Line up bottom of range hood with your bottom line on the wall
♦♦ Tighten and anchor the hood to the wall
♦♦ Make sure to anchor the hood to a stud so the wall can support the weight of the range hood
♦♦ Attach your ductwork to the top of the hood ♦♦ Duct tape into place
♦♦ Find the three pronged plug and connect to an electrical outlet
USER MANUAL 11
WALL HOOD INSTALLATION
STEP 4 Install chimney
♦♦ Take off protective laminate coating
♦♦ Place the chimney on top of range hood base
♦♦ Make sure the chimney is facing the correct direction (the vertical vent should be on the top)
♦♦ Secure the lower portion of the chimney to the base of the hood
♦♦ Attach the chimney to the ceiling mounting bracket
♦♦ Screw the chimney into place on both sides
♦♦ Now the chimney is secured to the ceiling and wall
STEP 5 Install grease filter
♦♦ Peel off any protective tape or film. ♦♦ Pop spring loaded filter into place
♦♦ That’s it! Now you’re ready to try out your new range hood