Mounting
Rack Mounting
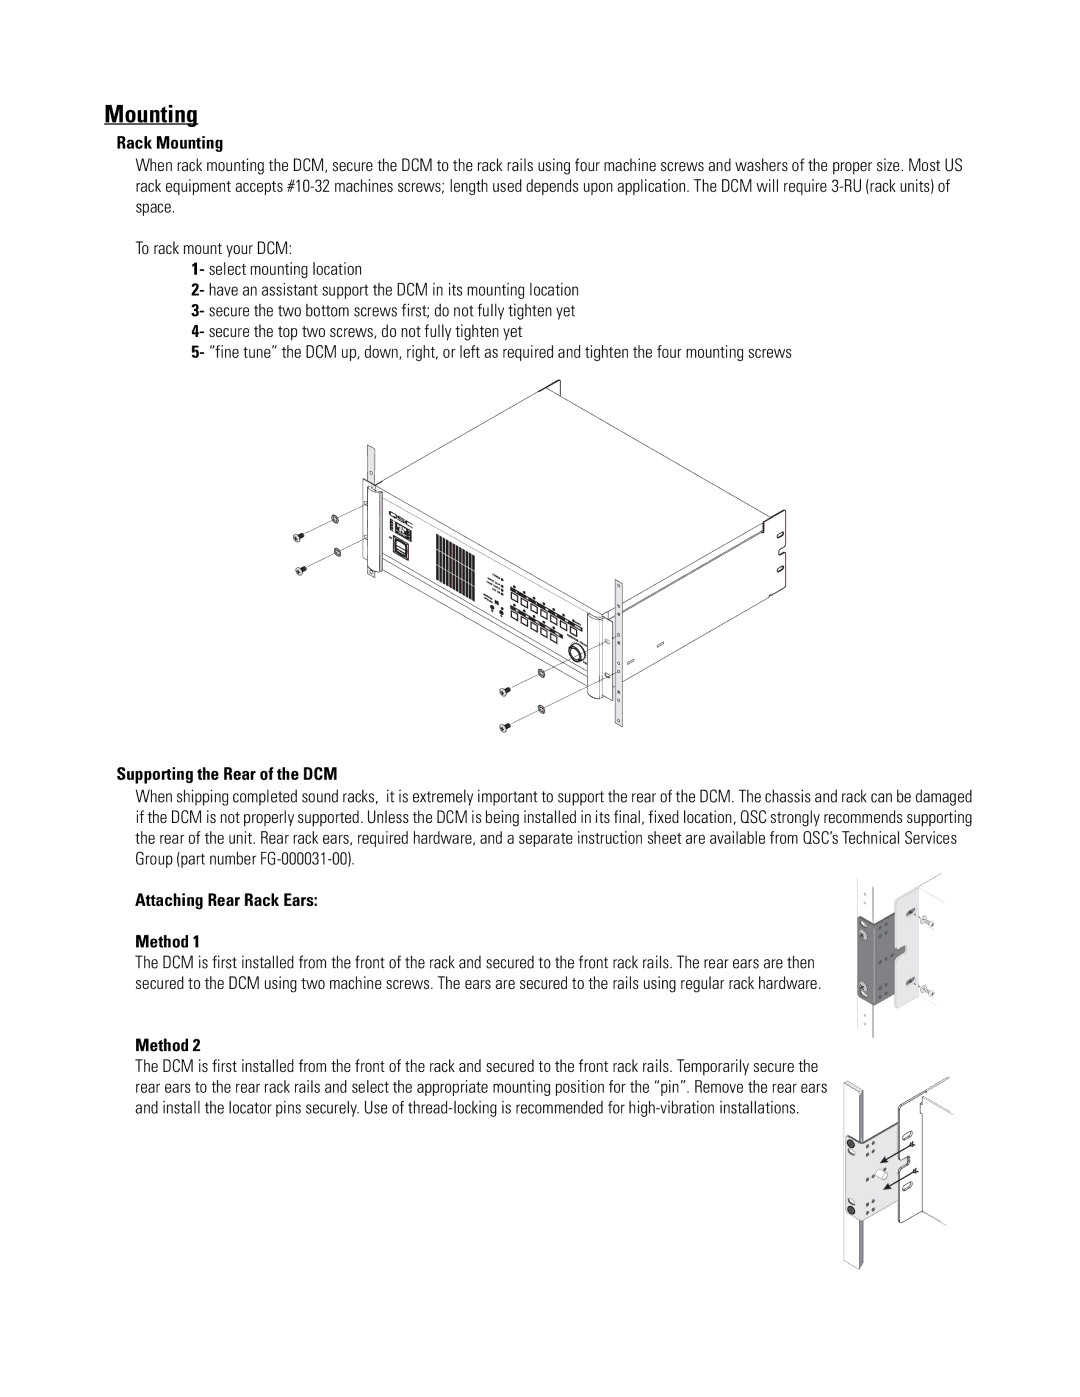
When rack mounting the DCM, secure the DCM to the rack rails using four machine screws and washers of the proper size. Most US rack equipment accepts
To rack mount your DCM:
1- select mounting location
2- have an assistant support the DCM in its mounting location 3- secure the two bottom screws first; do not fully tighten yet 4- secure the top two screws, do not fully tighten yet
5- “fine tune” the DCM up, down, right, or left as required and tighten the four mounting screws
Supporting the Rear of the DCM
When shipping completed sound racks, it is extremely important to support the rear of the DCM. The chassis and rack can be damaged if the DCM is not properly supported. Unless the DCM is being installed in its final, fixed location, QSC strongly recommends supporting the rear of the unit. Rear rack ears, required hardware, and a separate instruction sheet are available from QSC’s Technical Services Group (part number ![]()
Attaching Rear Rack Ears:
Method 1
The DCM is first installed from the front of the rack and secured to the front rack rails. The rear ears are then secured to the DCM using two machine screws. The ears are secured to the rails using regular rack hardware.
Method 2
The DCM is first installed from the front of the rack and secured to the front rack rails. Temporarily secure the rear ears to the rear rack rails and select the appropriate mounting position for the “pin”. Remove the rear ears and install the locator pins securely. Use of