9.Alternate EQ Select- Connecting this terminal to ground with an external switch or relay contact enables an alternate setting of each channel’s para- metric equalization. The alternate settings are made at the time of installation by using the DCM software. This allows for an alternate equalization to be quickly enabled during alternative content or advertising playback. Many
10.External Monitor Loudspeaker- On the rear panel are a set of screw terminals marked EXTERNAL SPKR. These are for connection to an external monitor loudspeaker. As shipped from the factory, a jumper between the IN SPR and the EXTERNAL SPKR + terminal routes audio to the DCM’s inter- nal monitor loudspeaker. This jumper must be removed if an external monitor loudspeaker is used, otherwise the DCM’s internal monitor amplifier will be overloaded. The minimum load impedance of the external monitor loudspeaker must be 4 ohms or greater.
11.Bass Management- Bass management allows extremely low frequency program content to be filtered from the screen channels and rerouted for mixing with the subwoofer output. This can reduce the amplification and loudspeaker requirements for all screen channels while minimally increasing subwoofer capability requirements.
A separate surround channel bass management feature allows the extremely low frequency surround channel program content to be filtered from the surround channels and summed for routing to the AUX DataPort output.
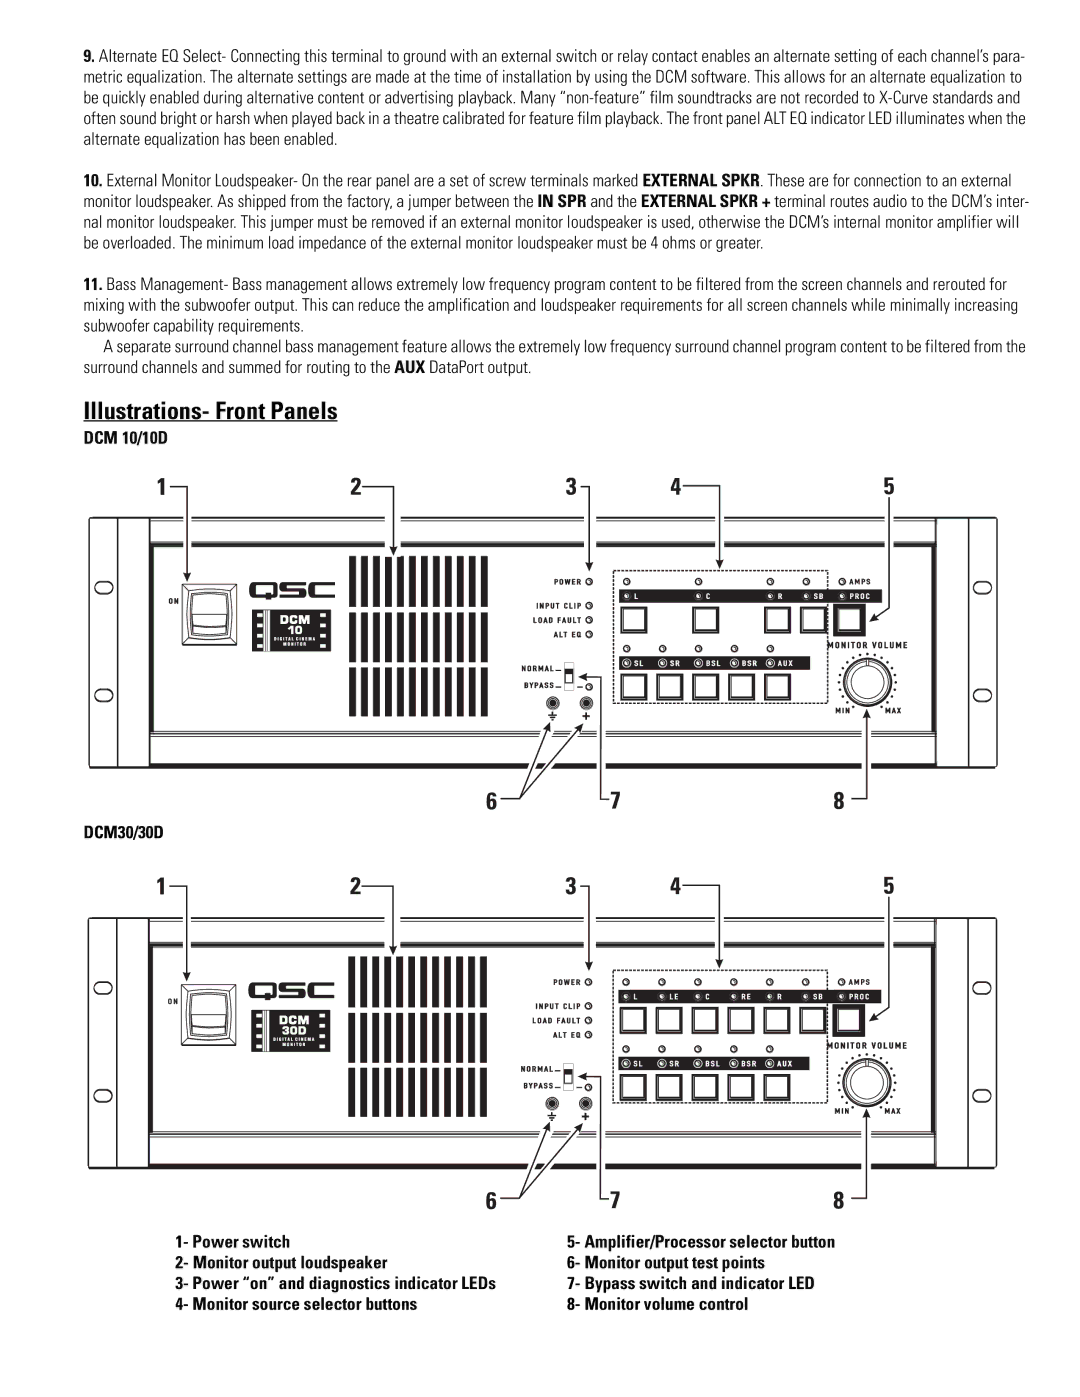
Illustrations- Front Panels
DCM 10/10D
DCM30/30D |
1- Power switch | 5- Amplifier/Processor selector button |
2- Monitor output loudspeaker | 6- Monitor output test points |
3- Power “on” and diagnostics indicator LEDs | 7- Bypass switch and indicator LED |
4- Monitor source selector buttons | 8- Monitor volume control |