4. Insert the tabs on
the narrow end of the mounting bracket into the upper slots near the center of the base, push the wide end of the bracket until it clicks into place,
then place the phone on the desk.
5.Plug the modular cord’s other ends into the modular phone line jack(s) for Lines 1 through 4, then plug the AC adapter into a standard AC outlet. Initial- izing.. briefly appears, then JAN 01 12:00 AM/EXT 11 FRI appears.
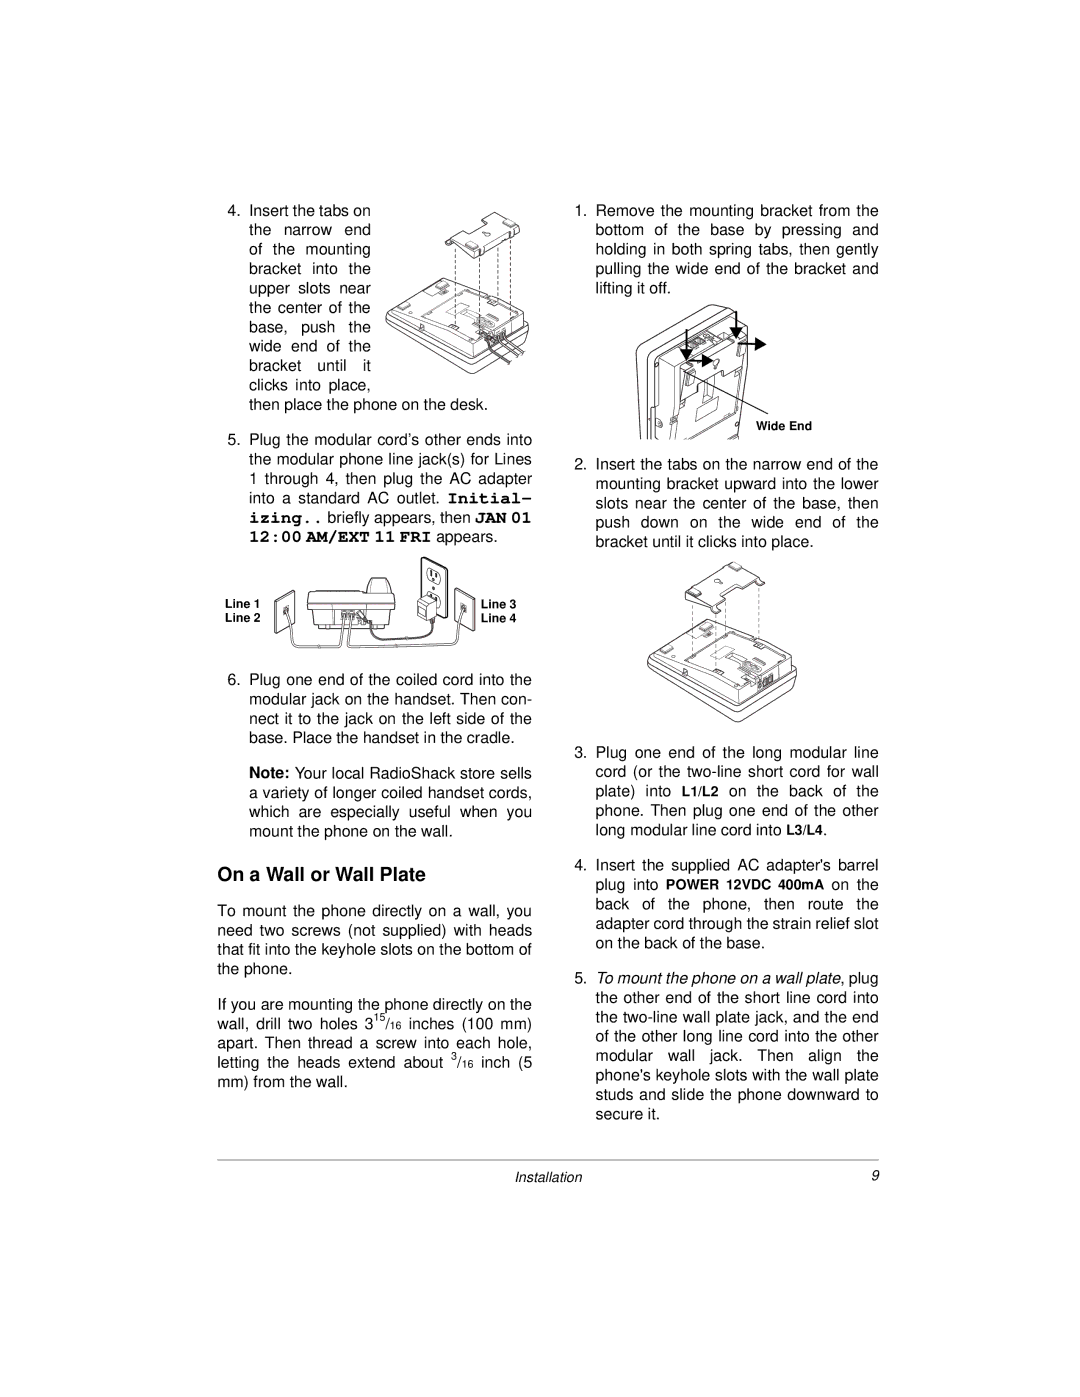
1.Remove the mounting bracket from the bottom of the base by pressing and holding in both spring tabs, then gently pulling the wide end of the bracket and lifting it off.
Wide End
2.Insert the tabs on the narrow end of the mounting bracket upward into the lower slots near the center of the base, then push down on the wide end of the bracket until it clicks into place.
Line 1 | Line 3 |
Line 2 | Line 4 |
6.Plug one end of the coiled cord into the modular jack on the handset. Then con- nect it to the jack on the left side of the base. Place the handset in the cradle.
Note: Your local RadioShack store sells a variety of longer coiled handset cords, which are especially useful when you mount the phone on the wall.
On a Wall or Wall Plate
To mount the phone directly on a wall, you need two screws (not supplied) with heads that fit into the keyhole slots on the bottom of the phone.
If you are mounting the phone directly on the wall, drill two holes 315/16 inches (100 mm) apart. Then thread a screw into each hole, letting the heads extend about 3/16 inch (5 mm) from the wall.
3.Plug one end of the long modular line cord (or the
4.Insert the supplied AC adapter's barrel plug into POWER 12VDC 400mA on the back of the phone, then route the adapter cord through the strain relief slot on the back of the base.
5.To mount the phone on a wall plate, plug the other end of the short line cord into the
Installation | 9 |