Oven shelves | Steam |
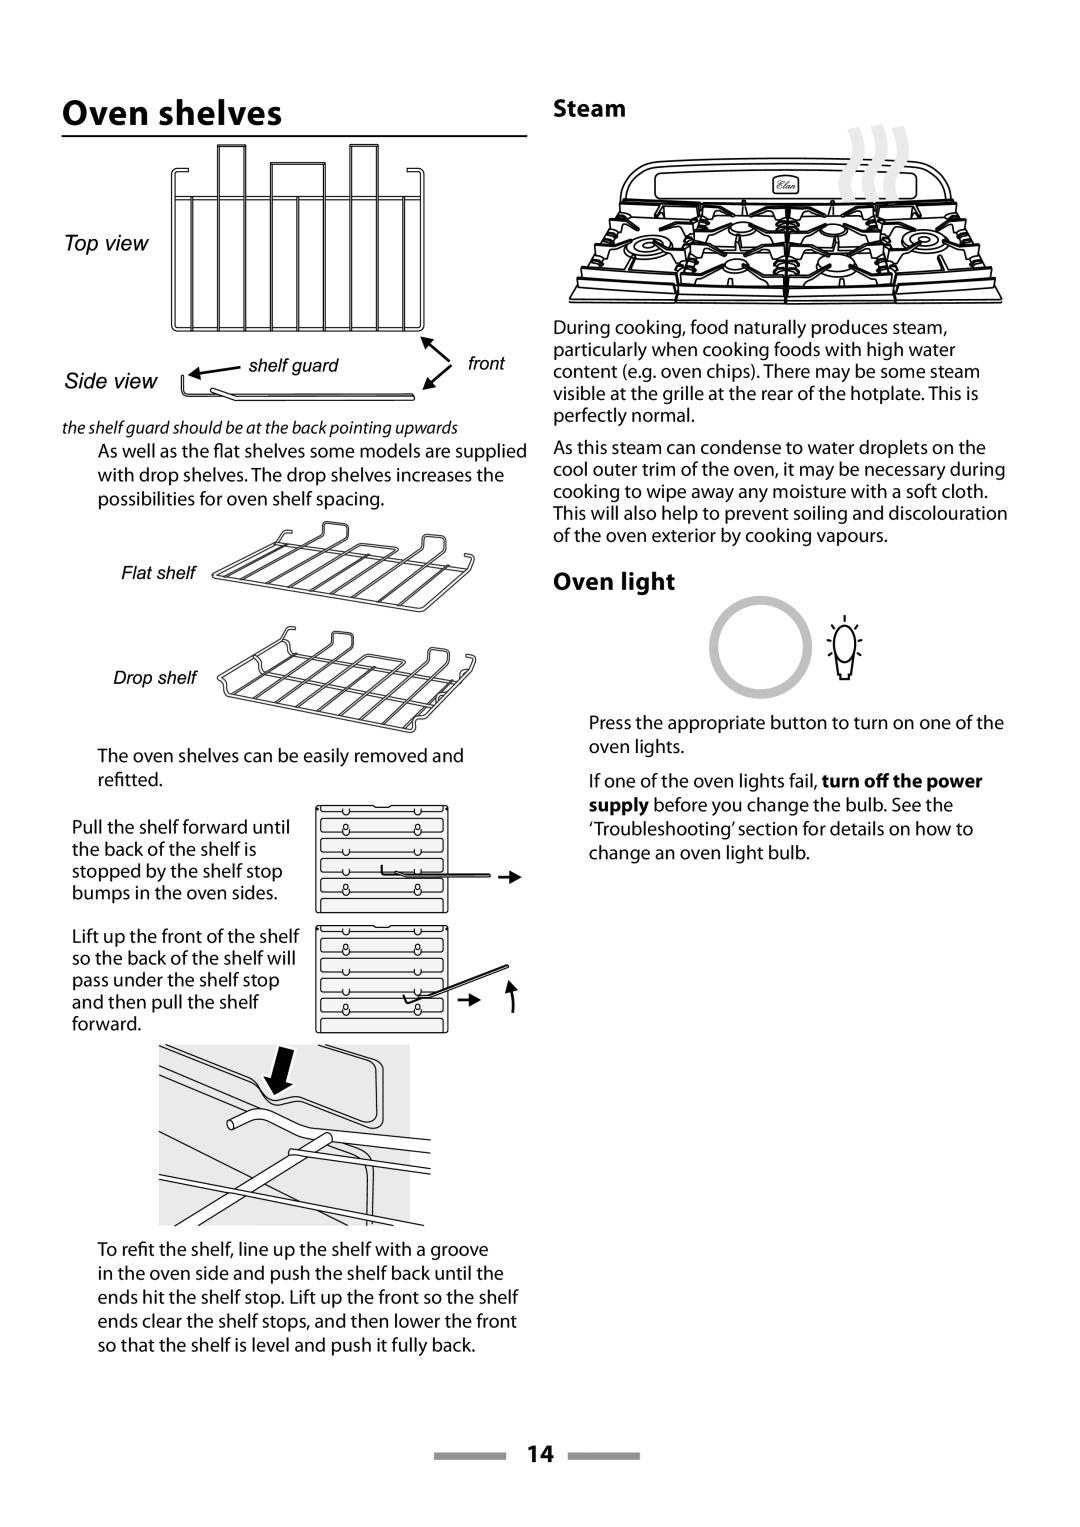
the shelf guard should be at the back pointing upwards
As well as the flat shelves some models are supplied with drop shelves. The drop shelves increases the possibilities for oven shelf spacing.
The oven shelves can be easily removed and refitted.
Pull the shelf forward until the back of the shelf is stopped by the shelf stop bumps in the oven sides.
Lift up the front of the shelf so the back of the shelf will pass under the shelf stop and then pull the shelf forward.
To refit the shelf, line up the shelf with a groove in the oven side and push the shelf back until the ends hit the shelf stop. Lift up the front so the shelf ends clear the shelf stops, and then lower the front so that the shelf is level and push it fully back.
During cooking, food naturally produces steam, particularly when cooking foods with high water content (e.g. oven chips). There may be some steam visible at the grille at the rear of the hotplate. This is perfectly normal.
As this steam can condense to water droplets on the cool outer trim of the oven, it may be necessary during cooking to wipe away any moisture with a soft cloth. This will also help to prevent soiling and discolouration of the oven exterior by cooking vapours.
Oven light
Press the appropriate button to turn on one of the oven lights.
If one of the oven lights fail, turn off the power supply before you change the bulb. See the ‘Troubleshooting’ section for details on how to change an oven light bulb.
14
