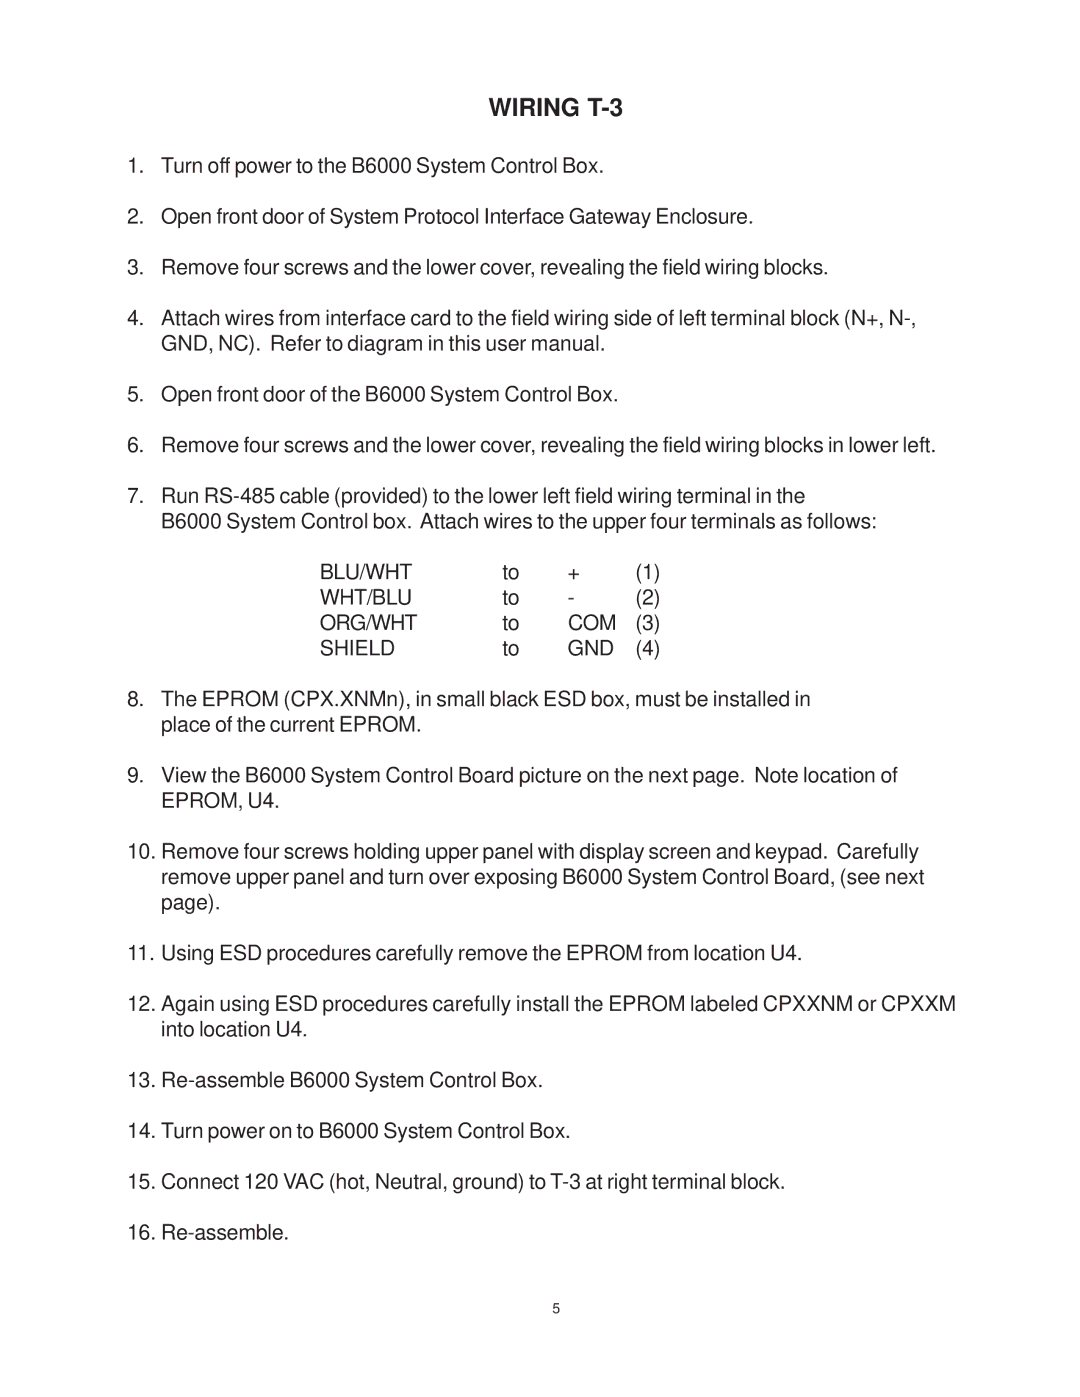
B6000 specifications
The Raypak B6000 is a high-efficiency boiler designed for residential and commercial heating applications. Known for its reliability and advanced features, the B6000 exemplifies Raypak's commitment to engineering excellence and innovative technology.One of the standout attributes of the Raypak B6000 is its robust construction. The boiler is built with high-quality materials, ensuring durability and longevity in a variety of environments. It features a compact design, which allows for easy installation even in spaces with limited room. Moreover, it has a user-friendly interface that facilitates straightforward operation and maintenance, making it accessible for both homeowners and HVAC professionals.
The B6000 is equipped with advanced heating technologies that enhance its performance and efficiency. It utilizes a modulating burner system that adjusts the heat output based on the demand, ensuring optimal energy usage. This not only leads to lower energy bills but also contributes to a reduced carbon footprint, making the B6000 an environmentally friendly choice.
Another key feature of the Raypak B6000 is its stainless steel heat exchanger, which provides superior heat transfer and contributes to the boiler's overall efficiency. The heat exchanger is designed to withstand high temperatures and pressures, ensuring safety and reliability throughout its operation. Additionally, the B6000 offers multiple venting options, including direct venting and horizontal venting, providing flexibility in installation.
The B6000 also comes with integrated controls that allow users to easily monitor and adjust settings. These controls can enhance energy efficiency by accommodating varying heating needs throughout the day. Furthermore, the boiler is compatible with smart home systems, enabling remote operation and monitoring.
In terms of safety features, the Raypak B6000 is equipped with multiple safety sensors and shutoff systems to ensure safe operation. This includes automatic shutdown in case of malfunction, preventing potential hazards.
Overall, the Raypak B6000 is a top-tier boiler that combines efficiency, reliability, and advanced technology, making it a preferred choice for those seeking a dependable heating solution. It is suitable for various applications, from residential heating to larger commercial projects, further establishing its versatility in the market. Whether for new installations or replacements, the B6000 stands out as a reliable option for efficient heating solutions.