Chapter 1: Connections and Setup
RF ANTENNA/CABLE
INPUT
INPUT |
| OUTPUT | COMPONENT |
|
|
|
| VIDEO OUTPUT |
|
|
| ||
|
|
|
|
|
| |
VIDEO | VIDEO |
| DIGITAL |
|
| |
|
| Y |
|
| ||
|
|
|
| AUDIO OUT |
|
|
L |
| L | Pb |
|
|
|
AUDIO |
| AUDIO |
| COAXIAL |
|
|
| Pr |
|
|
| ||
|
|
|
|
|
| PROG. |
|
|
|
|
|
| SCAN |
R | R |
| OPTICAL |
|
| |
|
|
|
| OFF | ON |
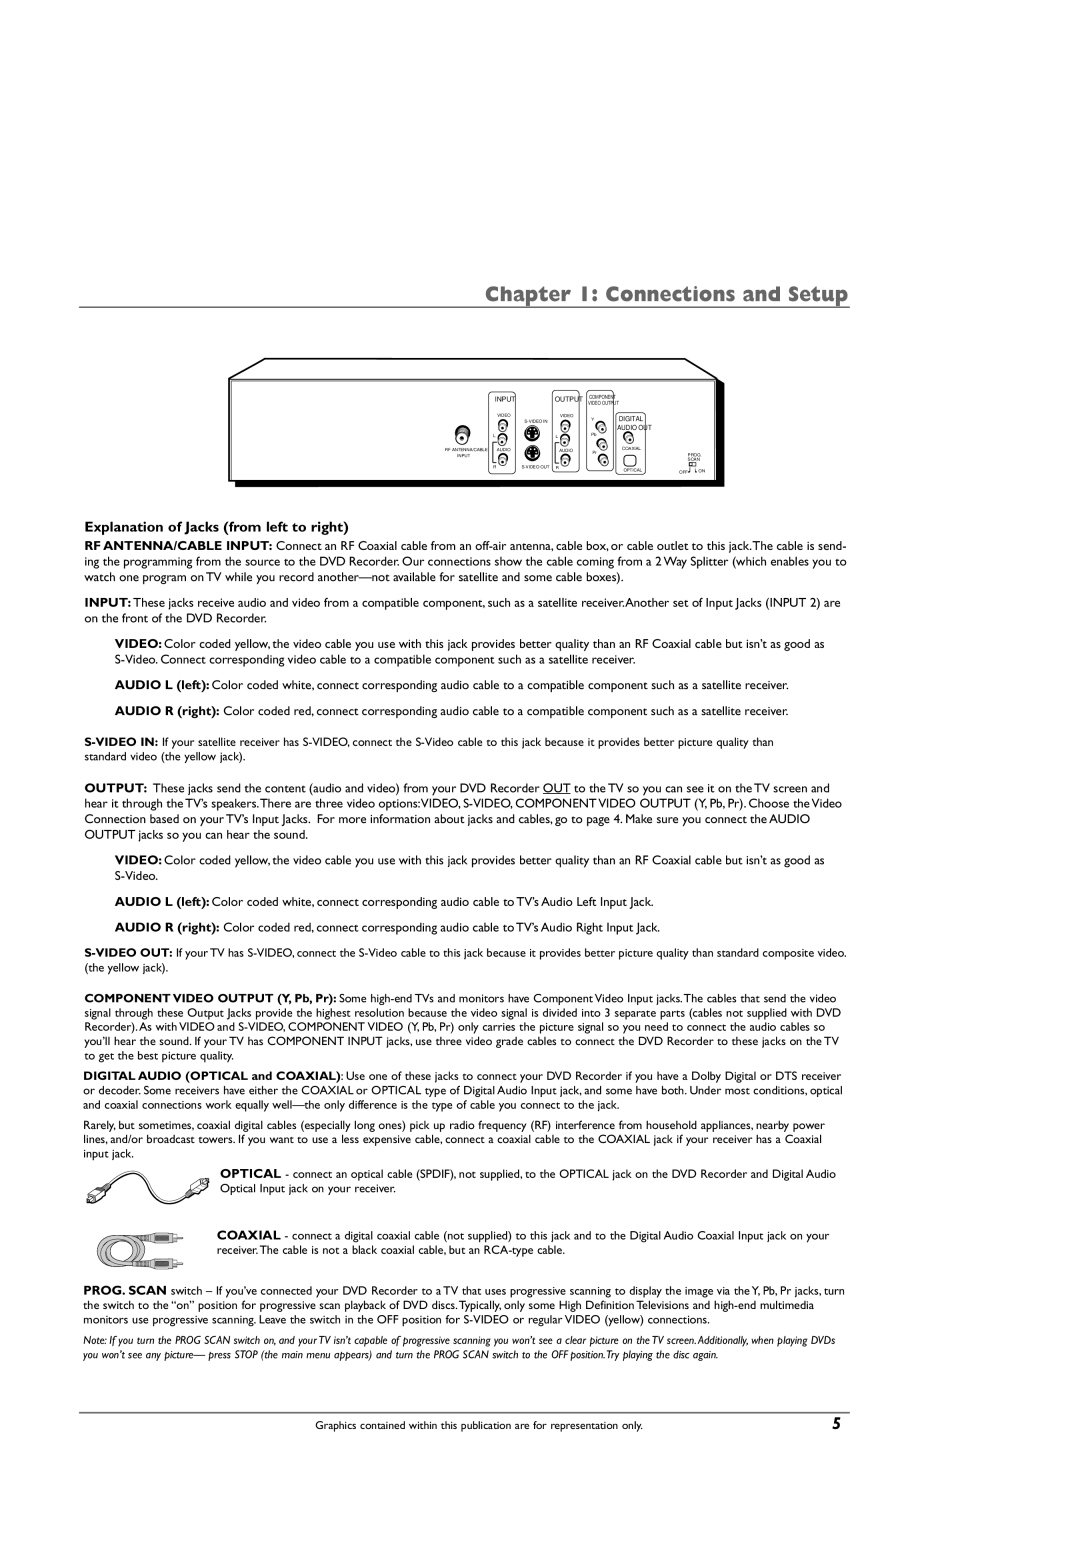
Explanation of Jacks (from left to right)
RF ANTENNA/CABLE INPUT: Connect an RF Coaxial cable from an
INPUT: These jacks receive audio and video from a compatible component, such as a satellite receiver.Another set of Input Jacks (INPUT 2) are on the front of the DVD Recorder.
VIDEO: Color coded yellow, the video cable you use with this jack provides better quality than an RF Coaxial cable but isn’t as good as
AUDIO L (left): Color coded white, connect corresponding audio cable to a compatible component such as a satellite receiver.
AUDIO R (right): Color coded red, connect corresponding audio cable to a compatible component such as a satellite receiver.
OUTPUT: These jacks send the content (audio and video) from your DVD Recorder OUT to the TV so you can see it on the TV screen and hear it through the TV’s speakers.There are three video options:VIDEO,
VIDEO: Color coded yellow, the video cable you use with this jack provides better quality than an RF Coaxial cable but isn’t as good as
AUDIO L (left): Color coded white, connect corresponding audio cable to TV’s Audio Left Input Jack.
AUDIO R (right): Color coded red, connect corresponding audio cable to TV’s Audio Right Input Jack.
COMPONENT VIDEO OUTPUT (Y, Pb, Pr): Some
DIGITAL AUDIO (OPTICAL and COAXIAL): Use one of these jacks to connect your DVD Recorder if you have a Dolby Digital or DTS receiver or decoder. Some receivers have either the COAXIAL or OPTICAL type of Digital Audio Input jack, and some have both. Under most conditions, optical and coaxial connections work equally
Rarely, but sometimes, coaxial digital cables (especially long ones) pick up radio frequency (RF) interference from household appliances, nearby power lines, and/or broadcast towers. If you want to use a less expensive cable, connect a coaxial cable to the COAXIAL jack if your receiver has a Coaxial input jack.
OPTICAL - connect an optical cable (SPDIF), not supplied, to the OPTICAL jack on the DVD Recorder and Digital Audio Optical Input jack on your receiver.
COAXIAL - connect a digital coaxial cable (not supplied) to this jack and to the Digital Audio Coaxial Input jack on your receiver.The cable is not a black coaxial cable, but an
PROG. SCAN switch – If you’ve connected your DVD Recorder to a TV that uses progressive scanning to display the image via the Y, Pb, Pr jacks, turn the switch to the “on” position for progressive scan playback of DVD discs.Typically, only some High Definition Televisions and
Note: If you turn the PROG SCAN switch on, and your TV isn’t capable of progressive scanning you won’t see a clear picture on the TV screen. Additionally, when playing DVDs you won’t see any picture— press STOP (the main menu appears) and turn the PROG SCAN switch to the OFF position.Try playing the disc again.
Graphics contained within this publication are for representation only. | 5 |
