GETTING STARTED
SETUP AND CONNECTION
Step 1: Connect Your TV
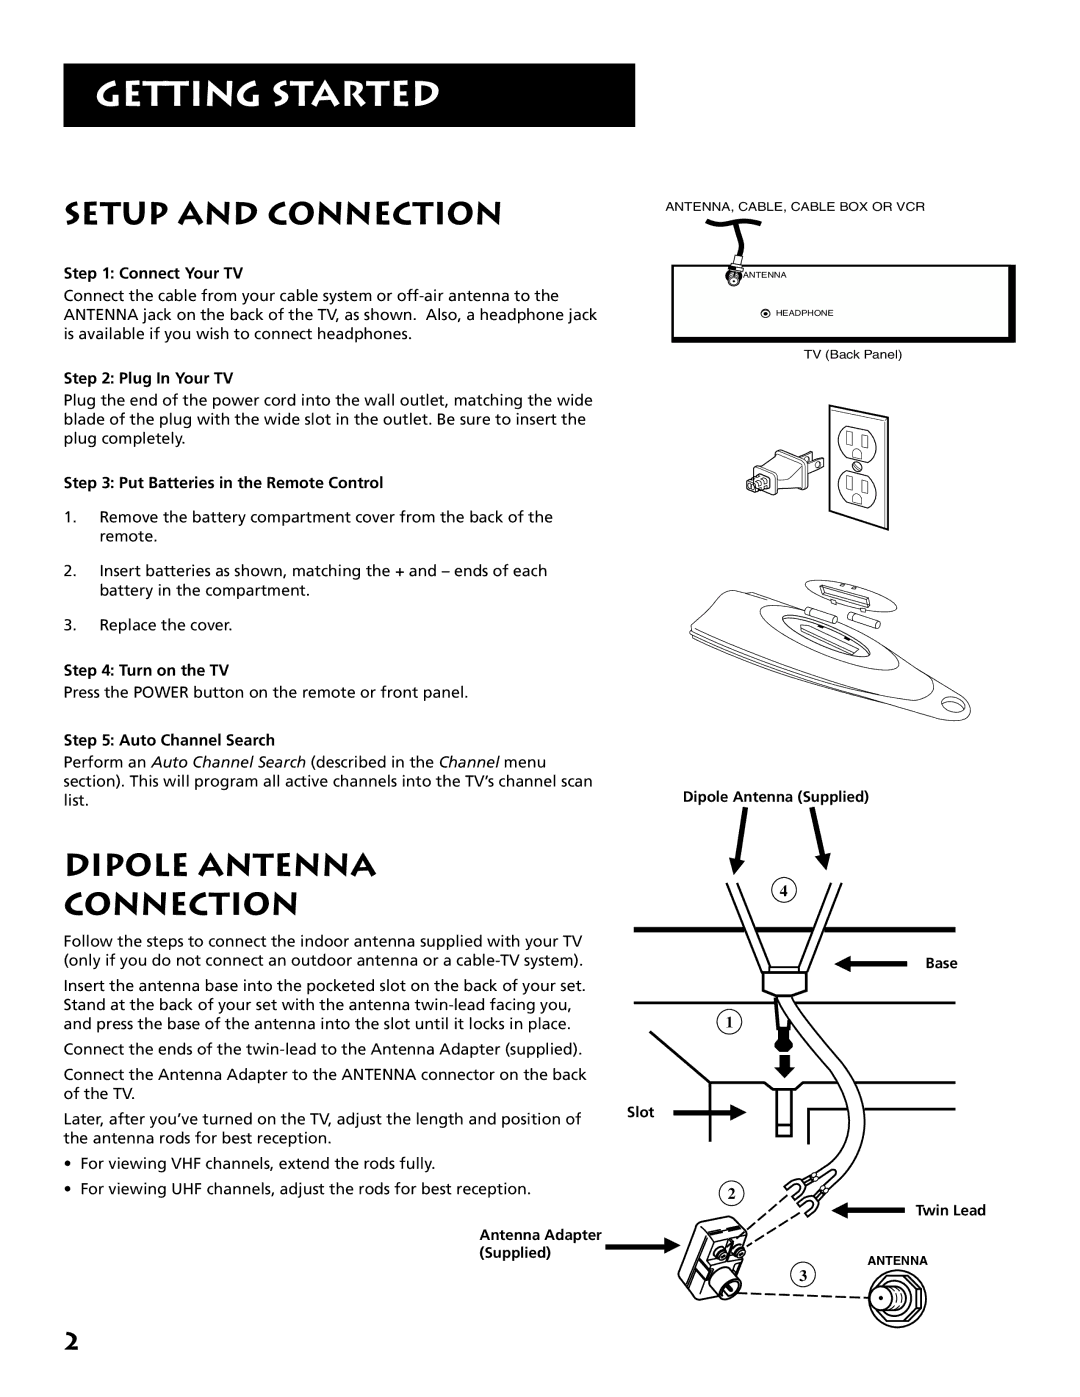
Connect the cable from your cable system or
Step 2: Plug In Your TV
Plug the end of the power cord into the wall outlet, matching the wide blade of the plug with the wide slot in the outlet. Be sure to insert the plug completely.
Step 3: Put Batteries in the Remote Control
1.Remove the battery compartment cover from the back of the remote.
2.Insert batteries as shown, matching the + and – ends of each battery in the compartment.
3.Replace the cover.
Step 4: Turn on the TV
Press the POWER button on the remote or front panel.
Step 5: Auto Channel Search
Perform an Auto Channel Search (described in the Channel menu section). This will program all active channels into the TV’s channel scan list.
ANTENNA, CABLE, CABLE BOX OR VCR
![]() ANTENNA
ANTENNA
HEADPHONE
TV (Back Panel)
Dipole Antenna (Supplied)
DIPOLE ANTENNA
CONNECTION
Follow the steps to connect the indoor antenna supplied with your TV (only if you do not connect an outdoor antenna or a
Insert the antenna base into the pocketed slot on the back of your set. |
|
Stand at the back of your set with the antenna | 1 |
and press the base of the antenna into the slot until it locks in place. |
Connect the ends of the
Connect the Antenna Adapter to the ANTENNA connector on the back of the TV.
Later, after you’ve turned on the TV, adjust the length and position of | Slot |
|
| |
| ||||
|
|
| ||
the antenna rods for best reception. |
|
|
| |
• | For viewing VHF channels, extend the rods fully. |
|
|
|
• | For viewing UHF channels, adjust the rods for best reception. | 2 | ||
Antenna Adapter (Supplied)
4
Base
Twin Lead
ANTENNA
3
2
